User Manager
The User Manager module in helps administrators manage user accounts efficiently by controlling access levels and permissions, ensuring secure and organized user interactions within the system.
Dashboards:
Steps:
- Click on Admin profile
- Click on Setup
- Click on Security
- Click on User Manager under Security
Step 1: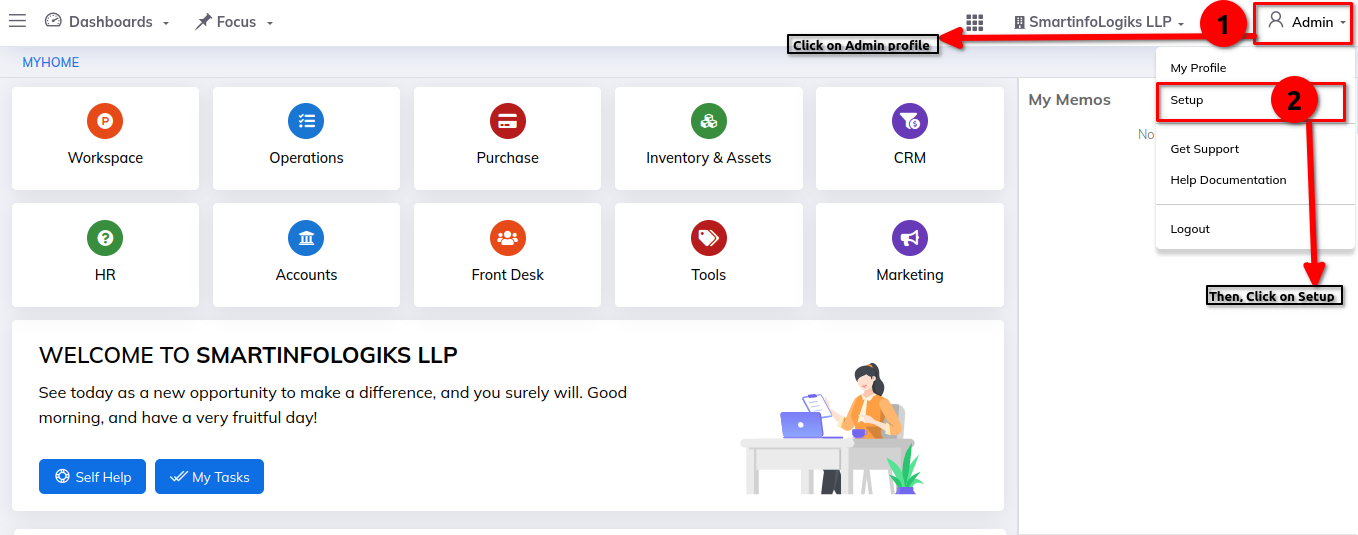
Step 2: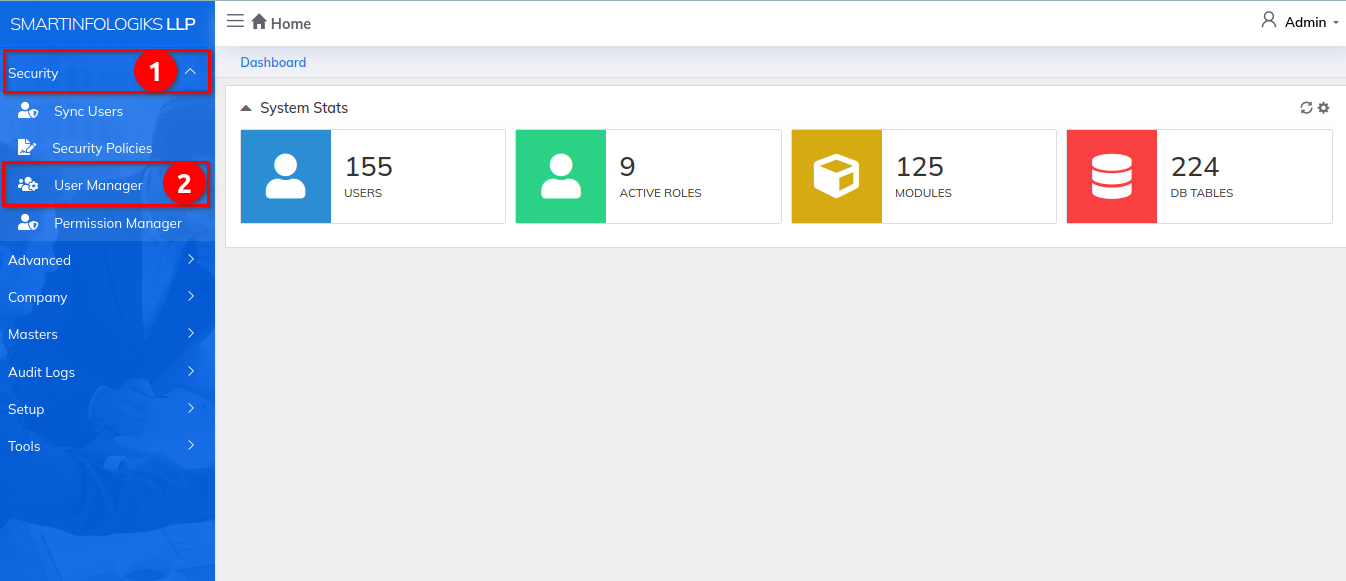
Group Manager:
Enter the details in New Group from:-
- Group name - Enter the group name
- Group Manager - Select the group manager from dropdown
- Parent Group - Select the parent group from dropdown
- Description - Enter the description.
Step 1:
Step 2: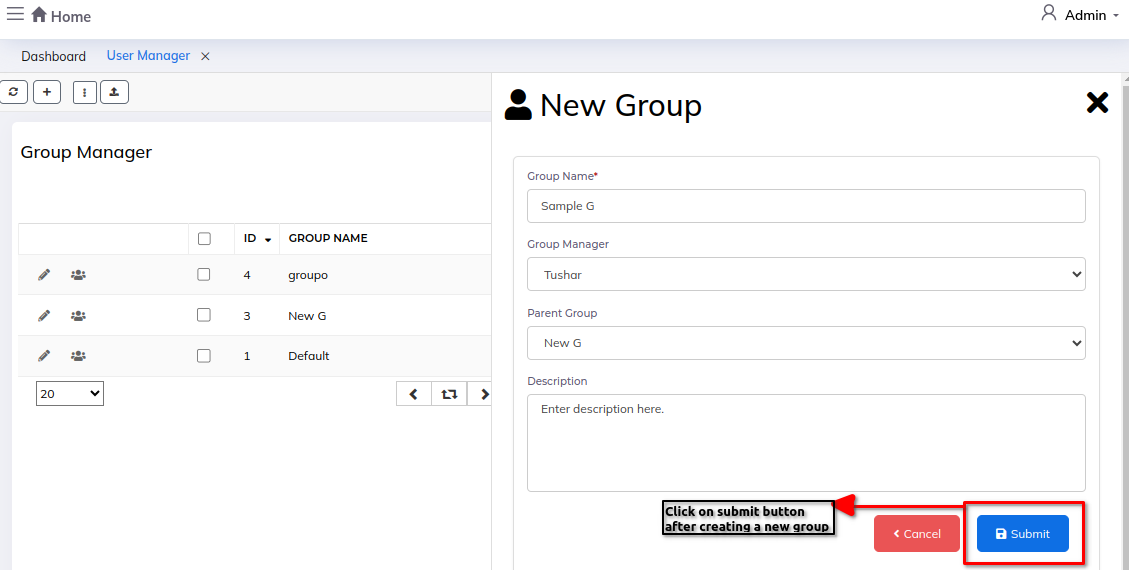
1) Edit access point icon :- To edit/update the group.
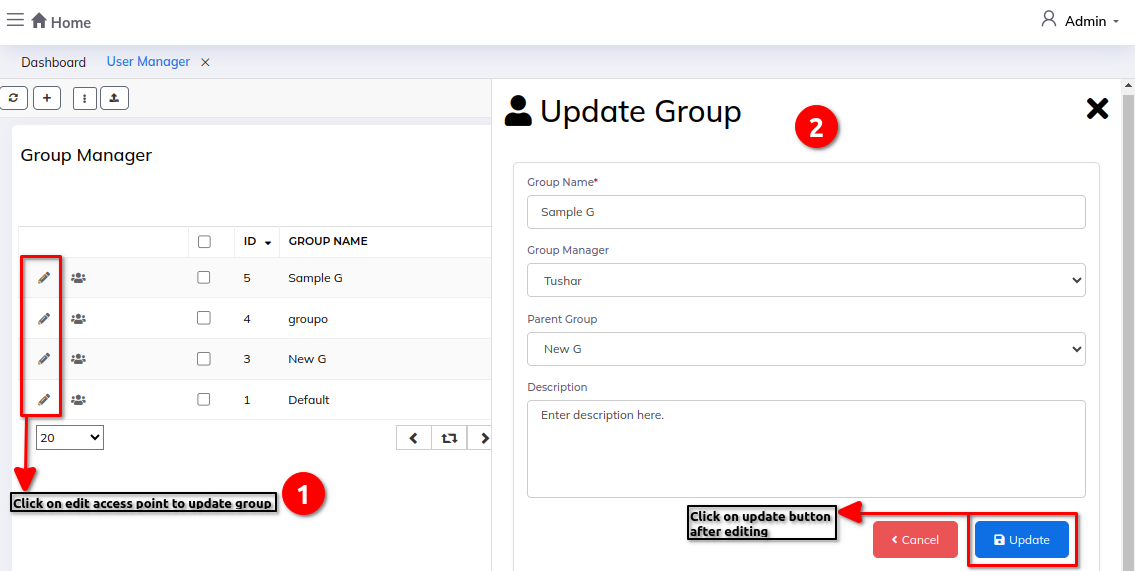
2) List users in this section icon :- To view the list of users.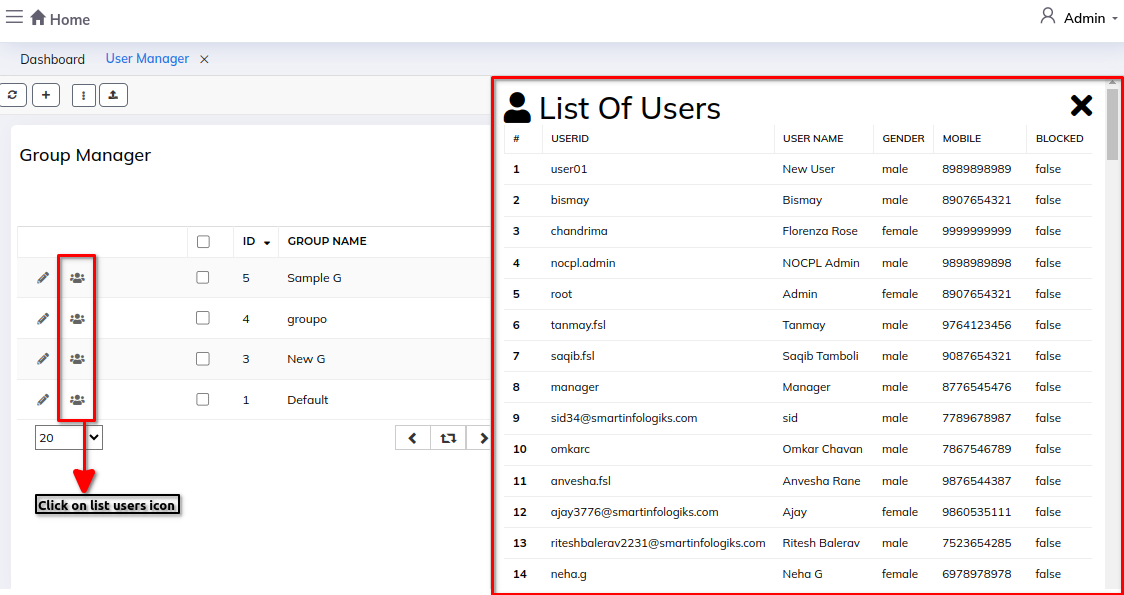
Role Manager:
Enter the details in New Roles form:-
- Role Name - Enter the role name
- Blocked - Select blocked/not blocked from the dropdown list
- Click on update button
Step 1: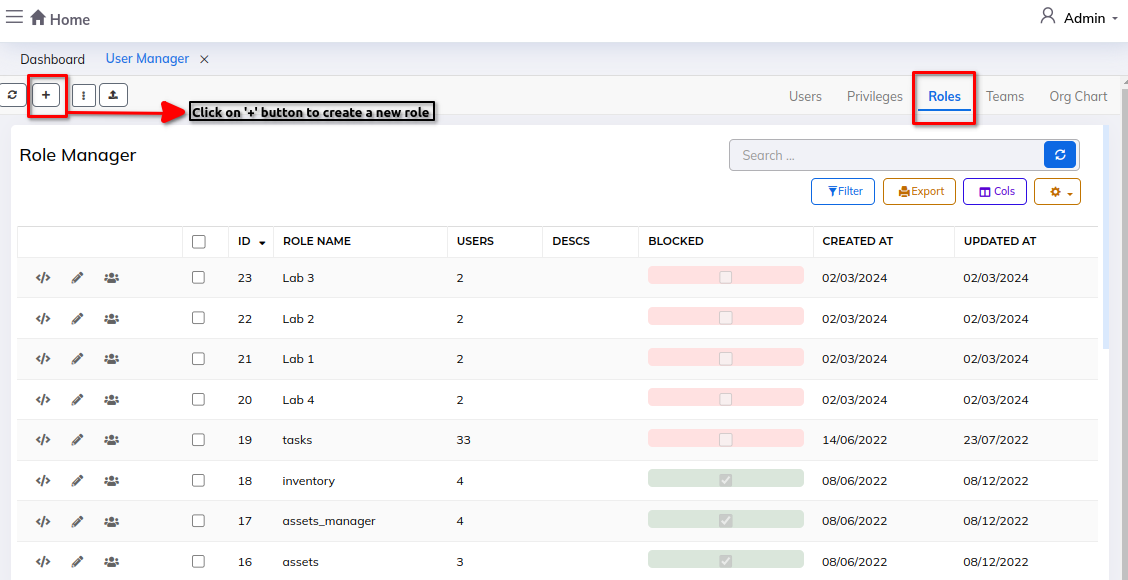
Step 2:
1) Edit Role icon :- To edit/update the role.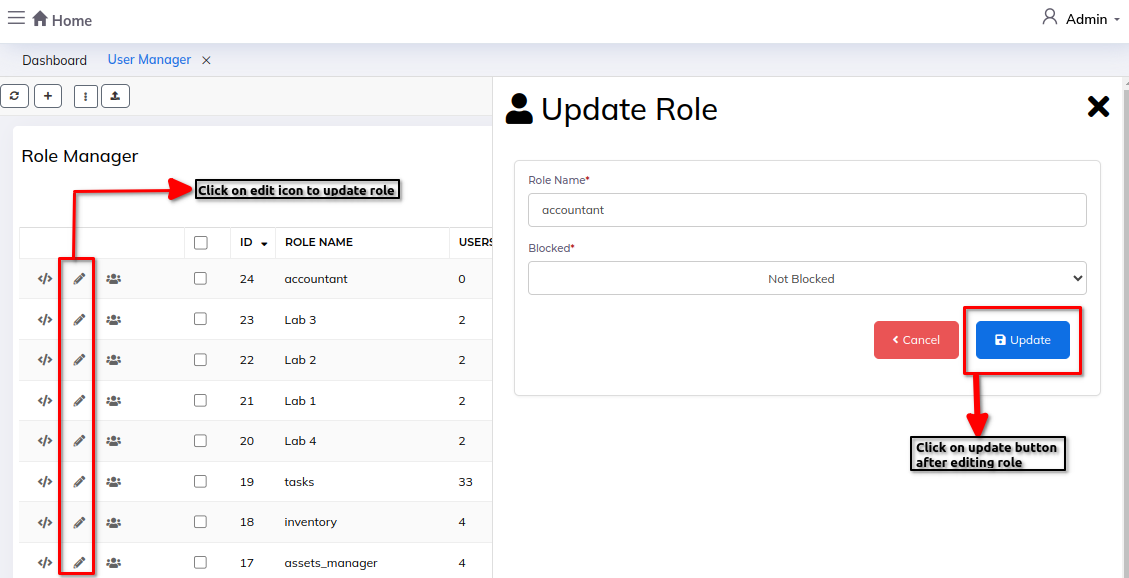
Privileges:
Enter the details in New Privileges form:-
- Role name - Enter the role name
- For Sites - Enter the sites name
- Blocked - Select Blocked/not blocked from the dropdown
Step 1: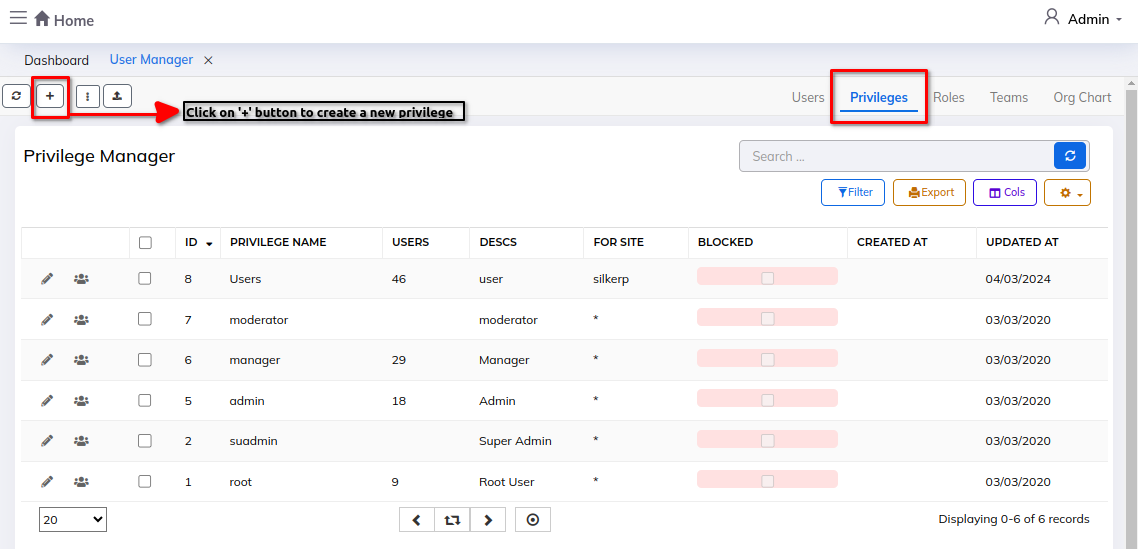
Step 2: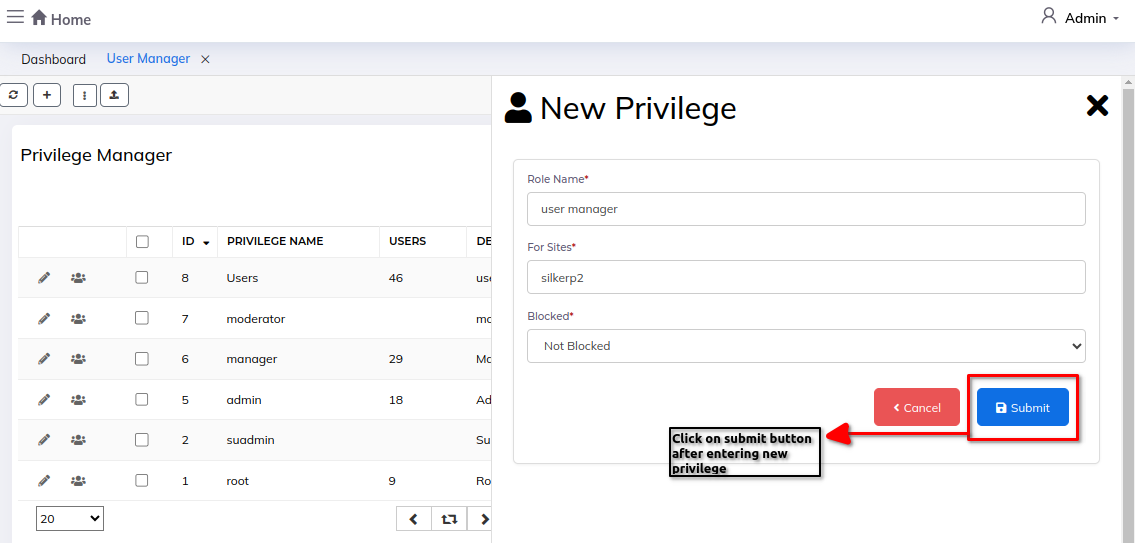
1) Edit privilege icon :- To edit the privilege details.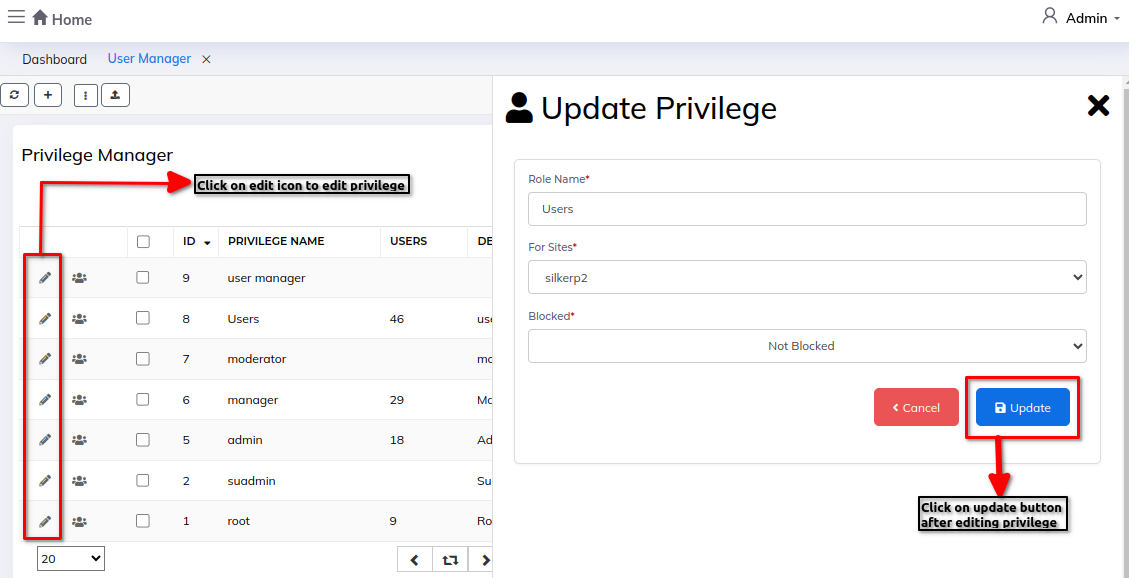
2) List users of section :- To view the list of users.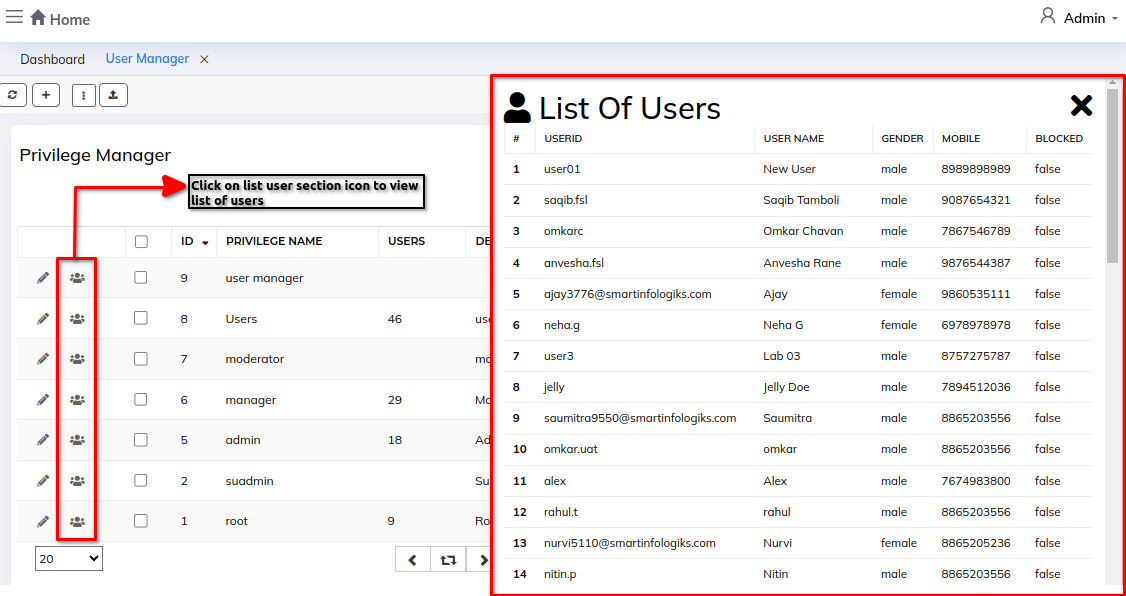
User Manager:
Enter the details in User form:-
Step 1: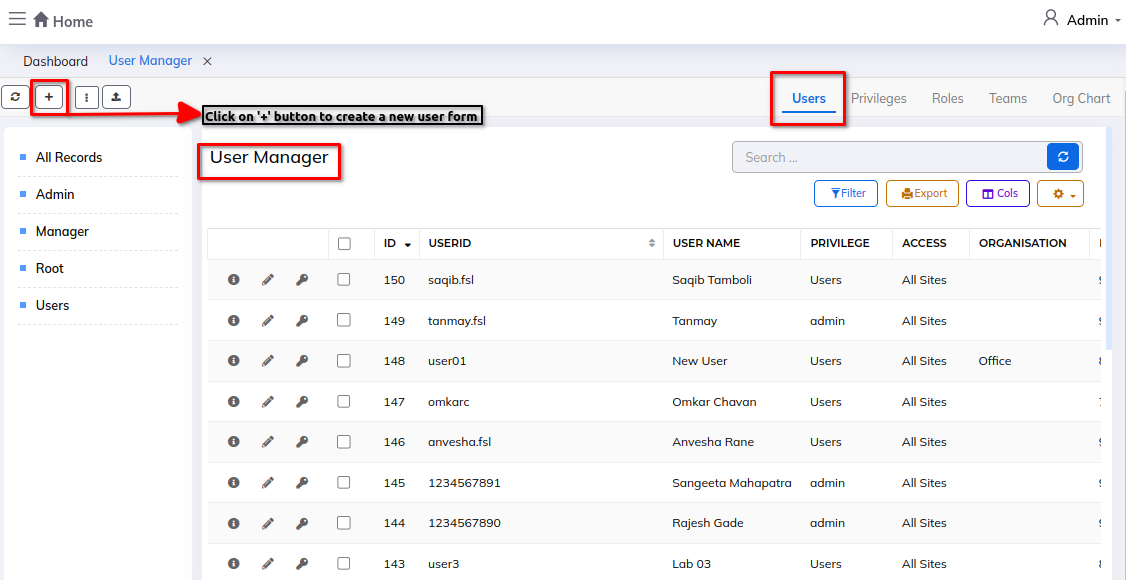
Admin:
- GUID : Enter the GUID.
- Privilege ID : Select the Privilege ID.
- Access ID : Select the Access ID.
- Group/Team : Select the Group/Team.
- User Reference Code : Enter reference code.
- User Registered Site : Select the registered site.
Step 2: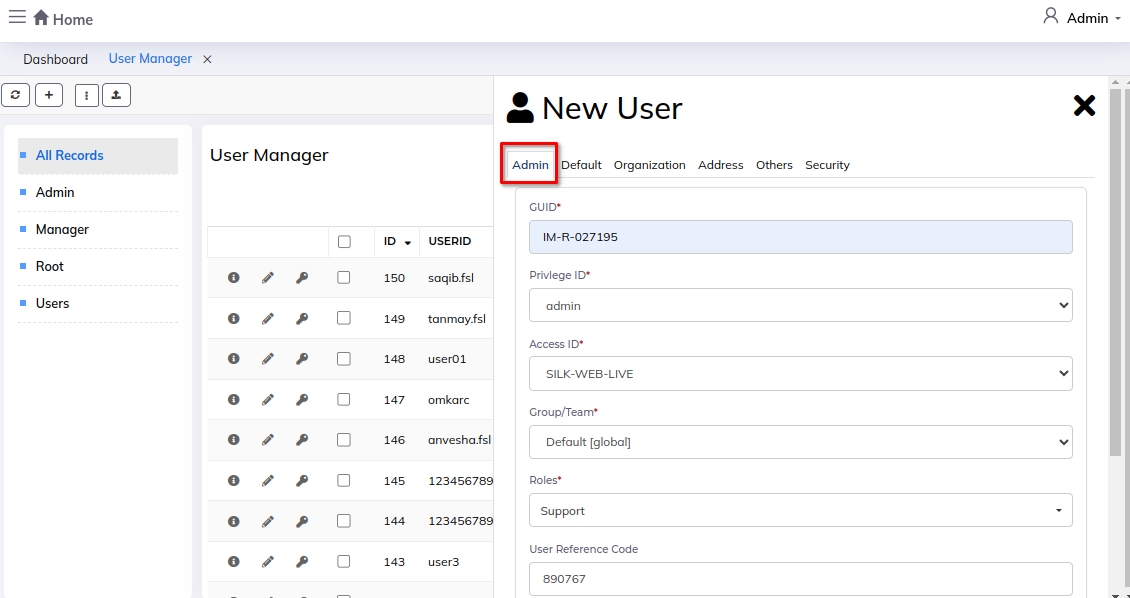
Default:
- Login ID - Enter the login ID
- Full name - Enter the full name
- E-mail - Enter valid E-mail ID
- Mobile - Enter mobile number
- Description notes - Describe notes
Step 3: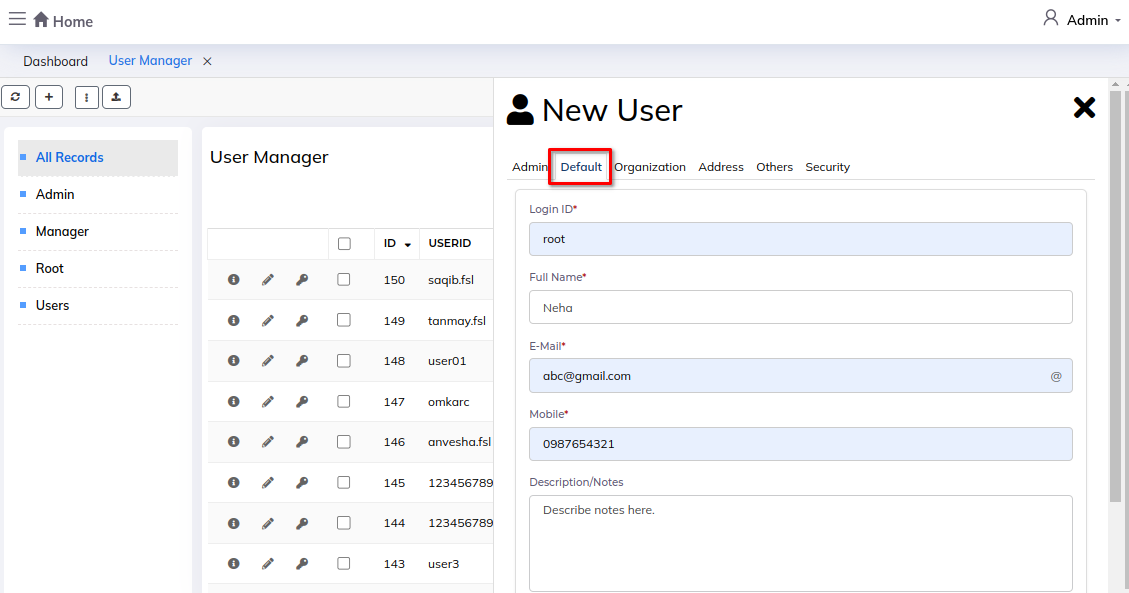
Organization:
- Organization Name : Enter the name of the Organization.
- Organization Position : Enter the user's position in the organization..
- Organization Email : Enter the organization's email id.
Step 4: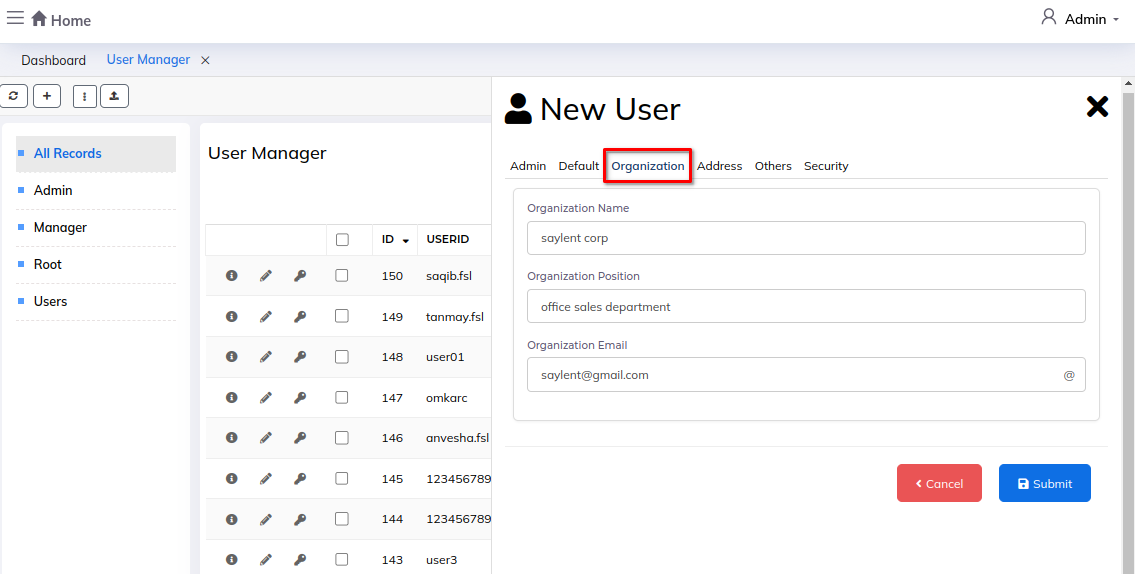
Address:
- Address : Enter the user address details.
- Region/State : Enter the state or region.
- Country : Enter the country.
- Zip code/PIN Code : Enter the zip code.
Step 5: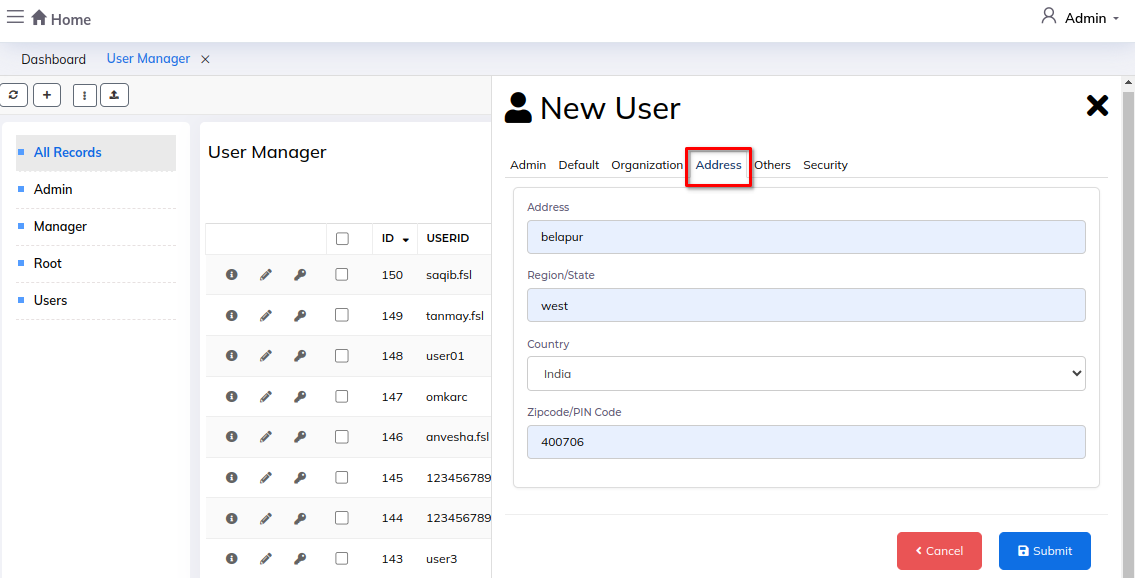
Others:
- Tags : Enter the tags.
- Gender : Select the gender.
- Date Of Birth : Specify the DOB of the user.
- Blocked : Select block status.
Step 6: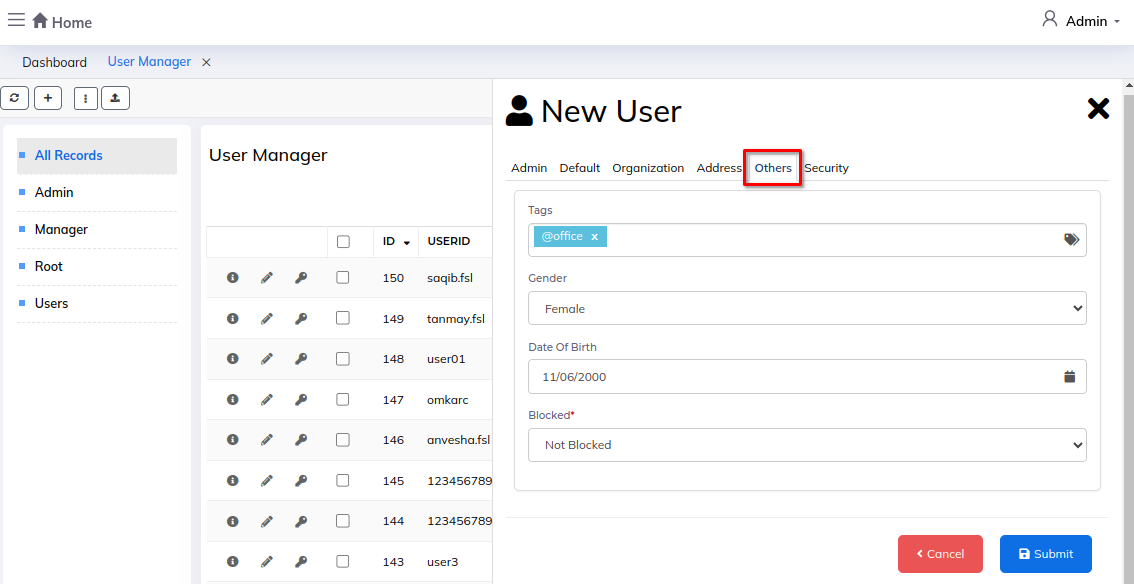
Security:
- Account Expires On : Select the account expire date.
- User Security Policy : Select the User's Security Policy.
- Data Privacy Policy : Select the Data Privacy Policy.
- Geo Location (For Login Lock) : Enter the Geo location.
- Geo IP (For Login Lock) : Enter the Geo IP.
Step 7: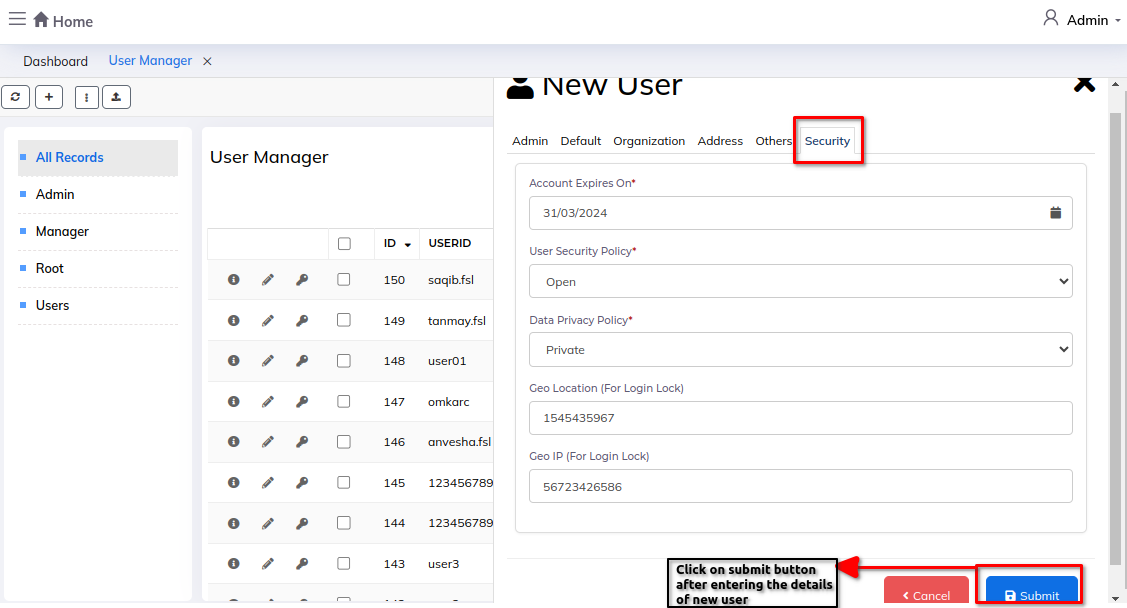
1) User information icon: To view the user information/details.
Step 1: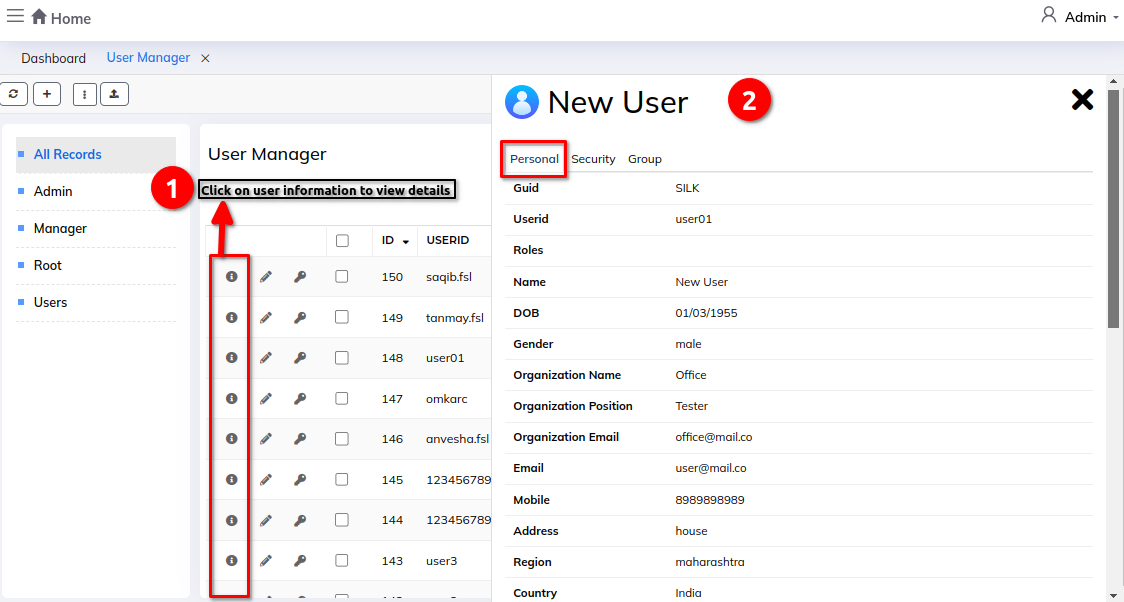
Step 2: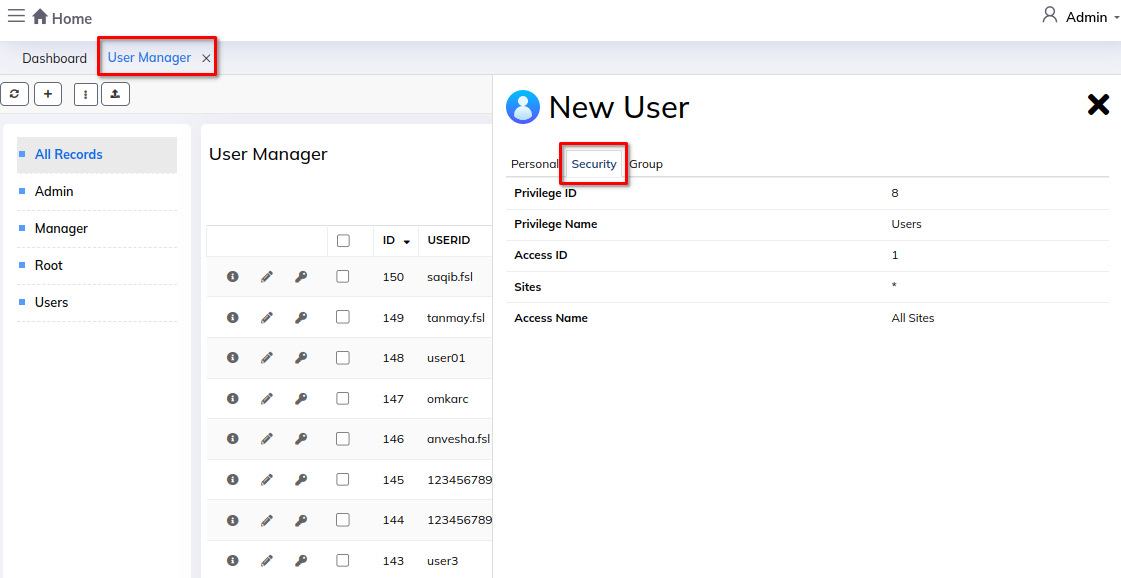
Step 3: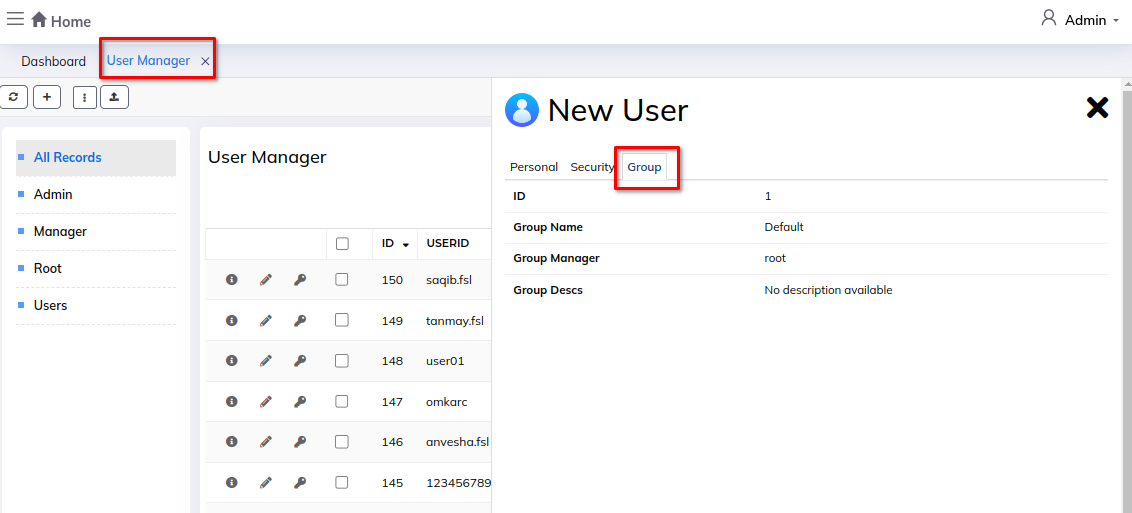
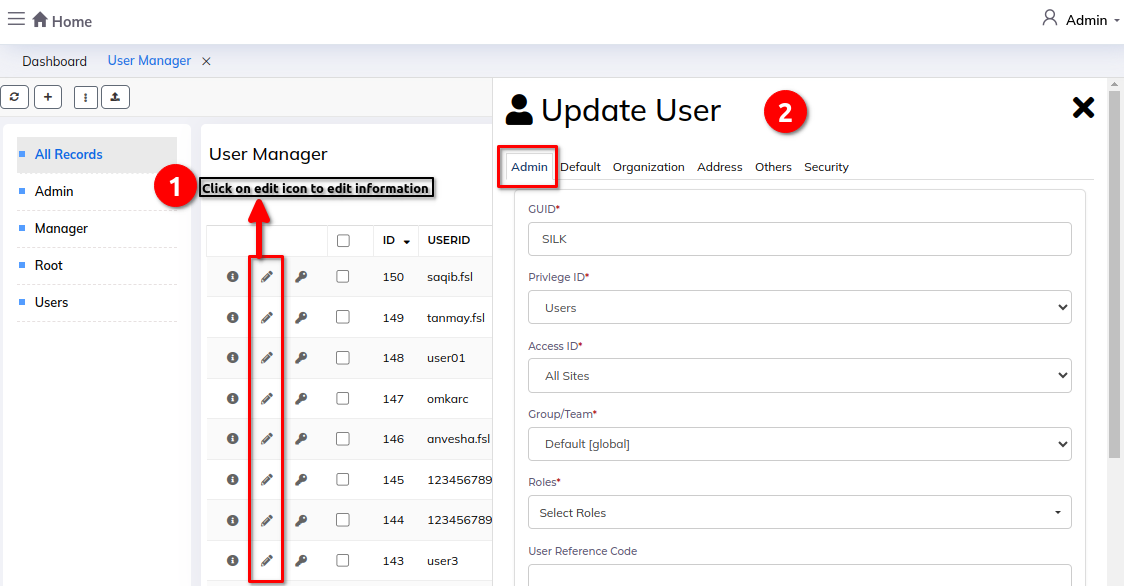
2) Edit user icon: To edit the user information.
3) Change password: To change the password of user.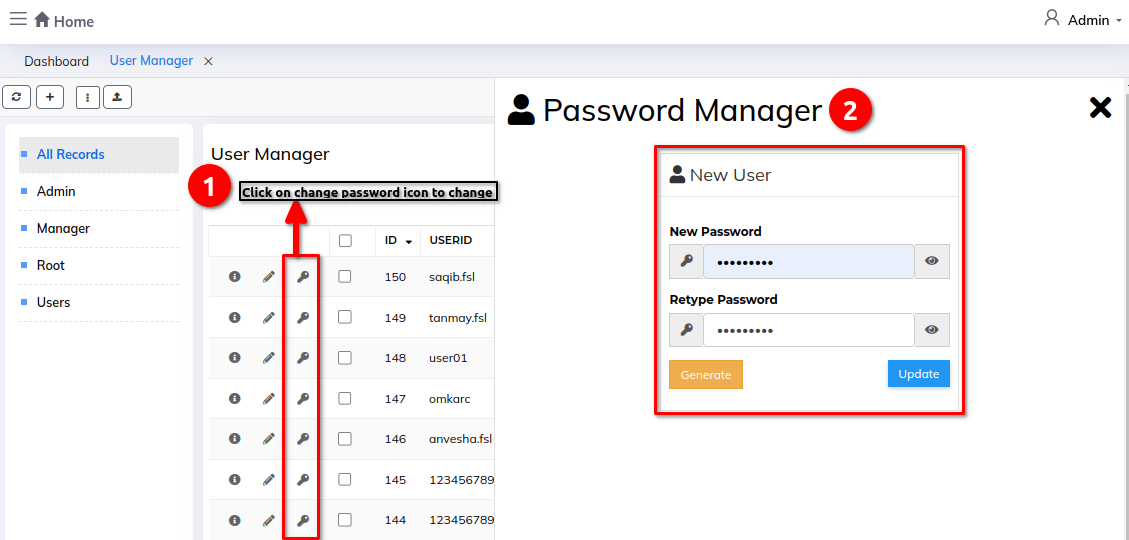
Import users:
Step 1: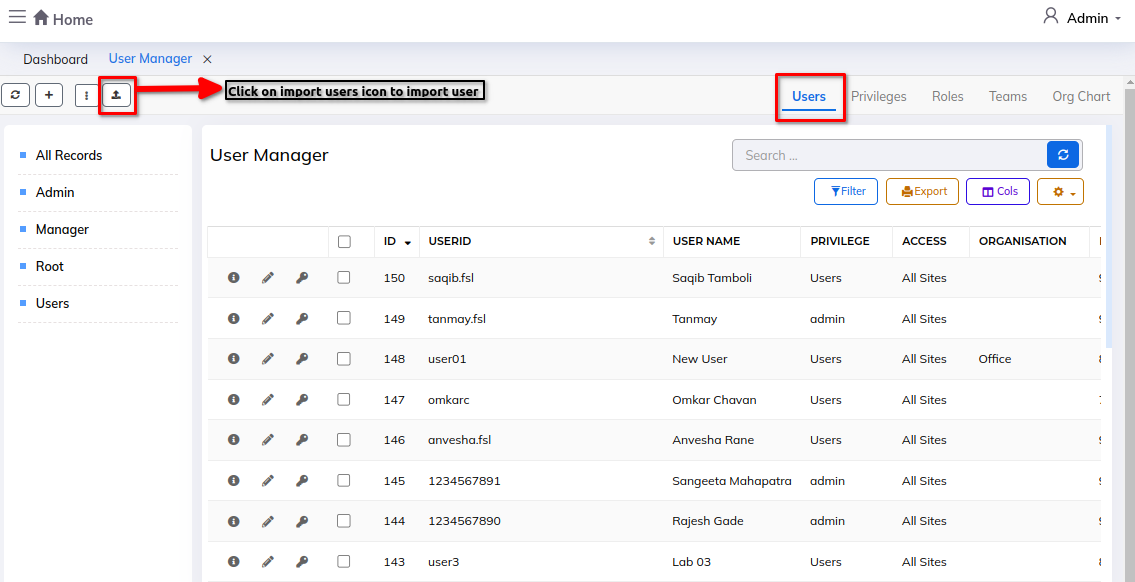
Step 2: