CRM
- To build and maintain strong customer relationships while streamlining business processes and improving profitability.
- CRM helps sales teams manage leads, track sales opportunities, and forecast sales. It provides tools for managing the sales pipeline and automating sales processes.
LeadBook:
- For capturing and recording information about leads. This information can include the lead's contact details, company information, source of the lead (e.g., website inquiry, trade show, referral), and any interactions or enquiries made by the lead.
Steps:
- Goto the CRM.
- Then Go to the Leadbook Module.
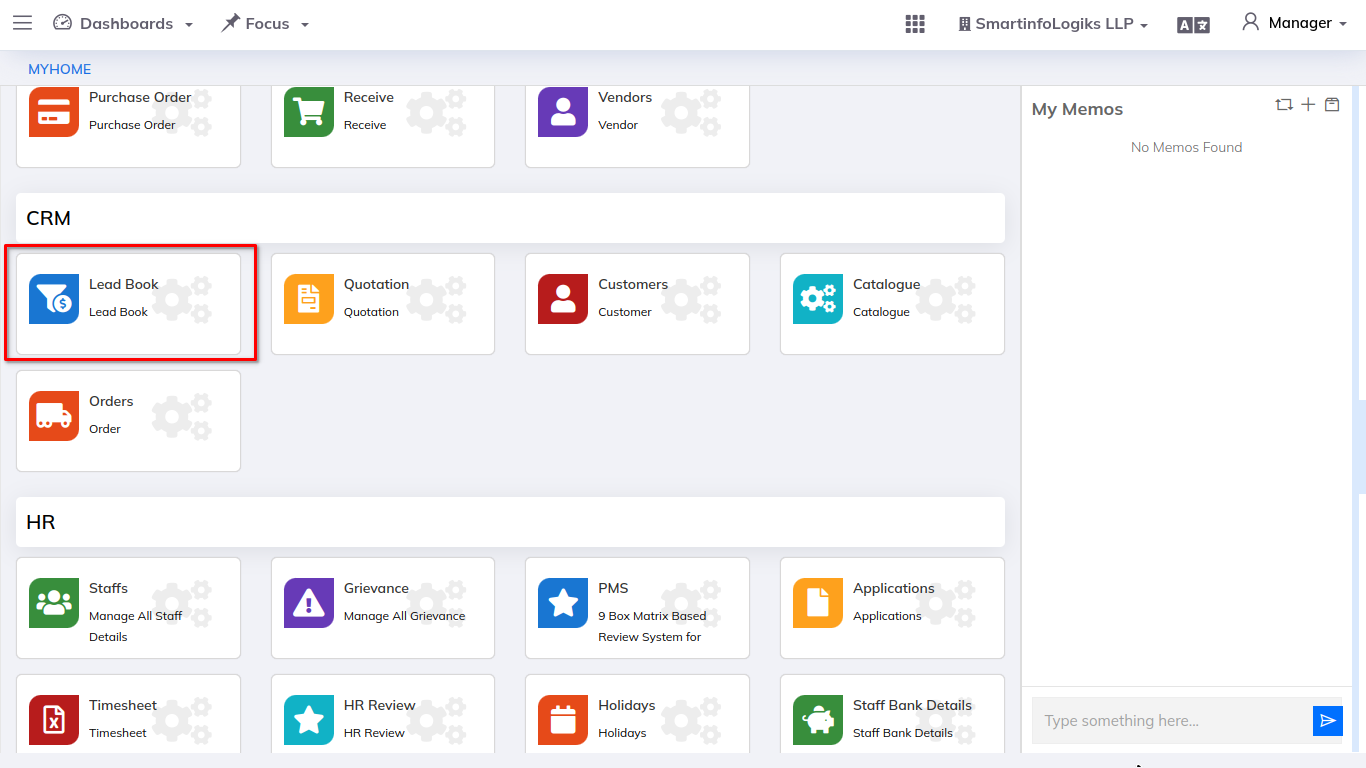
- After clicking on Leadbook module, user will be redirect to the My Leads tab as shown in below image.
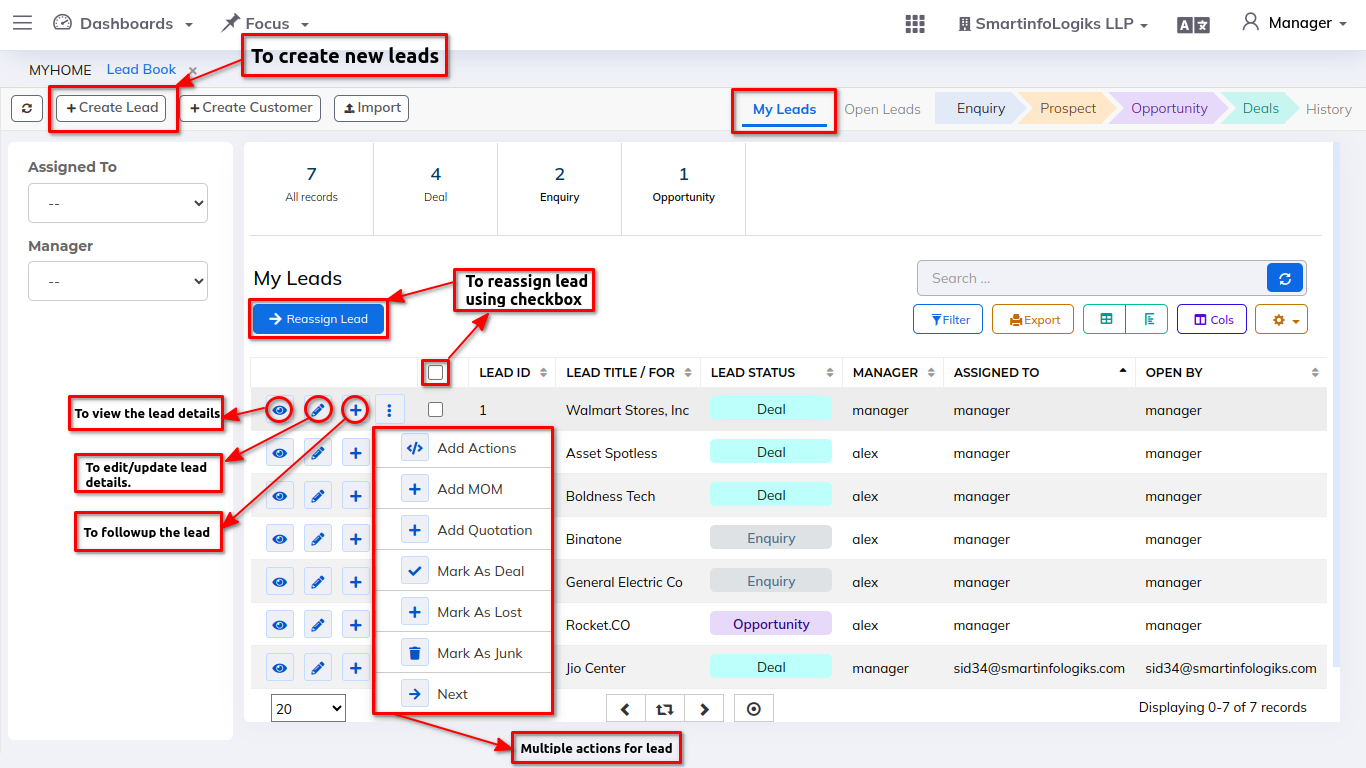
1. My Leads:
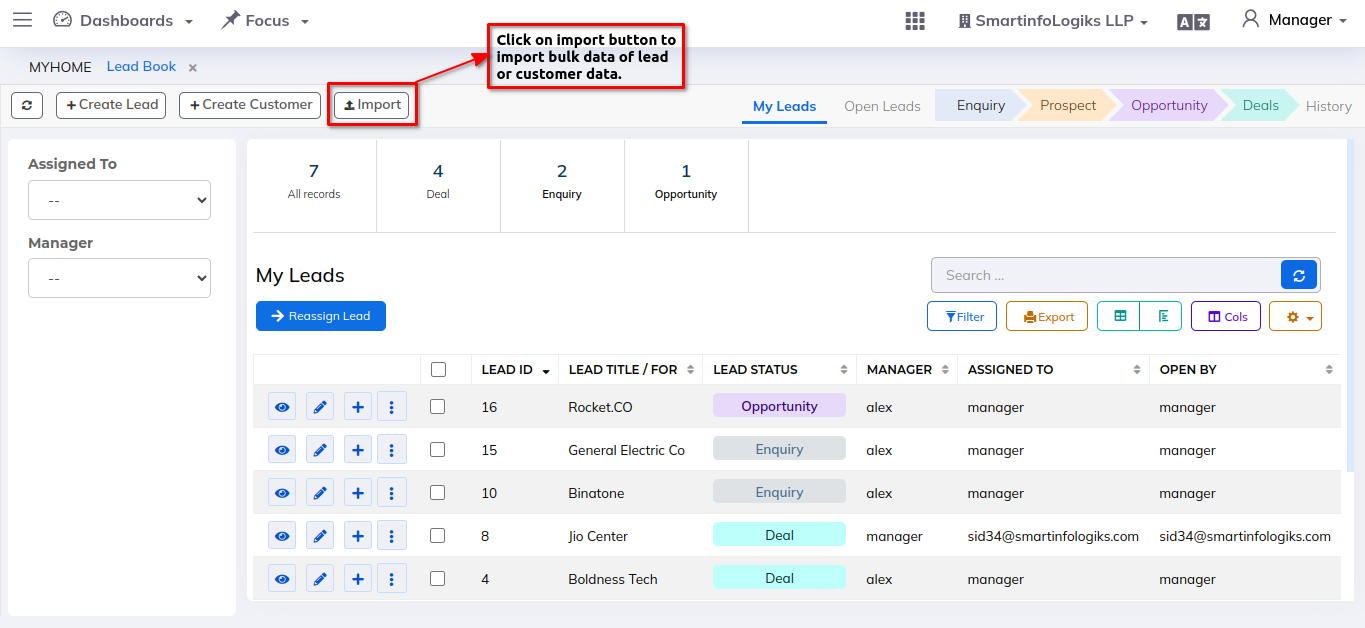
- We have the My Leads tab for creating and importing Leads and Customer details.
- Based on the sidebar we can easily get filter the record as per Assigned to and Manager.
- My Lead report is only be displayed records when it is assigned to a lead or manager, or when it open by a lead.
For creating Lead please follow the below steps:
Steps:
Step 1: Click on the +Create Lead button, the lead generation form will open and provide the user the choice to create enquiries, prospects, and opportunities as shown in the image below.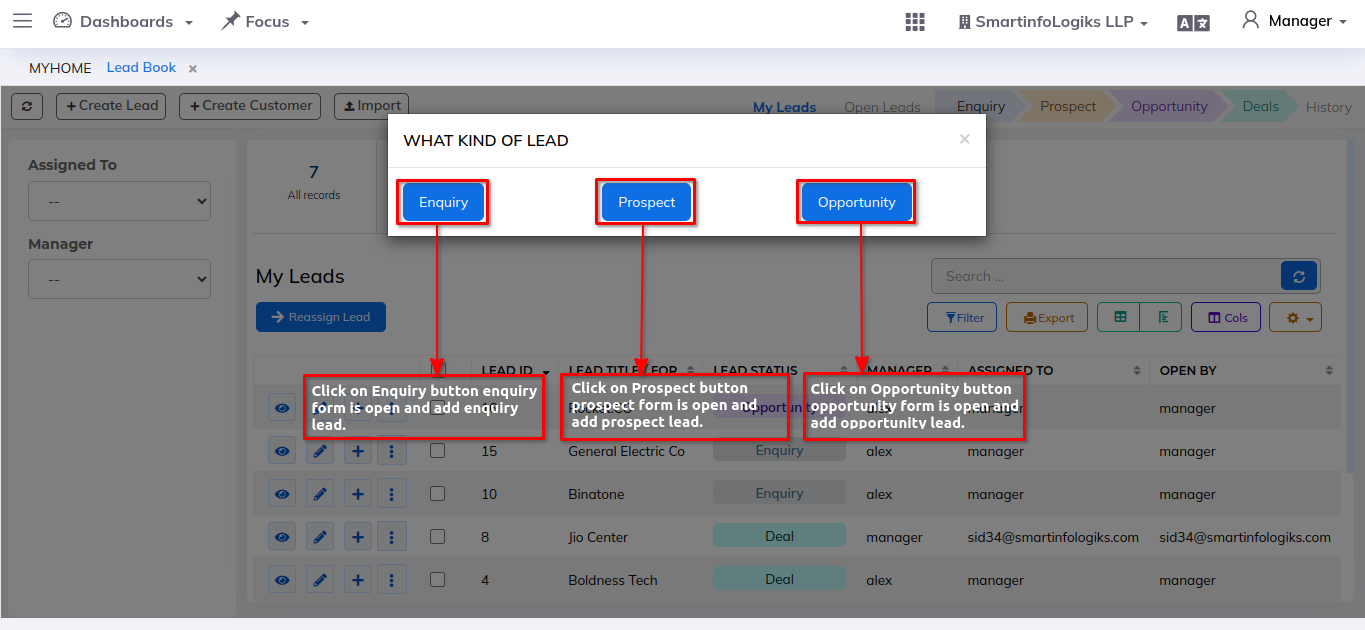
Step 2 : Click on the Enquiry button, lead enquiry creation form will get open as shown in the below image.
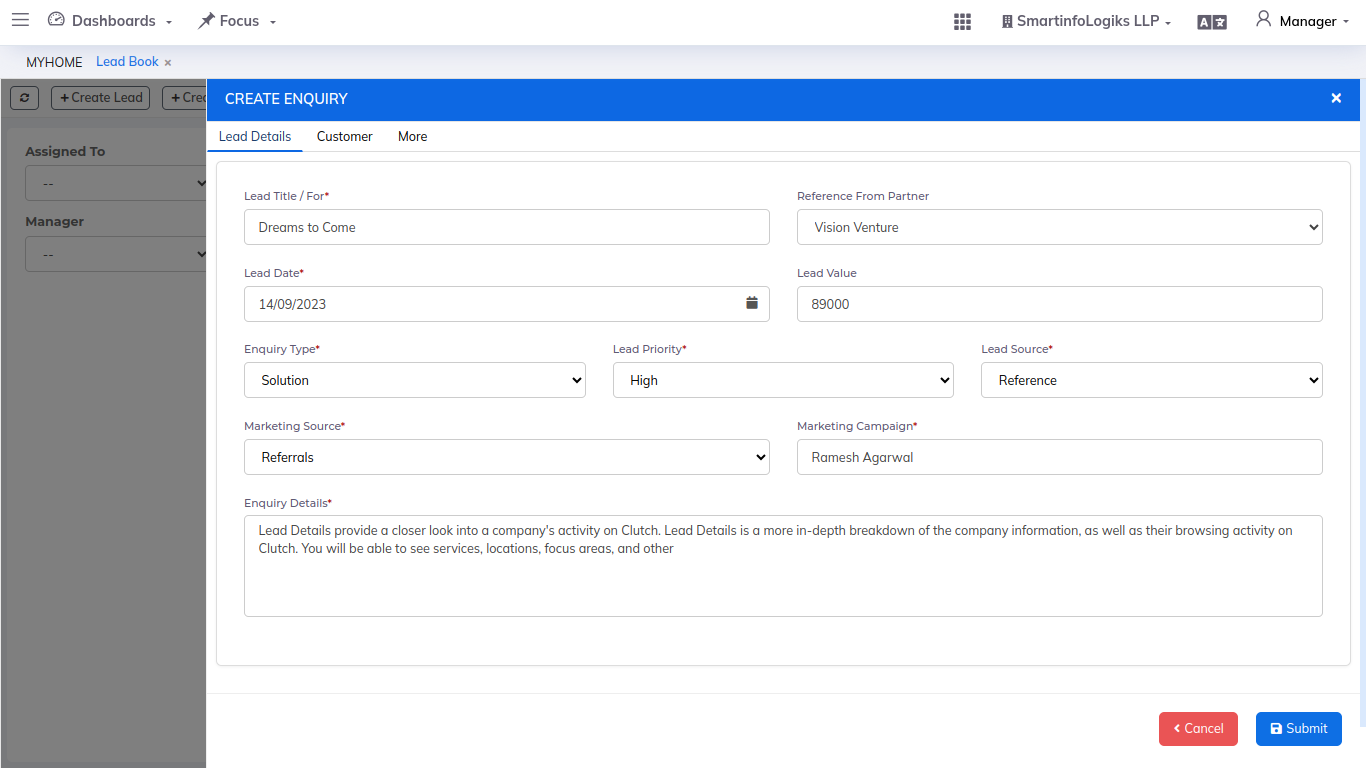
Enter the required details.
- Lead Title: Title of the Lead.
- Lead Date: Specify the lead date of the Lead.
- Lead Priority: Select the priority of the Lead using dropdown.
- Lead Source: Select the source of the Lead using dropdown.
- Enquiry Type: Select the enquiry type of the Lead using dropdown..
- Marketing Source: Select Marketing source using dropdown.
- Marketing Campaign: Specify the marketing campaign of the Lead.
- Enquiry Details: Enter the enquiry details.
- After filling all the mandatory fields click on the Submit button. On click of submit, record will be added successfully.
- Also we can provide non-mandatory/additional option while creating new lead.

- Reference From Partner: Choose the refrence from partner using dropdwon.
- Lead Value: Enter the estimated or decided lead value.
- After entering all the lead details in the 'lead details' tab, click on the Customer tab.
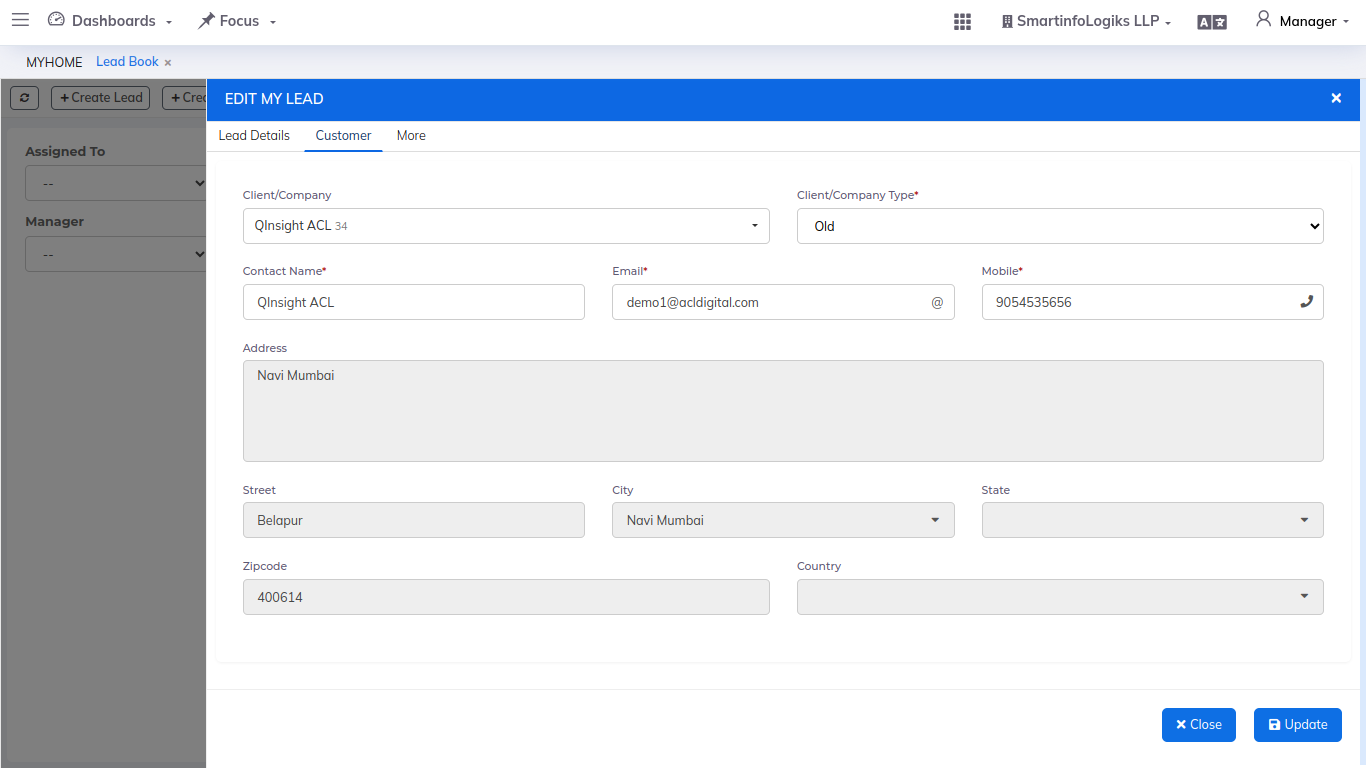
- Client/Company: Search to find and pick a company/client, and other info is retrieved while selecting a client.
- Client/Company Type: Select the old or new type from the dropdown options. When choosing new, the user can create a customer for the first time. When choosing old, the company will be selected and all information from the current contact will be fetched.
- Contact Name: When a new client/company type is chosen, the customer's name must be entered however, if old client/company type is chosen, data is retrieved automatically.
- Email: When a new client/company type is chosen, the customer's email id must be entered however, if old client/company type is chosen, data is retrieved automatically.
- Mobile: When a new client/company type is chosen, the customer's contact number must be entered however, if old client/company type is chosen, data is retrieved automatically.
- Address: When a new client/company type is chosen, the customer's address must be entered however, if old client/company type is chosen, data is retrieved automatically.
- Street, City, State, Zipcode and Country: When a new client/company type is chosen, the customer's street, city, state, zipcode and country must be entered however, if old client/company type is chosen, data is retrieved automatically.
- After entering all the customer details in the 'Customer' tab, click on the More tab.
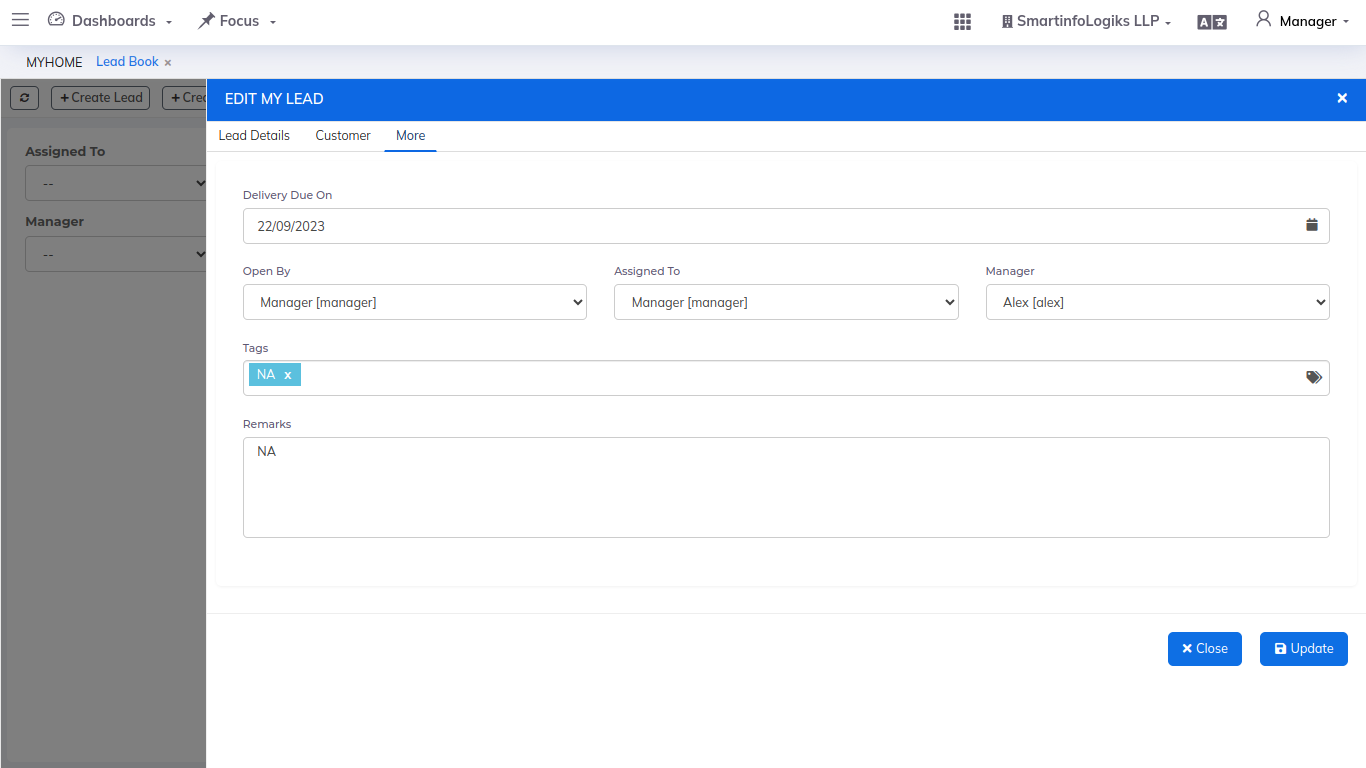
- Delivery Due On: Specify the delivery due date of the Lead.
- Open By: Choose the name of the staff to whom the open by the lead.
- Assigned To: Choose the name of the staff to whom the lead is assigned.
- Manager: Choose the name of the manager to whom the lead is assign.
- Tags: Enter the lead tags.
- Remarks: Enter the Remarks.
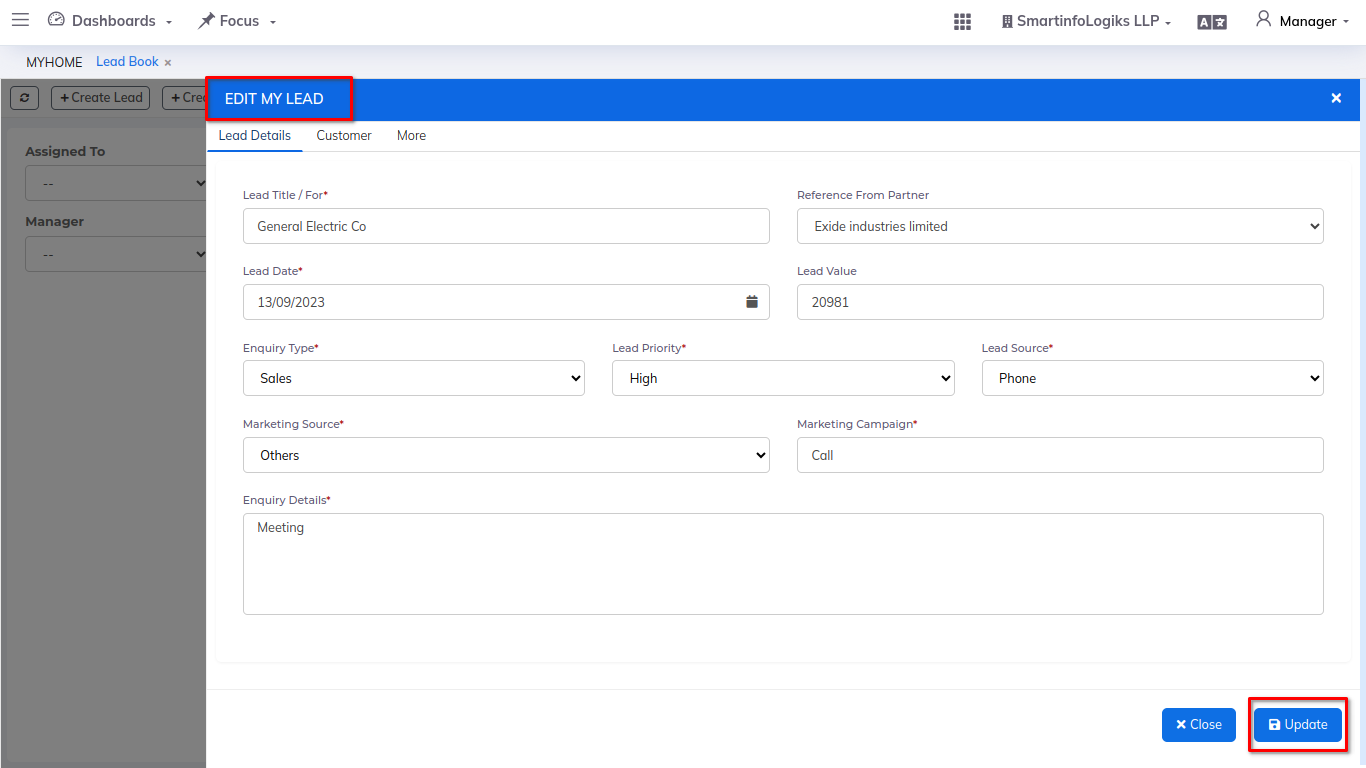
- After adding lead user can edit or update lead details using pencil icon.
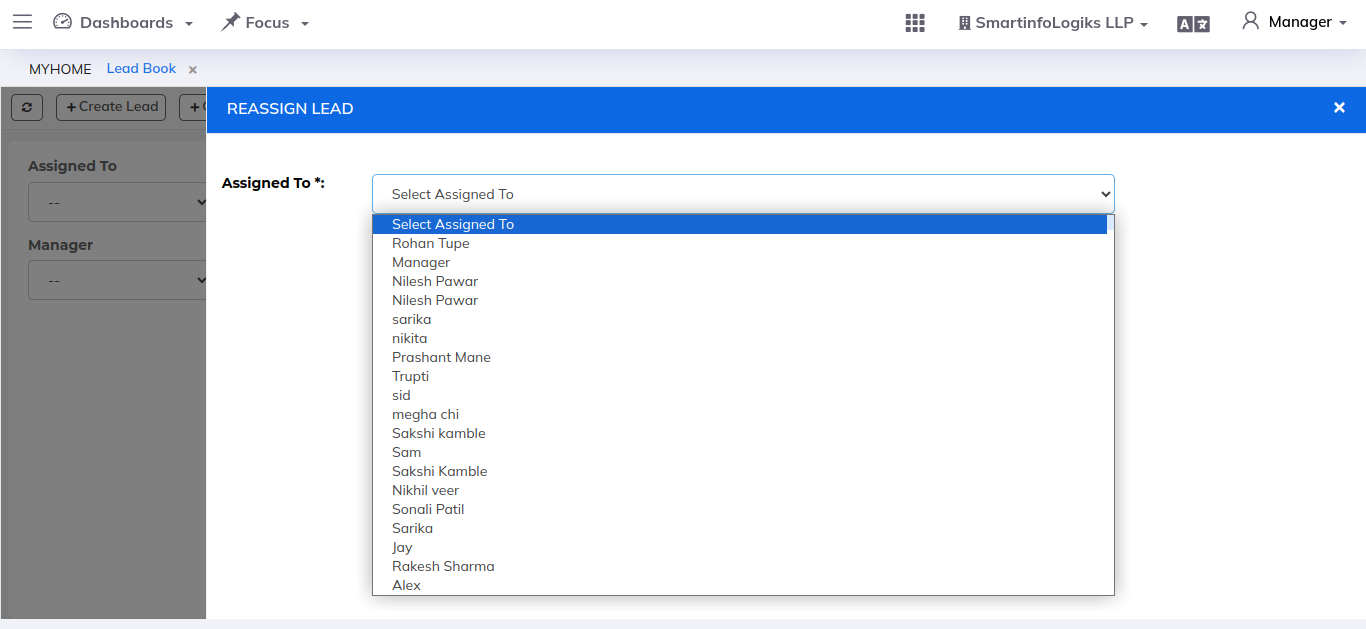
- Reassign Lead is using the checkbox, select one or more leads, then allocate them to the staff.
- Follow up Process of contacting and engaging with potential customers or leads who have shown interest in a product or service but have not yet made a purchase.
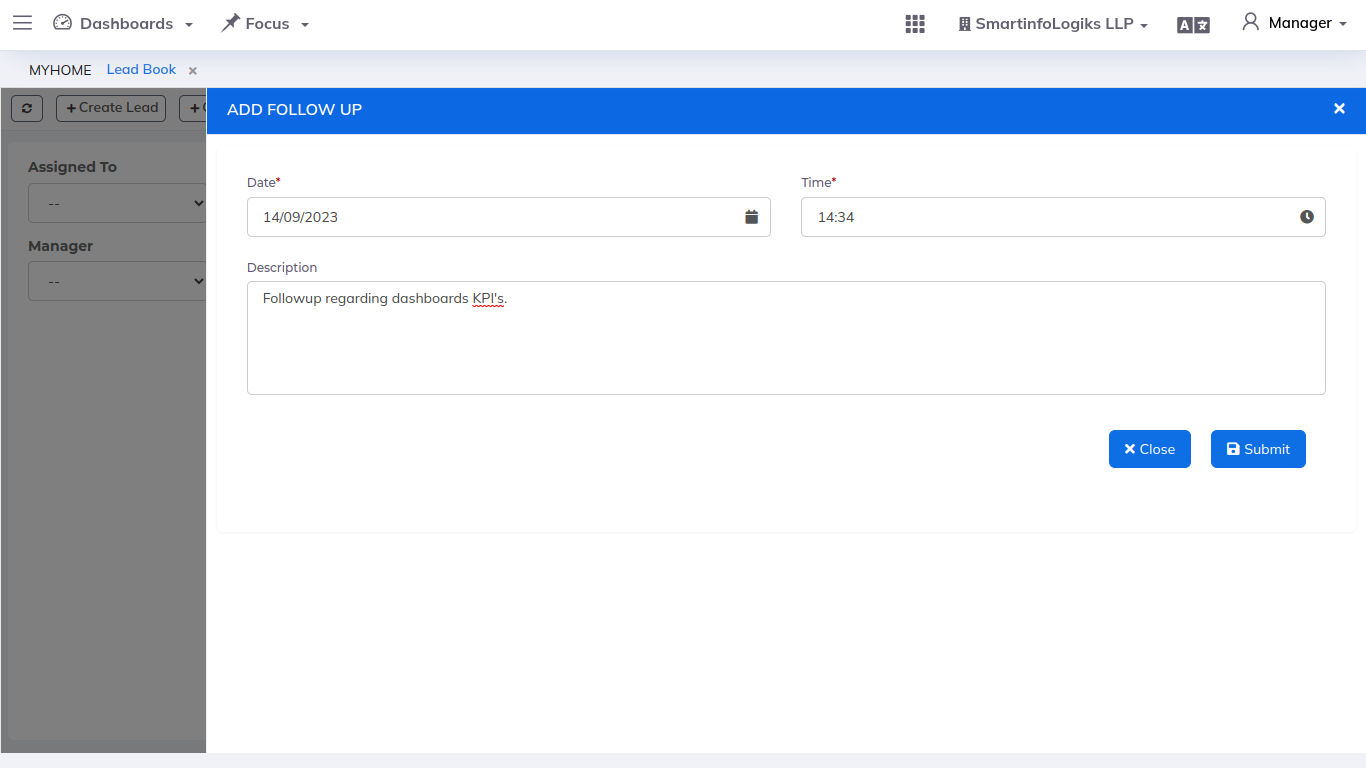
- Select the date, time and enter followup description for particular lead then click on Submit button.
- While viewing specific lead details, additional features can be added in the info view.
1) Lead Details: The information that we added to the form is visible in this tab: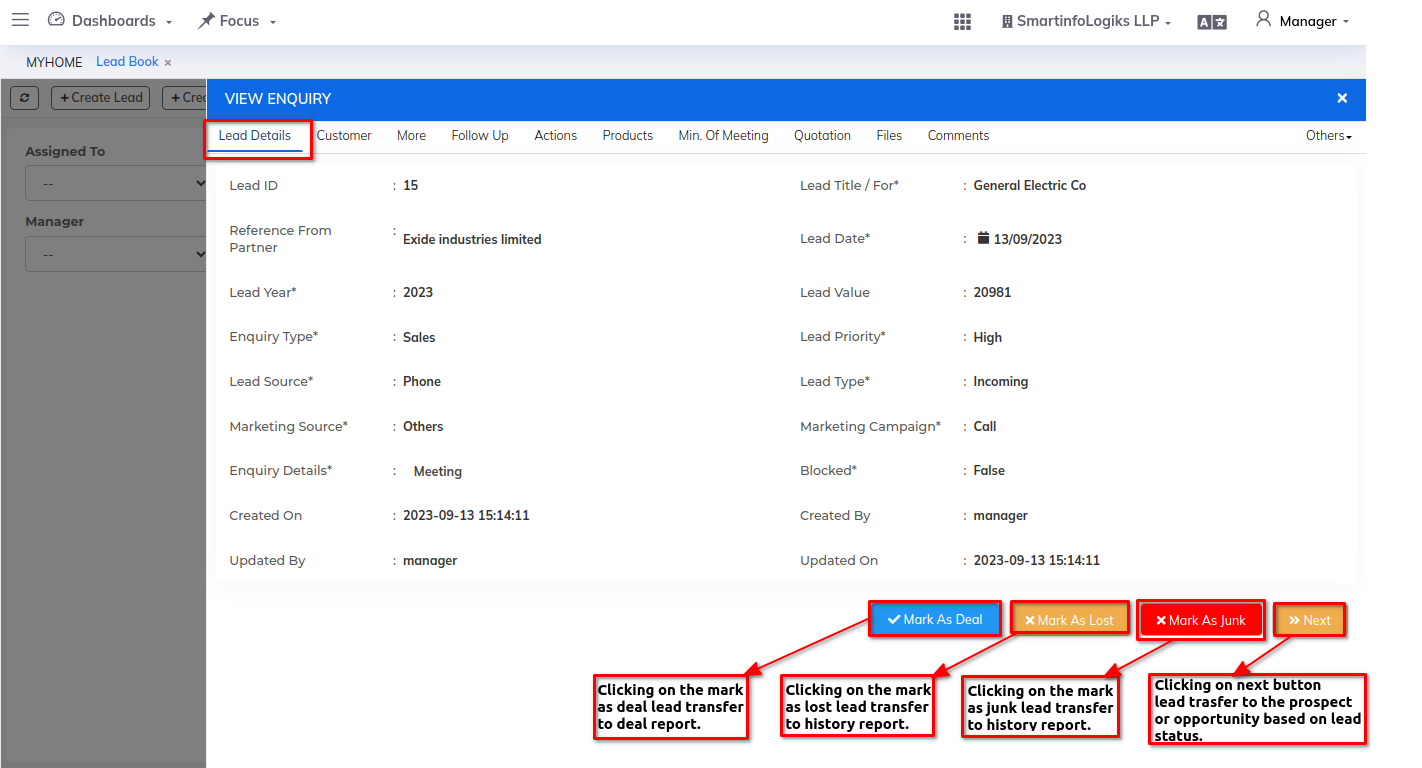
2) Customer: The customer information that we added to the form is visible in this tab: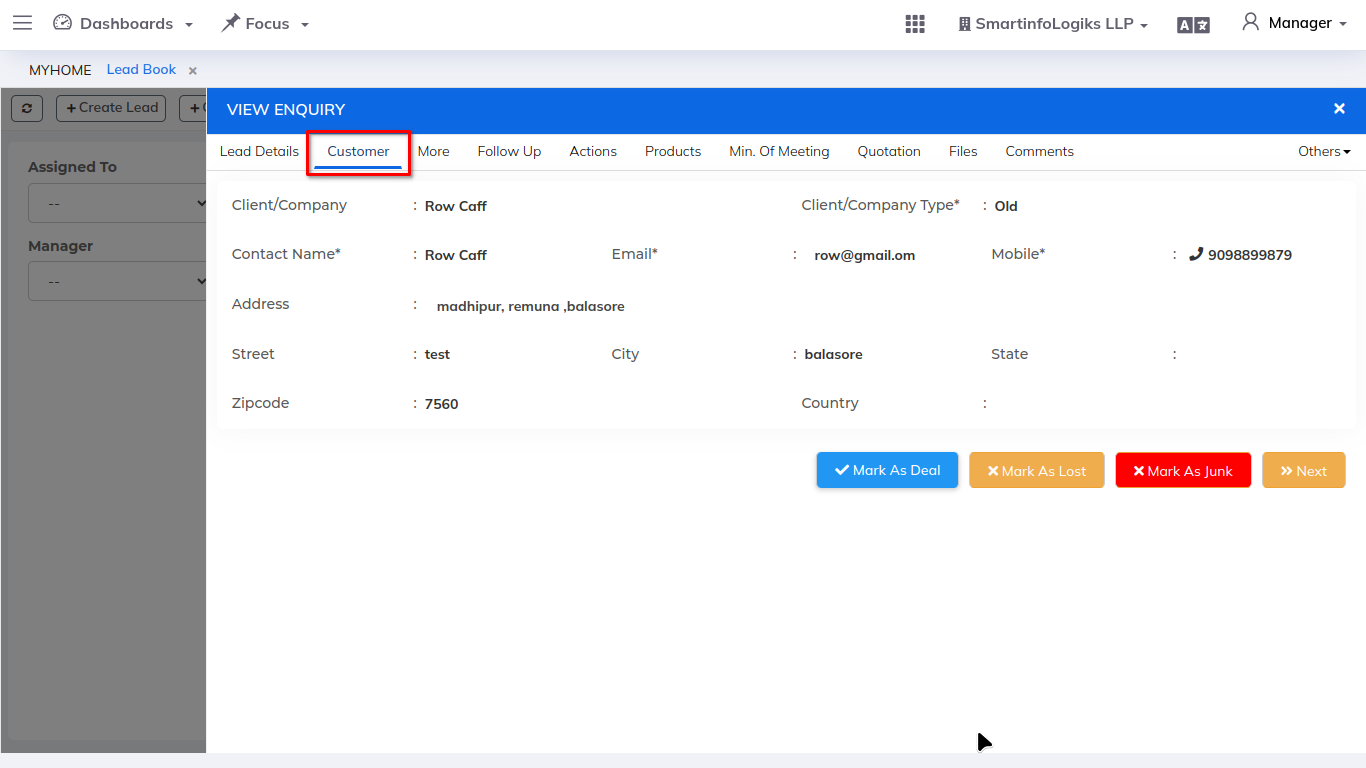
3) Follow Up: The follow up information that we added multiple to the form is visible in this tab: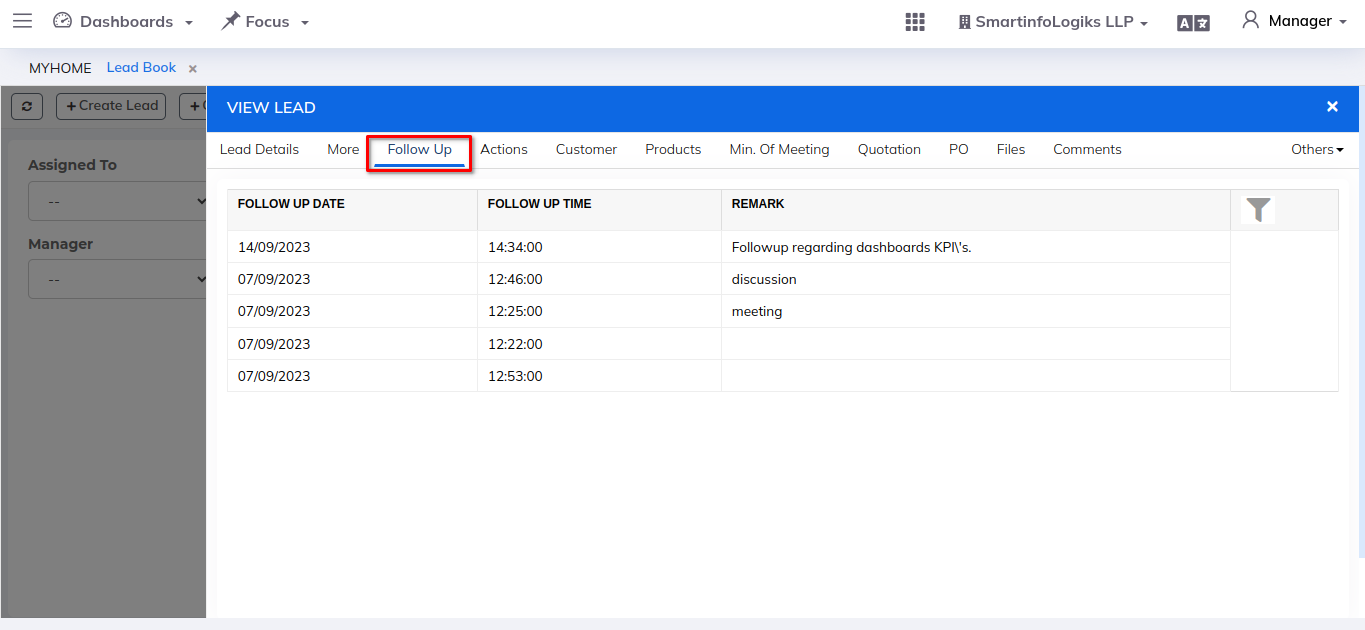
4) Actions: Action on lead is to move the lead through the sales funnel, from initial interest to a successful conversion into a paying customer.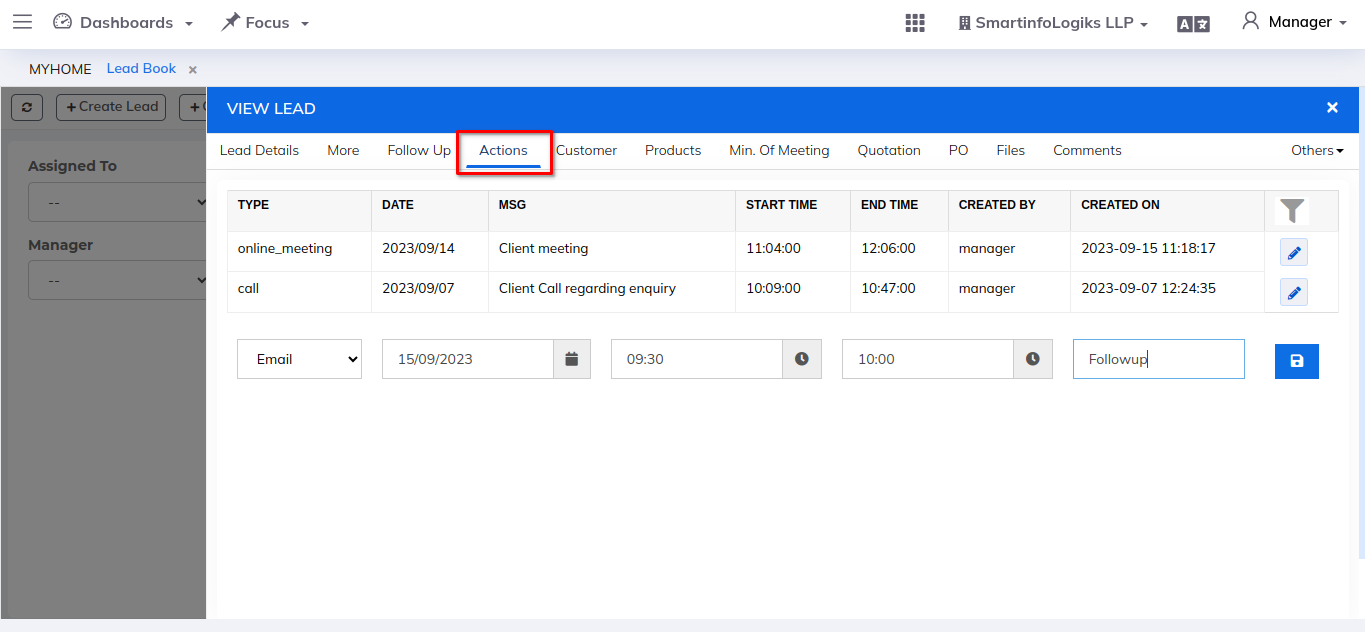
5) Products: Adding products in a lead is a fundamental aspect of the sales process.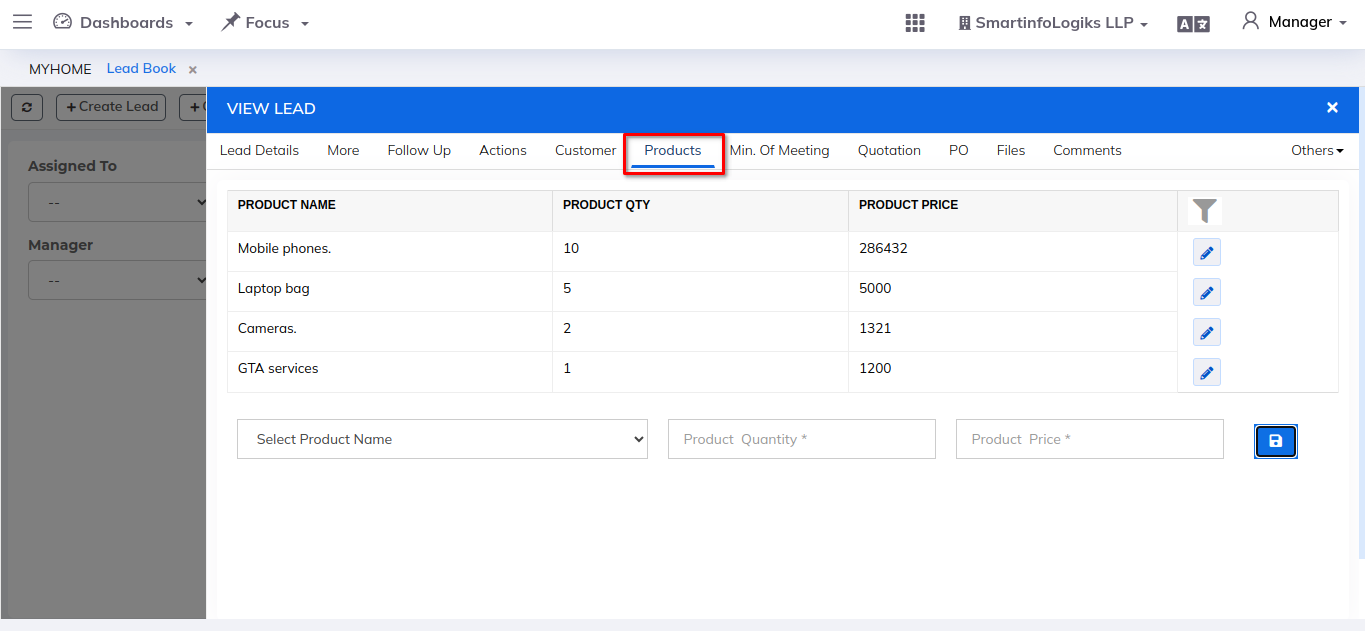
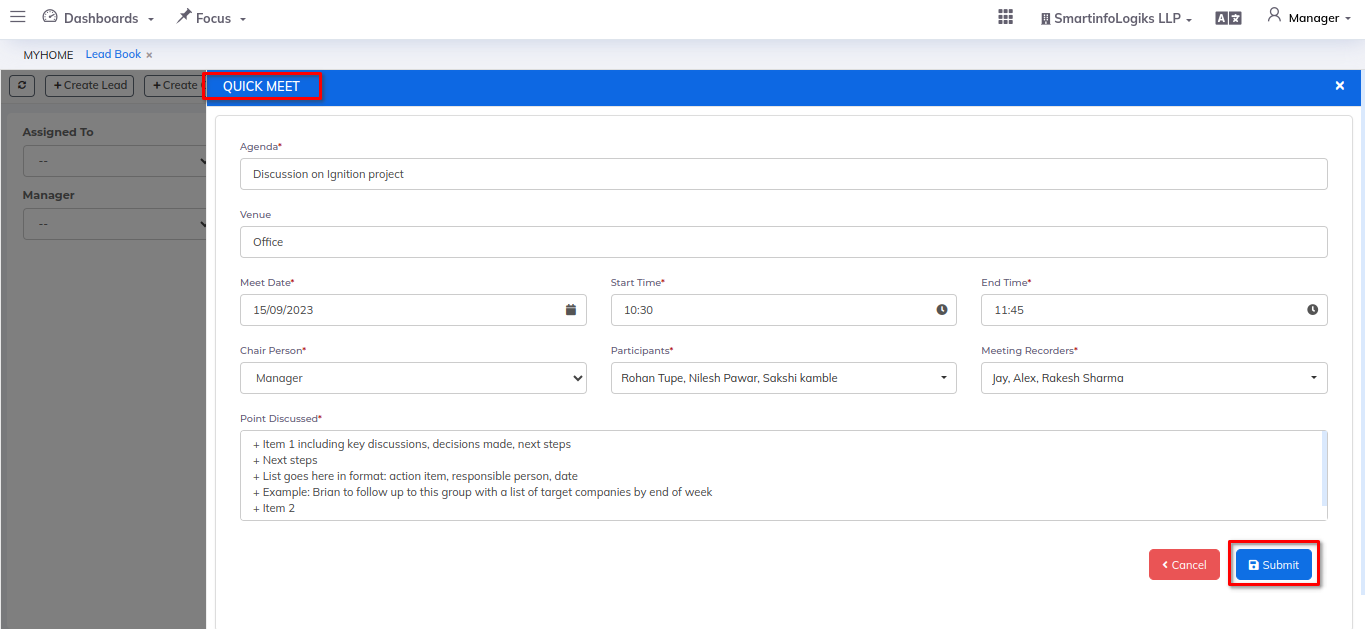
6) Min. Of Meeting: Storing documenting and recording the discussions, decisions, and action points that occur during meetings with potential customers or leads.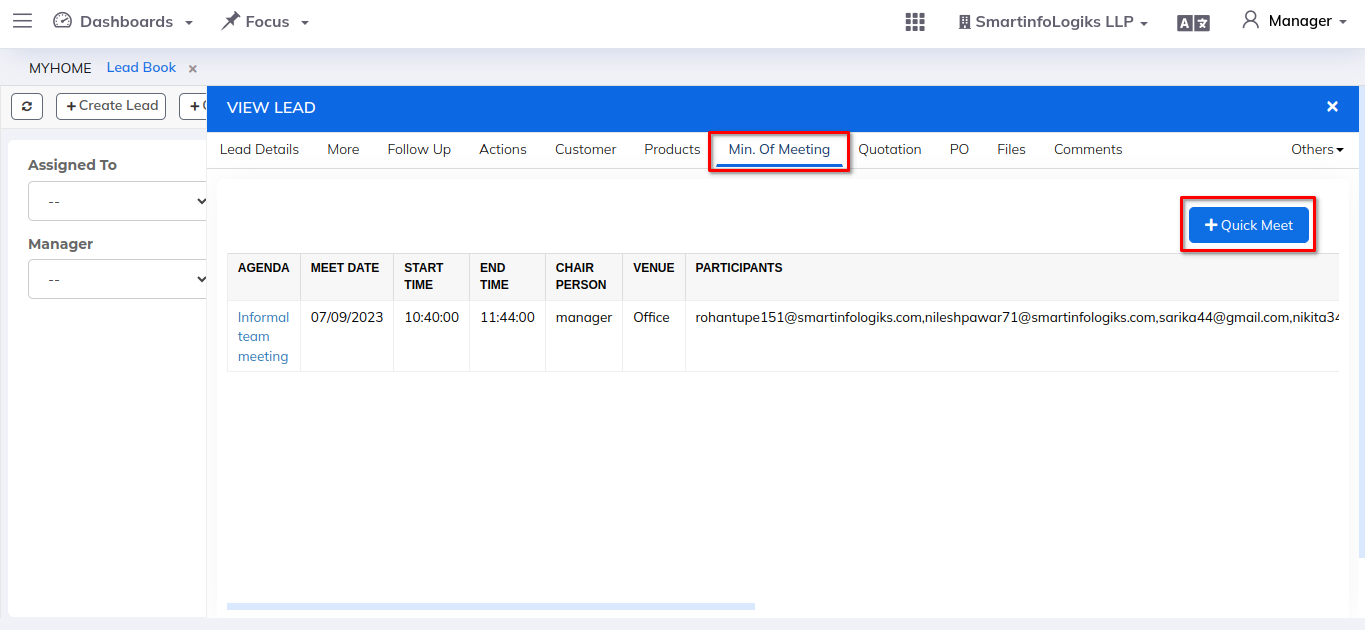
7) Quotation: Providing a formal quotation that outlines the pricing, terms, and details of a proposed sale to a potential customer or lead.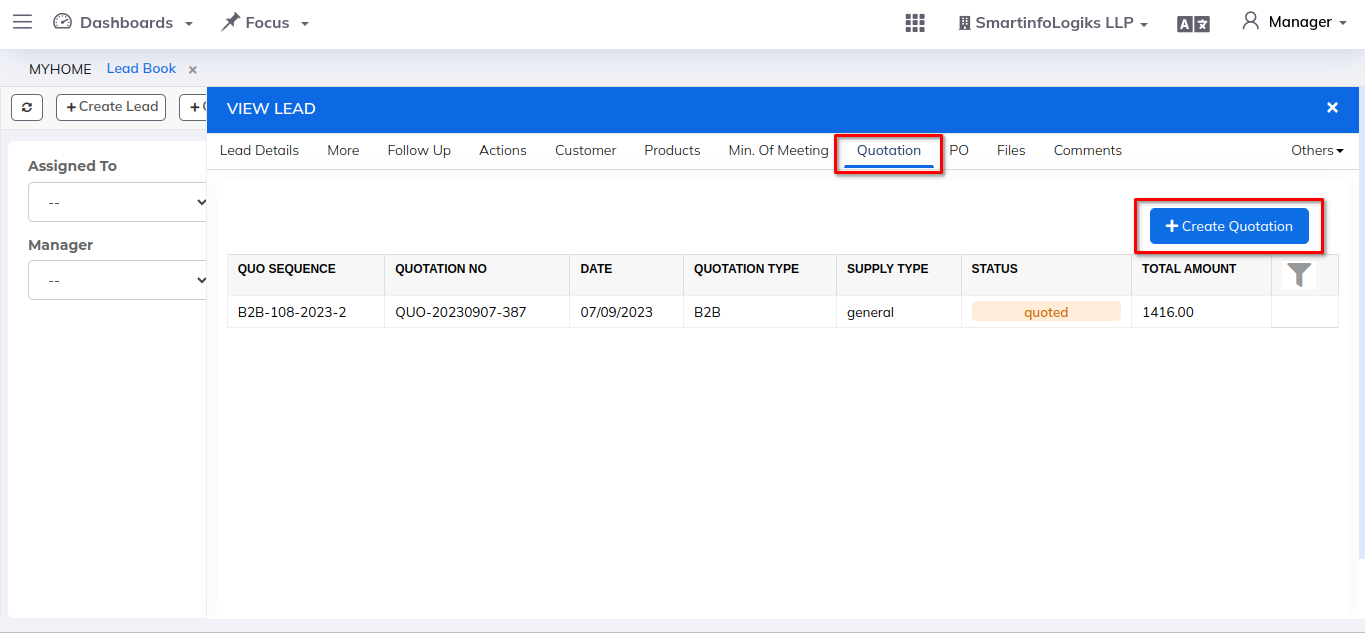
- Also we can view other lead related details in the infoview.
- For creating customers please follow the below steps:
Step: - Click on the +Create Customer button, customer creation form will get open as shown in the below image.
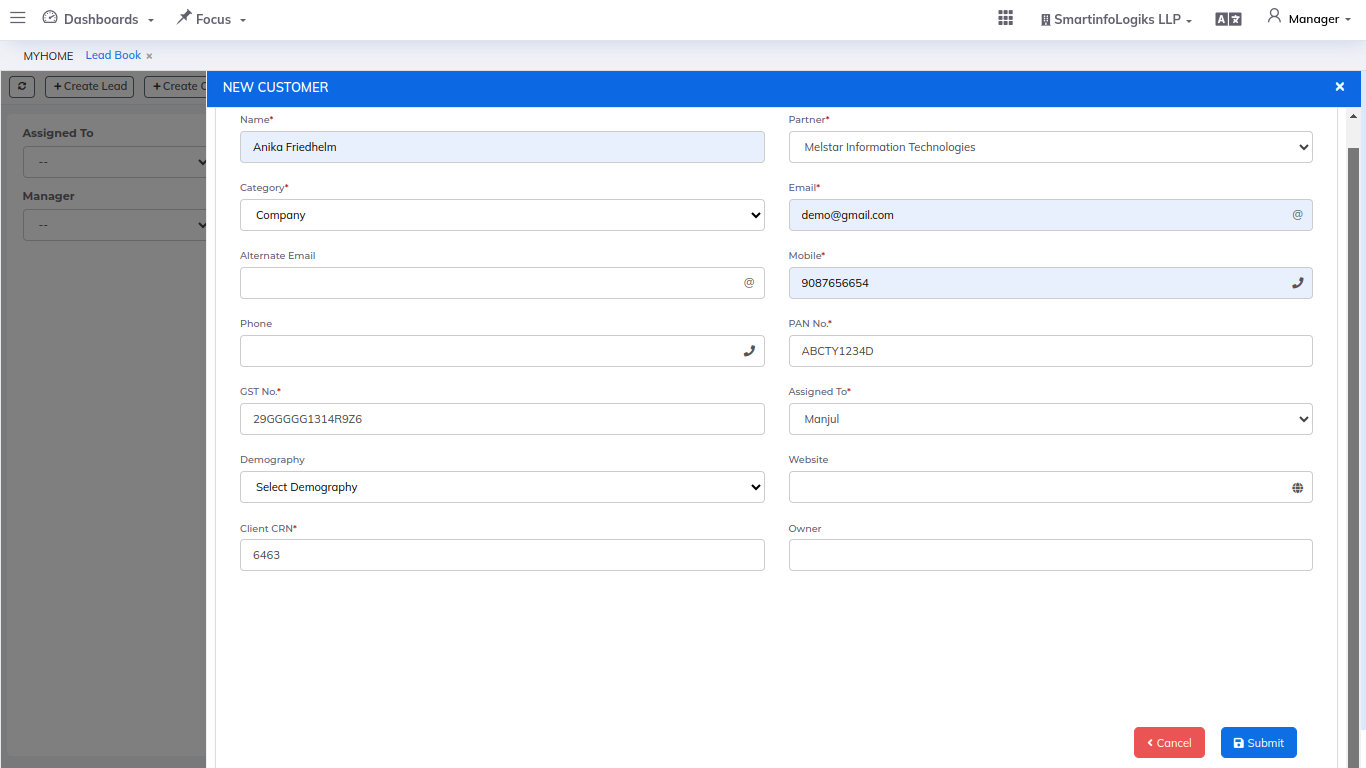
Enter the required details.
- Name: Enter the customer name.
- Partner: Select customer partner name using dropdown.
- Category: Select customer category using dropdown.
- Email: Enter the customer's email id.
- Mobile: Enter the customer's contact number.
- PAN No.: Enter the customer PAN number.
- GST No.: Enter the customer GST number.
- Assigned To: Choose the name of the staff to whom the customer is assign.
- Client CRN: Enter the customer CRN number.
Additional details can be add while creating customer:
- Alternate Email: Enter the customer's alternate email id.
- Phone: Enter the customer's alternate contact number.
- Demography: Select customer demography using dropdown.
- Website: Enter the URL if the customer's website is present.
- Owner: Enter the owner name of the company.
- DOB: Specify the date of birth of the customer.
- Blood Group: Select customer blood group using dropdown.
- Fax: Enter the customer Fax.
- Tags: Enter the tags.
- Remarks: Enter the Remarks.
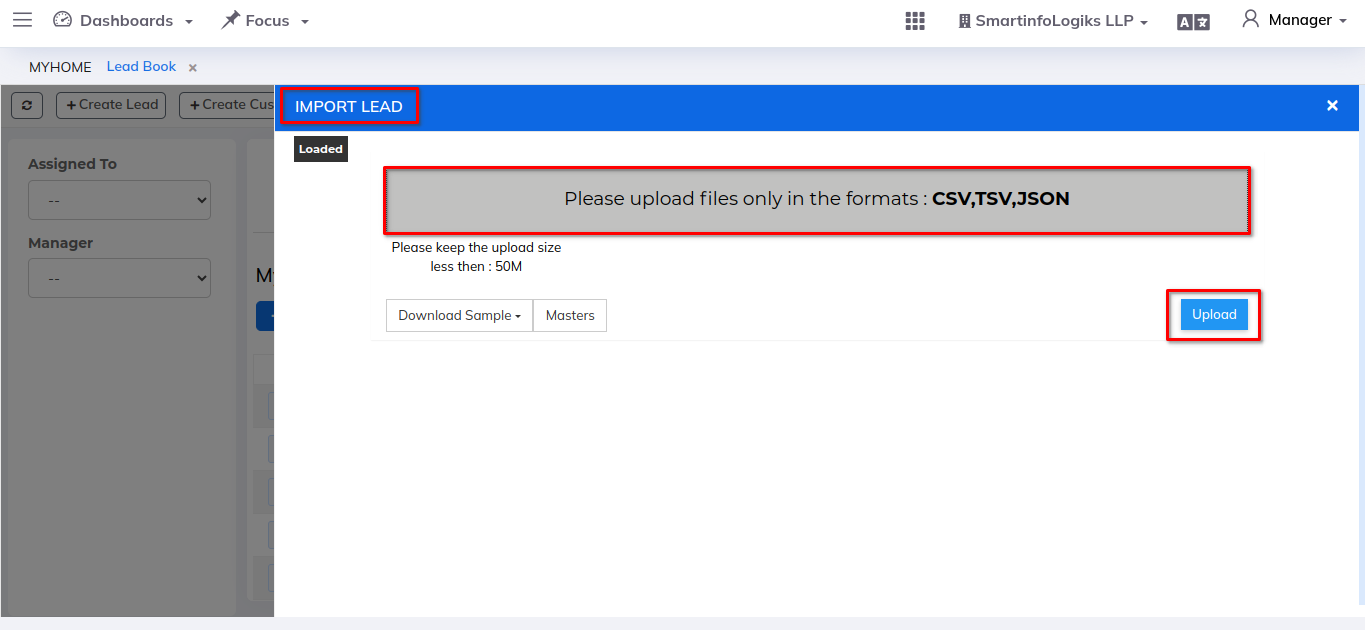
- Data Import option is an easy way to upload (or edit) bulk data (especially master data) into the system.
2. Open Leads:
- Potential customer or sales prospect that has not yet been assigned to a specific team within an organization.

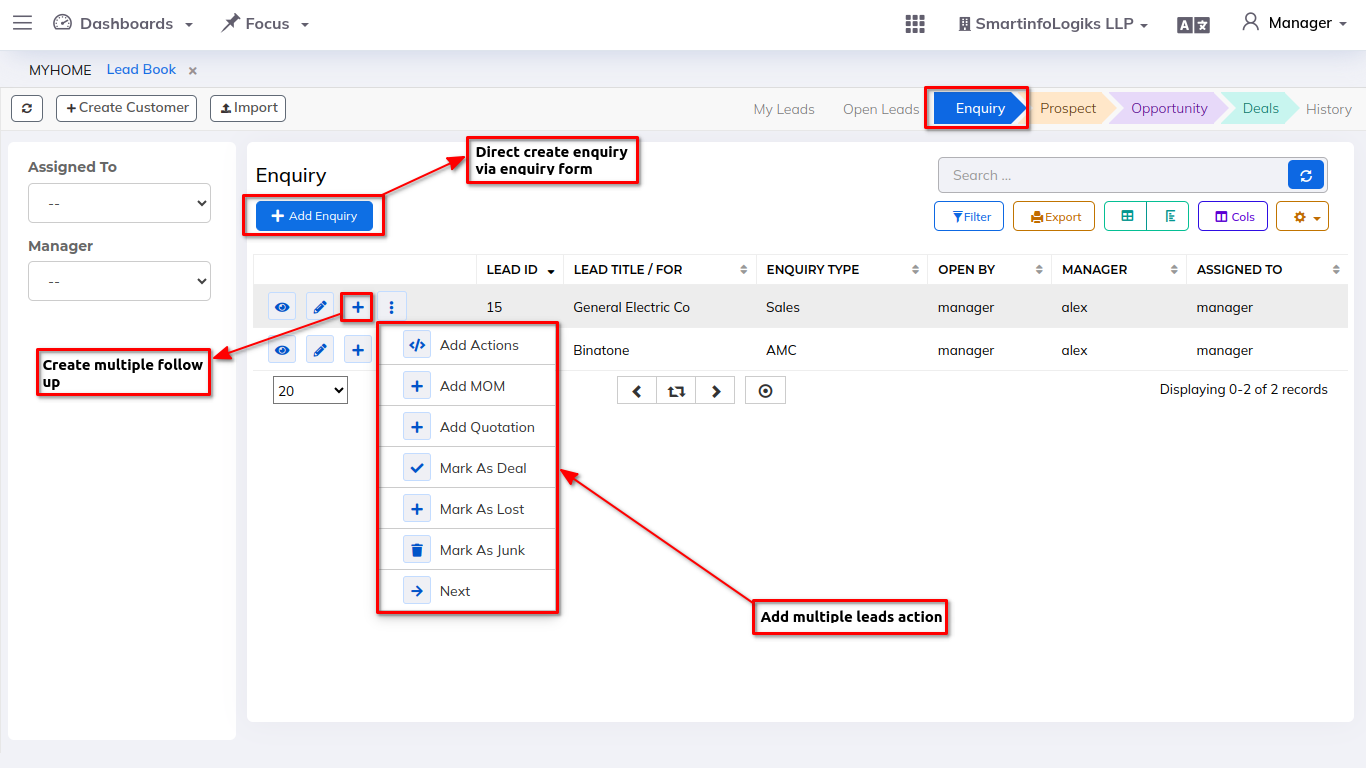
3. Enquiry Leads:
- An enquiry lead is generated when an individual or organization reaches out to a company, often through various channels like website forms, email, phone calls, or social media, to seek information, request a quote, or express interest in a product or service.
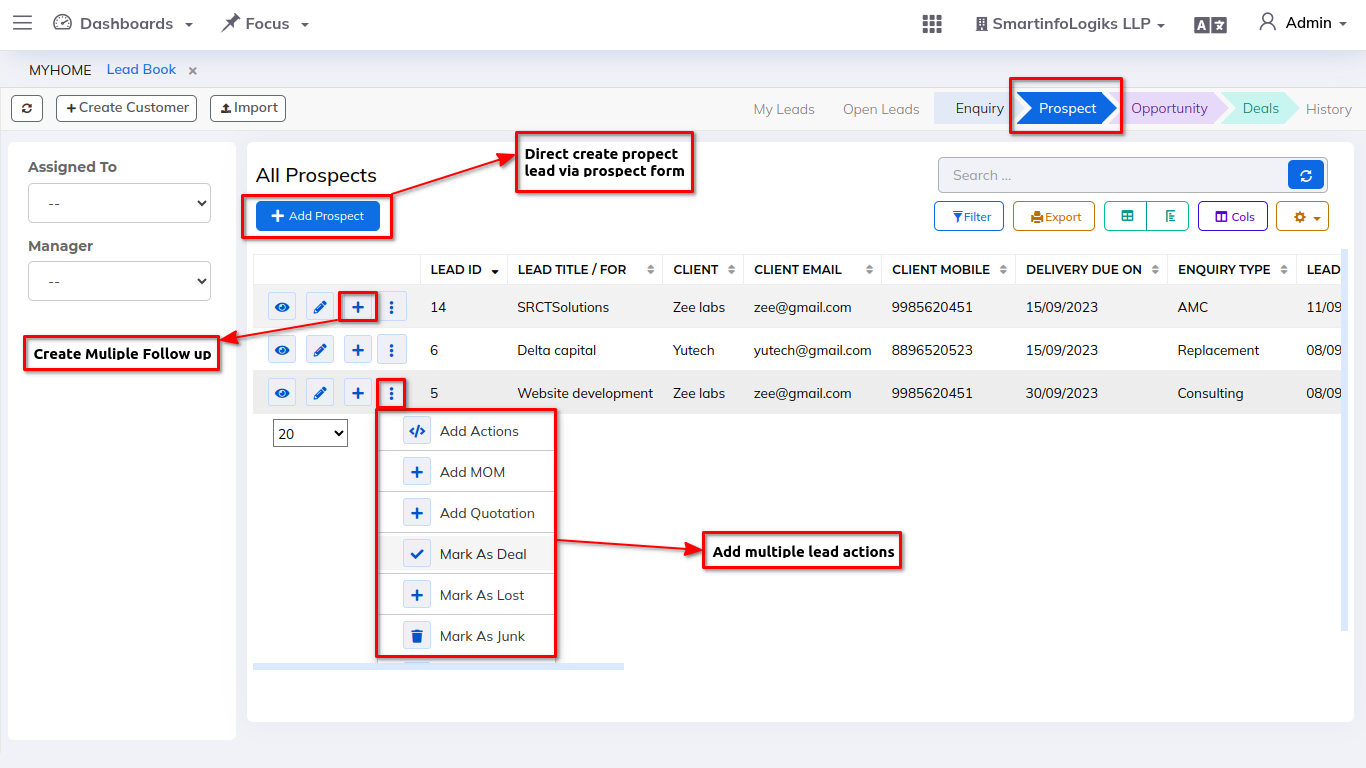
4. Prospect Leads:
- Prospect leads are individuals or organizations that have shown initial interest in a company's products or services but have not yet advanced to the stage of becoming qualified opportunities
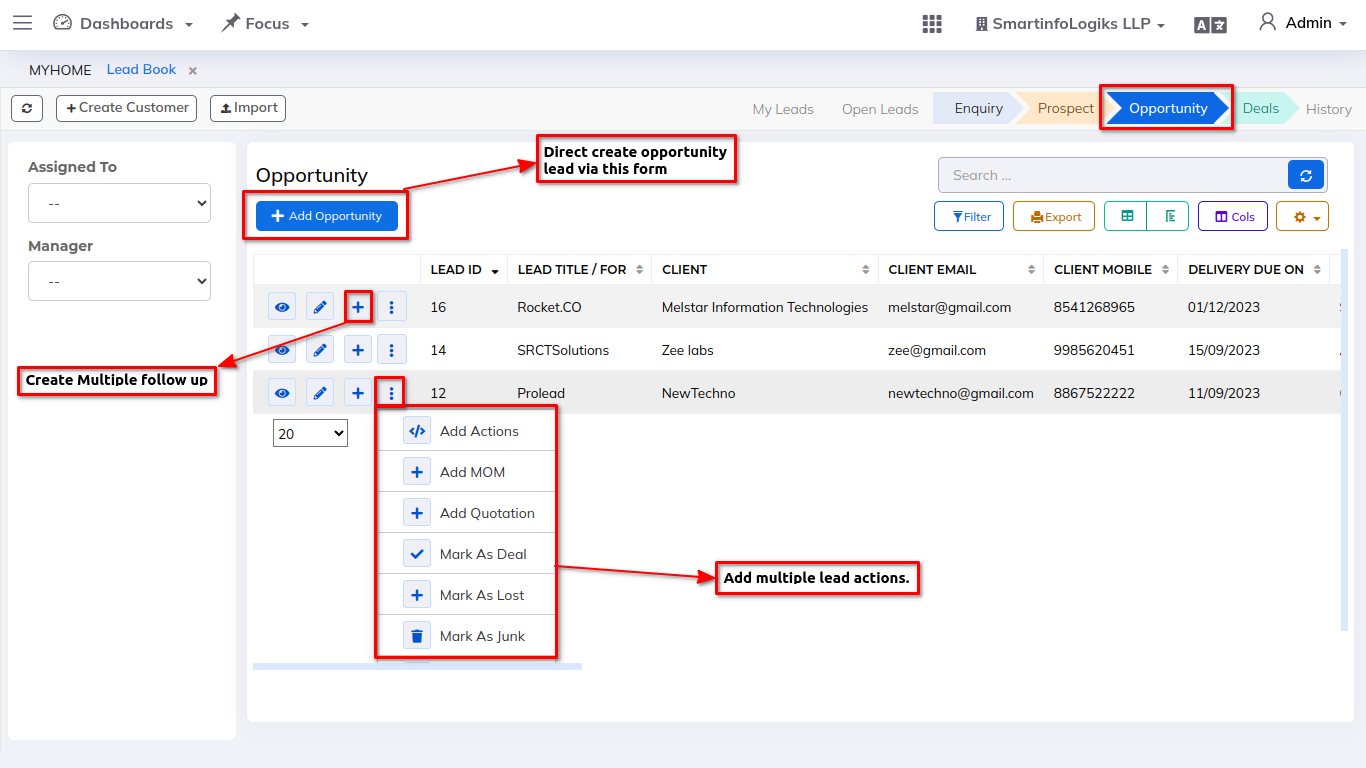
5. Opportunity Leads:
- Opportunity leads represent potential business opportunities that are more qualified and closer to making a purchasing decision.
6. Deal Leads:
- In CRM, a "deal" is typically refers to the actual transaction or purchase made by a customer. It represents the successful conversion of an opportunity or lead into a paying customer.
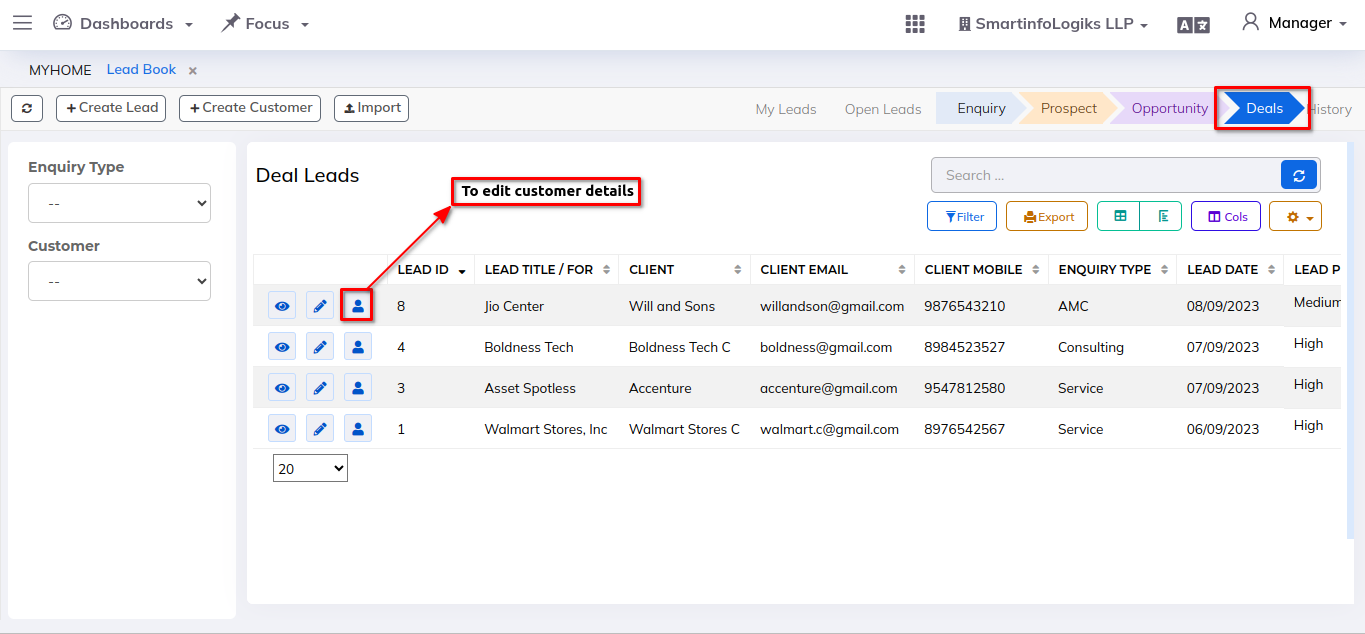
- To view the lead details click on the eye icon.
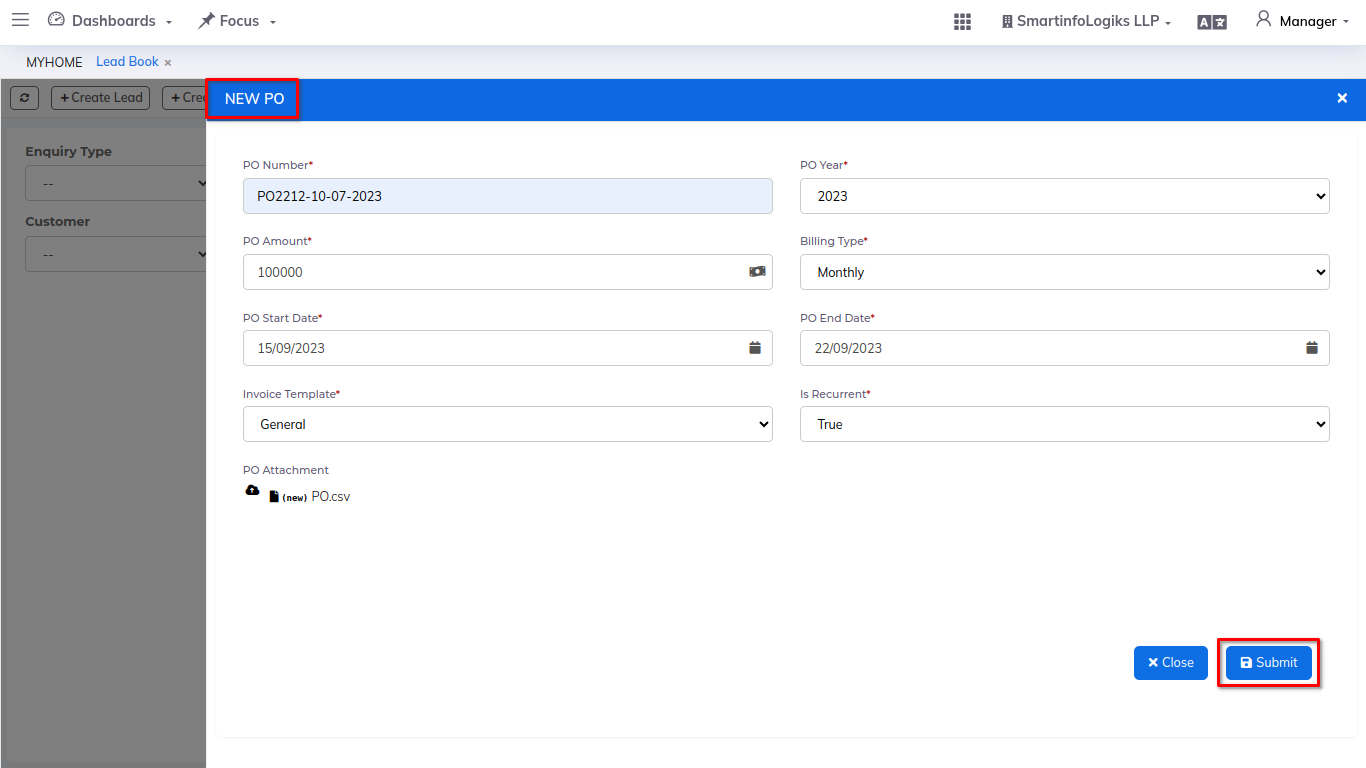
- The lead converts to the order needing a "Quotation" and "PO". (condition:Orders greater then 1Lac will need Quotation and PO before proceeding.)
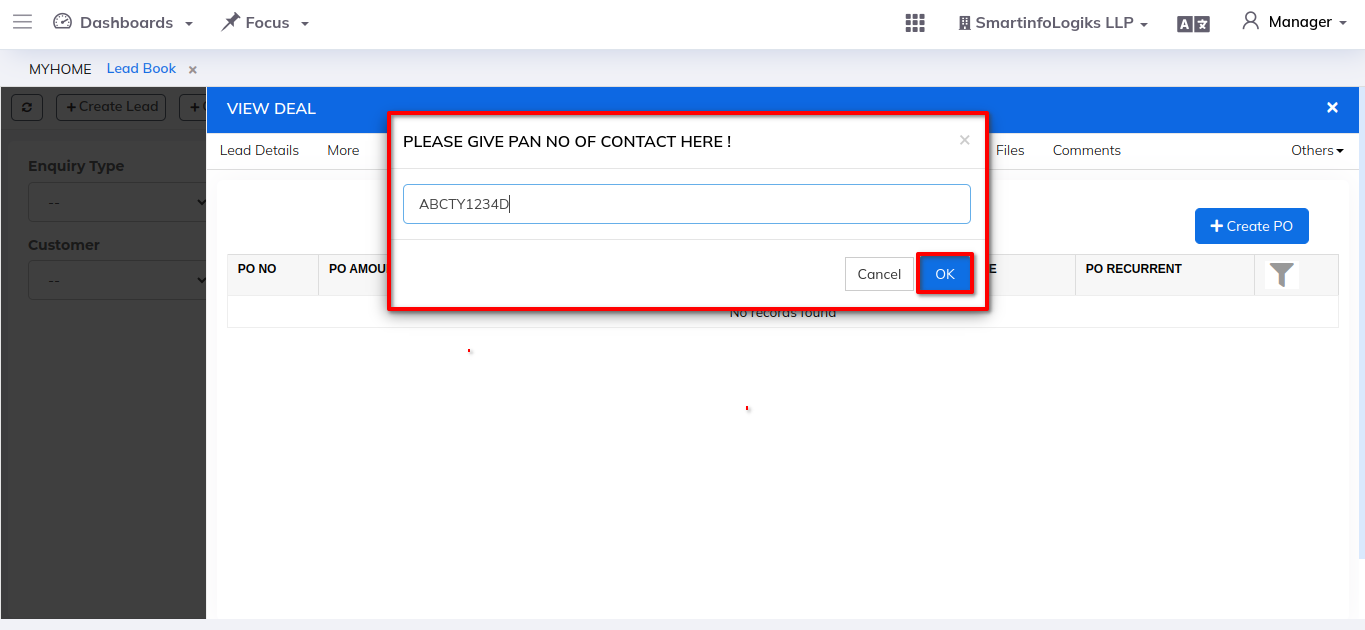
- When a new customer is created via a lead, a customer PAN number is required for the PO.
- Step: Click on the "+Create PO" button, PO creation form will get open as shown in the below image.
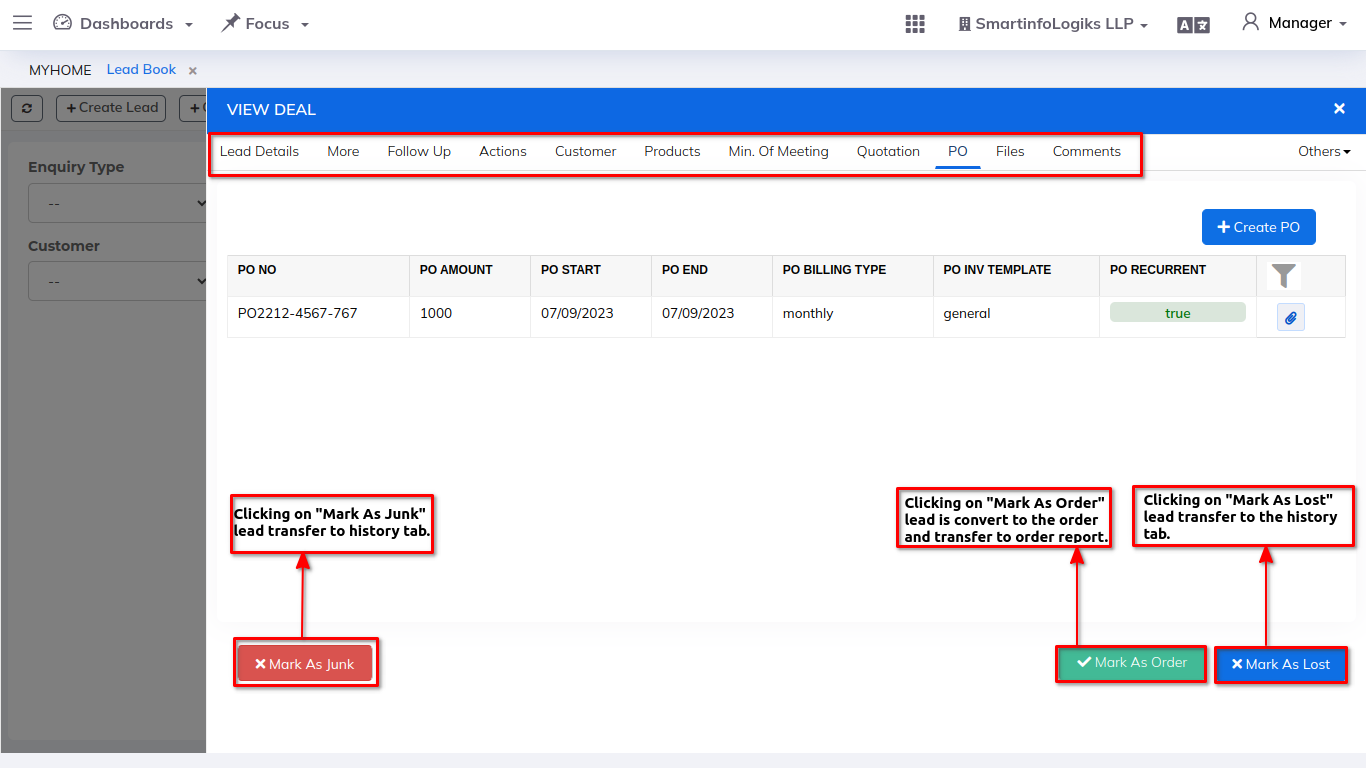
- The lead converts into an order after clicking the "Mark As Order" button.
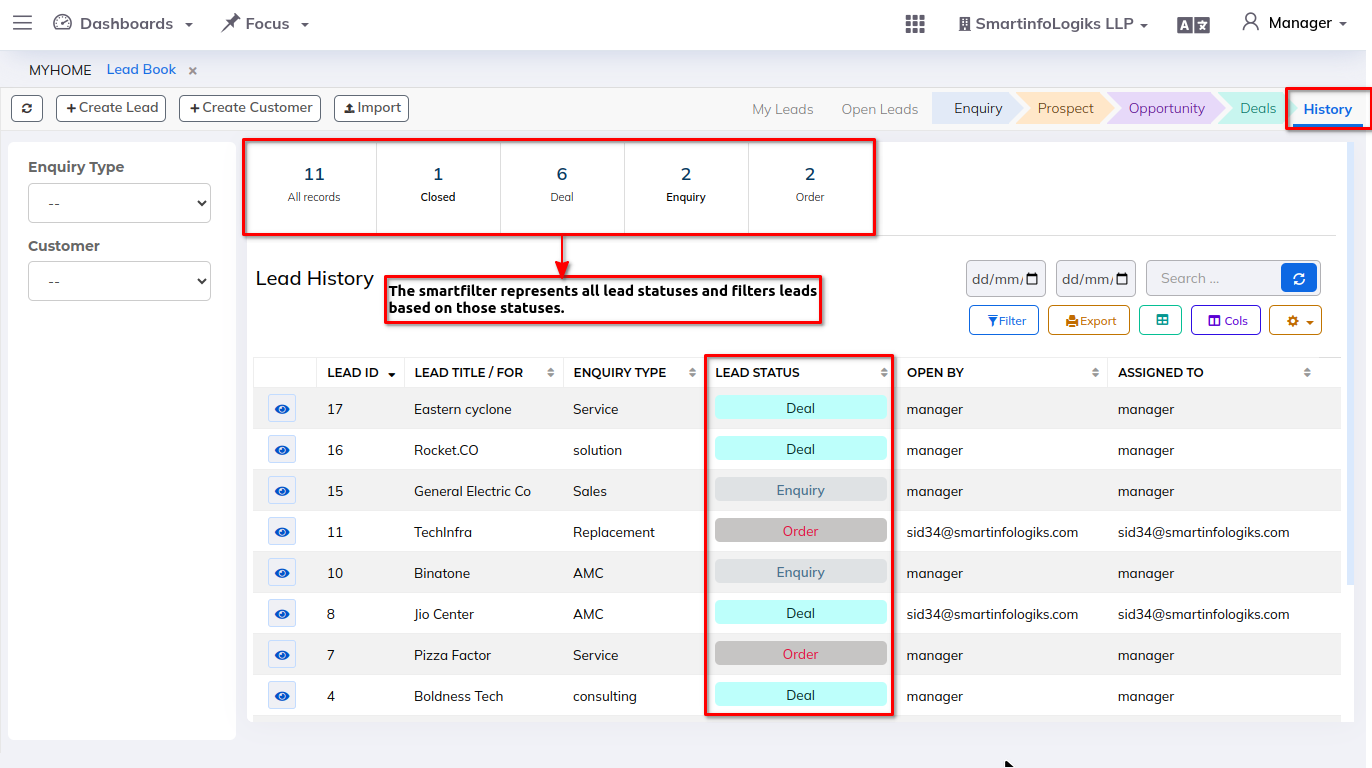
7. History:
- The purpose of maintaining lead history is to provide a complete and organized record of all interactions and activities related to a lead.
- The smart-filter represents all leads statuses and filter leads based on the those statuses, as shown in the below image.