It is a process of identifying, tracking, prioritizing, and resolving problems or concerns that arise within the system.
These issues could be related to functionality, performance, data integrity, security, or user experience.
Effective issue management is crucial for maintaining the smooth operation of an ERP system and ensuring that it meets the needs of the organization. Steps:
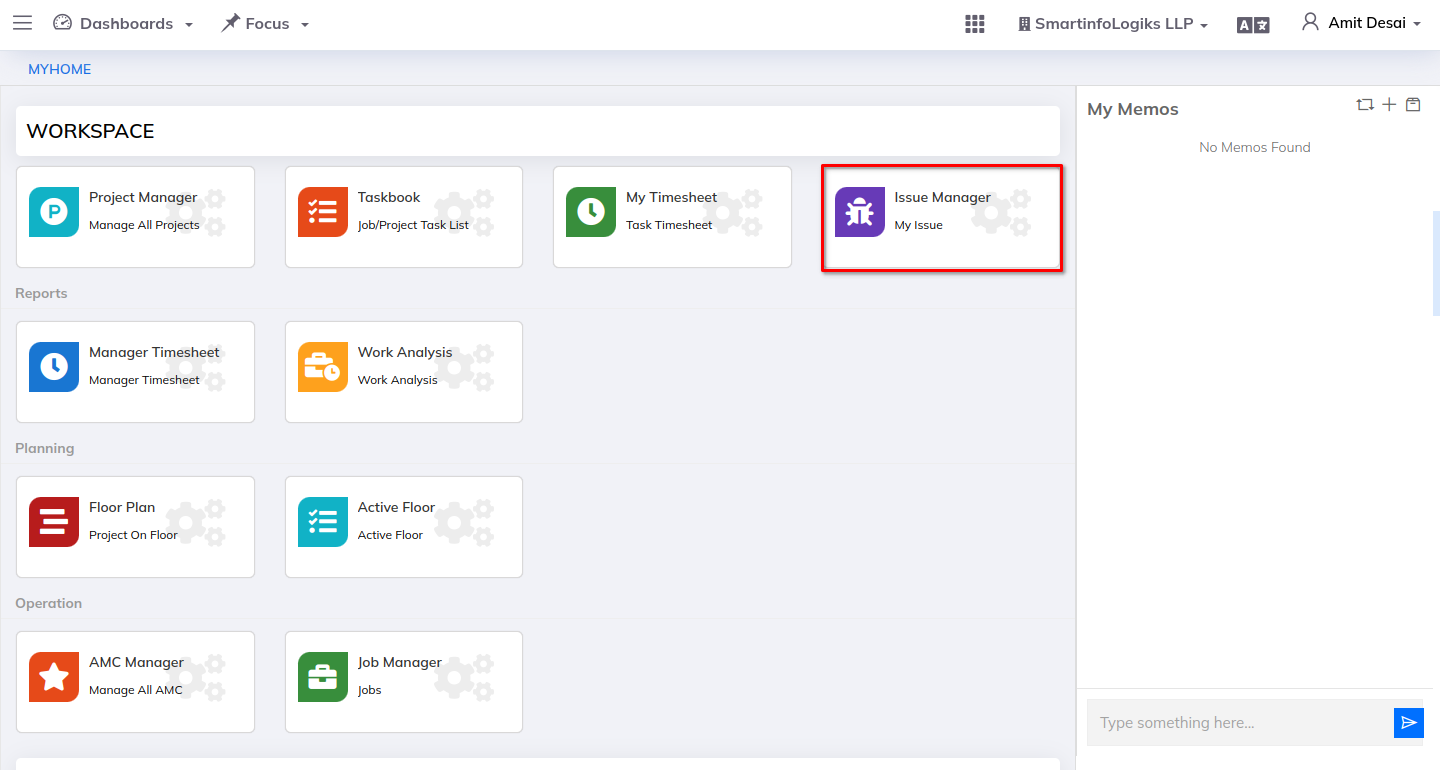
Click on Workspace , then click on the Issue Manager module.
Issue manager dashboard will be shown as below image:
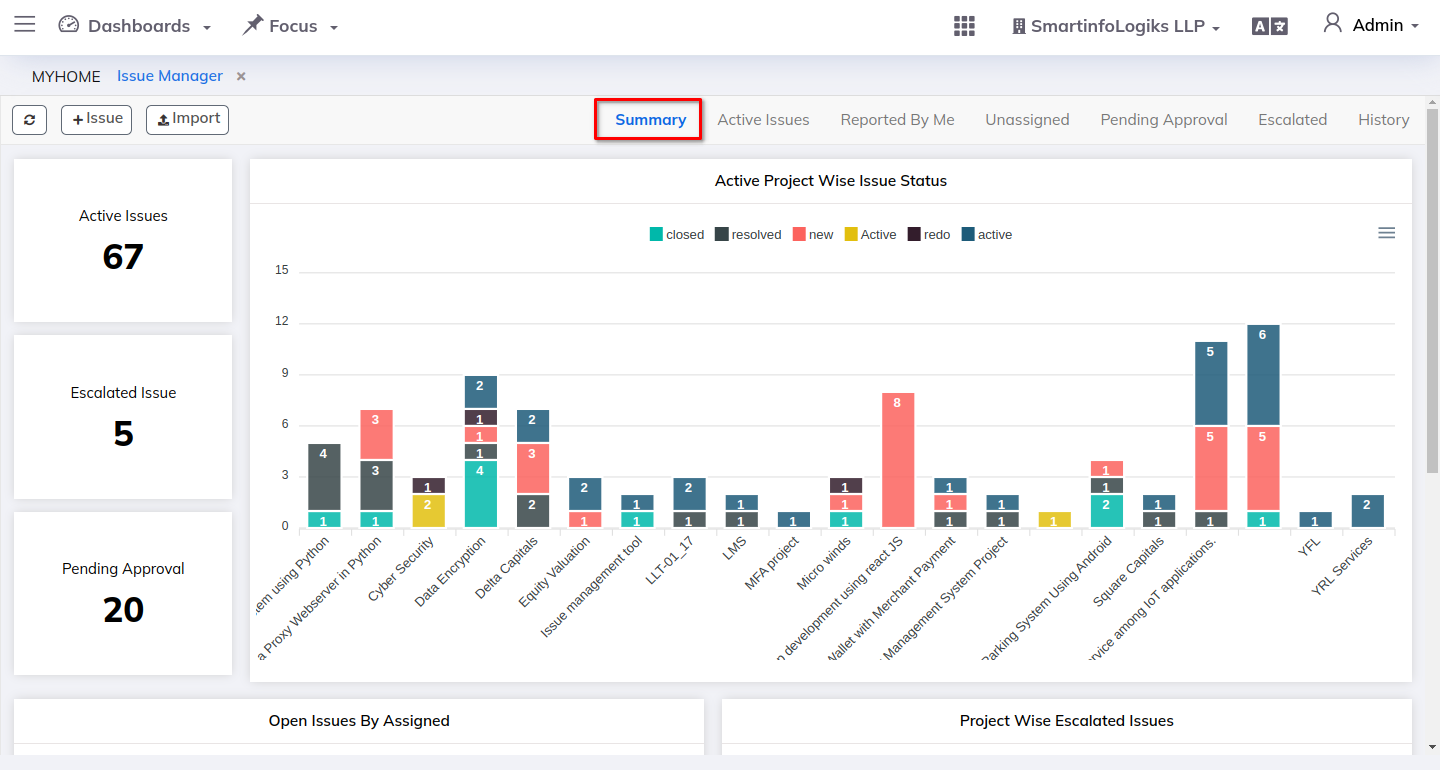
1. Summary
Summary is the only page where we can see the status of issues for all projects.
In the left hand side of the dashboard we can see the issue count for 'Active' , 'Escalated Issue' , 'Pending Approval'
Active Project Wise Issue Status: Issues which are listed for active project will come under this graph.
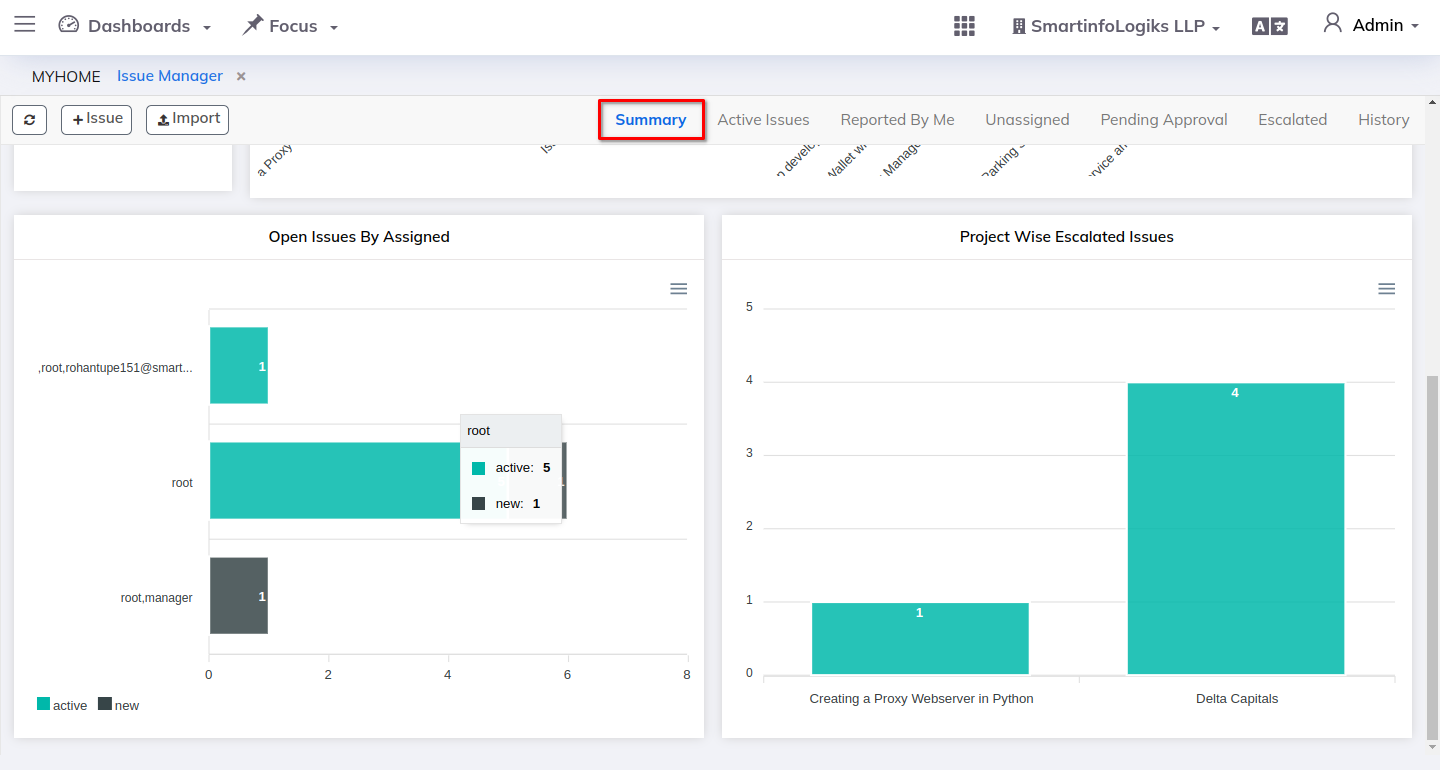
Open Issues By Assigned: issues which are assigned to session user will be visible here with issue status.
Project Wise Escalated Issues: issue which are not yet resolved will be automatically moved in the escalated tab with escalation level as E1, E2, E3
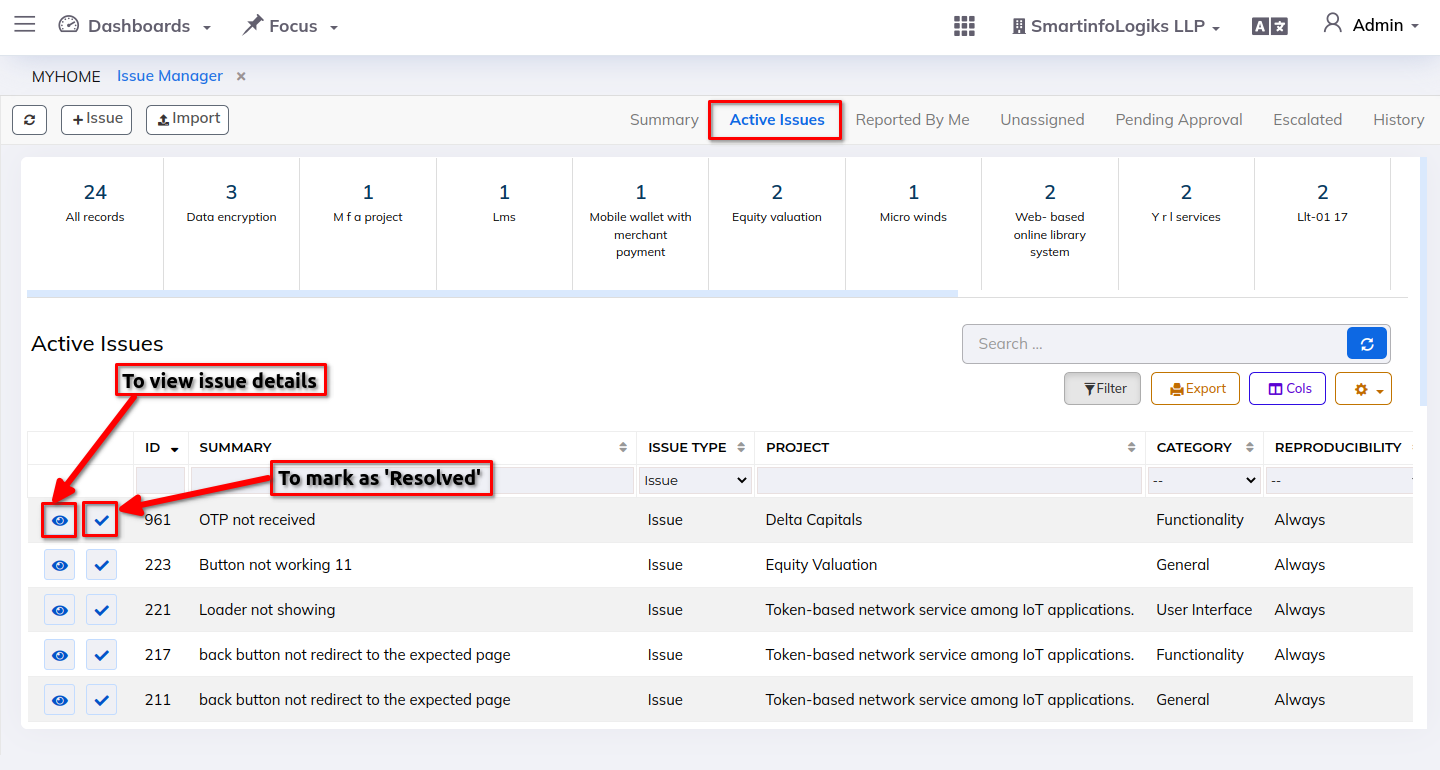
2. Active Issue:
The Active Tab displays a list of all issues which are assigned to session users.
We can also add new issues using +Issue button.
Project wise issue count is displayed at the top of the report.
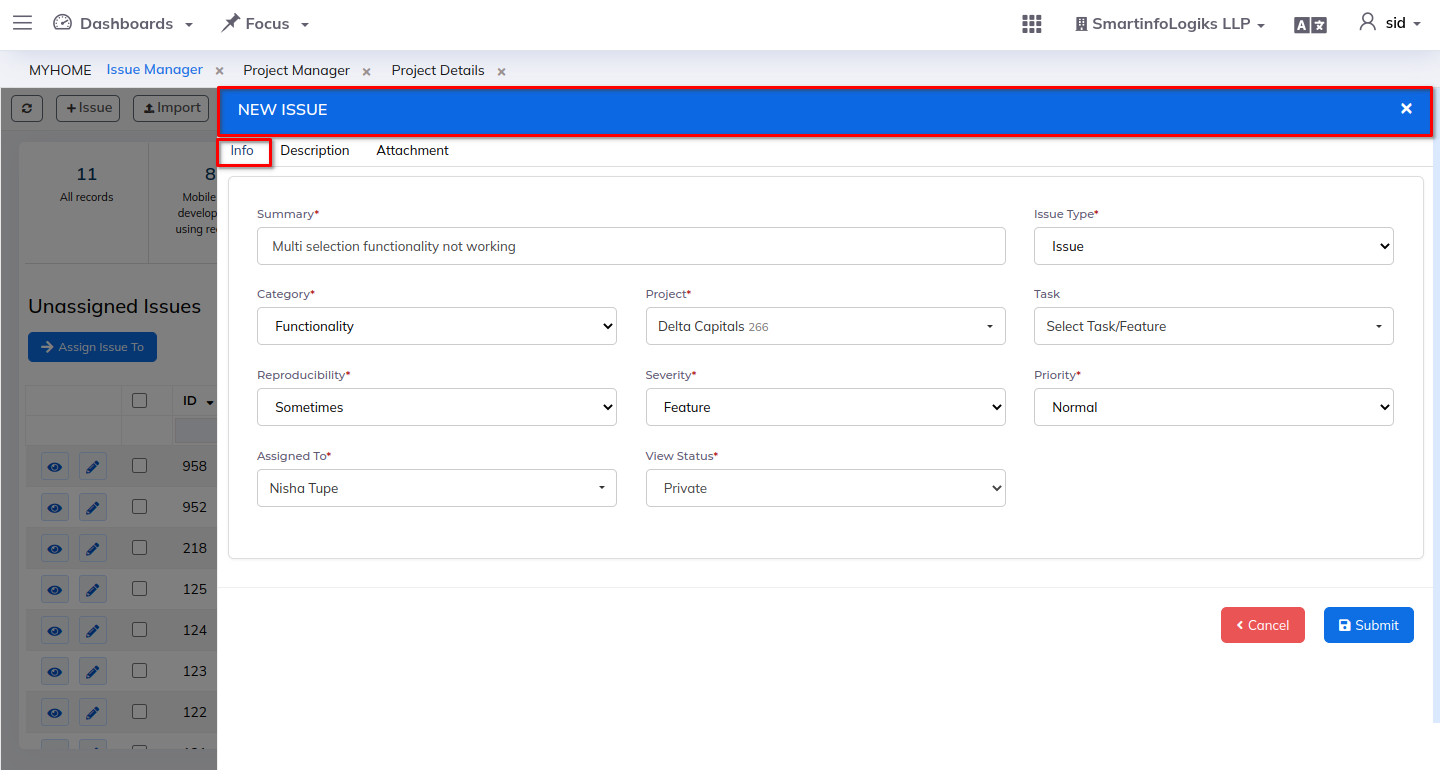
For creating/adding new issue please follow the below steps: Step 1: Click on the +Issue button, new issue form will get open as shown in the below image:
* Enter all required details.
Step 3: Summary: Mention the short description of the issue. Step 4: Issue Type: Select type of the issue. a.Issue b.QC c. Feedback Step 5:.Category: Select issue category based on the issue. Step 6: Project: Select project Step 7: Reproducibility: Select reproducibility of the issue. Step 8: Severity: Select the level of impact or seriousness of a particular issue. Step 9: Priority: Select priority of the issue. Step 10: Assigned To: Select name of the respective user to whom you want to assign the issue. Step 11: View Status: Select view status Step 12: Description: Describe the issue in detail.
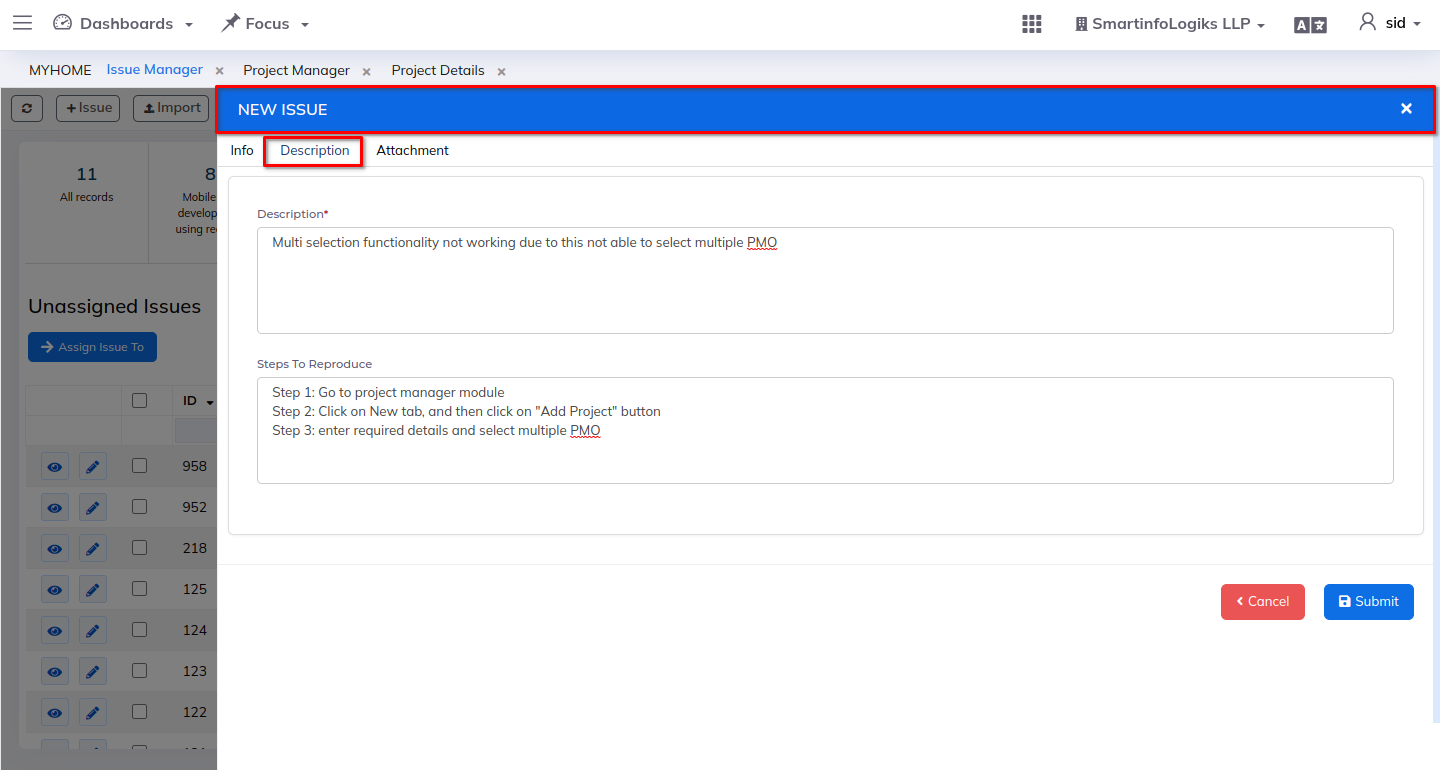
* Additional details can be add while creating new project:
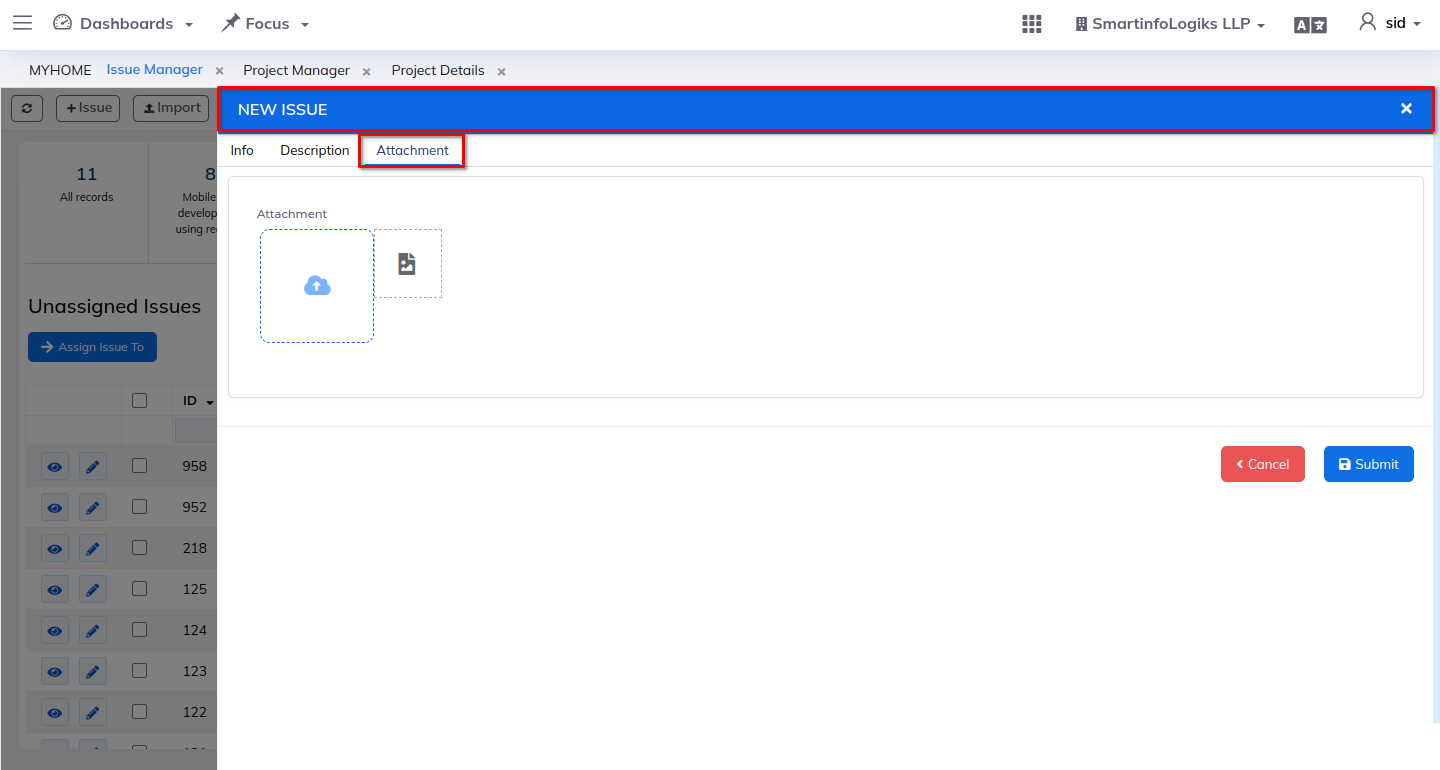
Step 13: Task: Select the task from task dropdown Step 14: Steps To Reproduce: Enter the steps Step 15: Attach screenshot or any document if any.
To view the issue details click on the View icon.
By clicking on the "Resolved issue" icon, you must enter the resolved on date and duration to mark an issue as "Resolved".
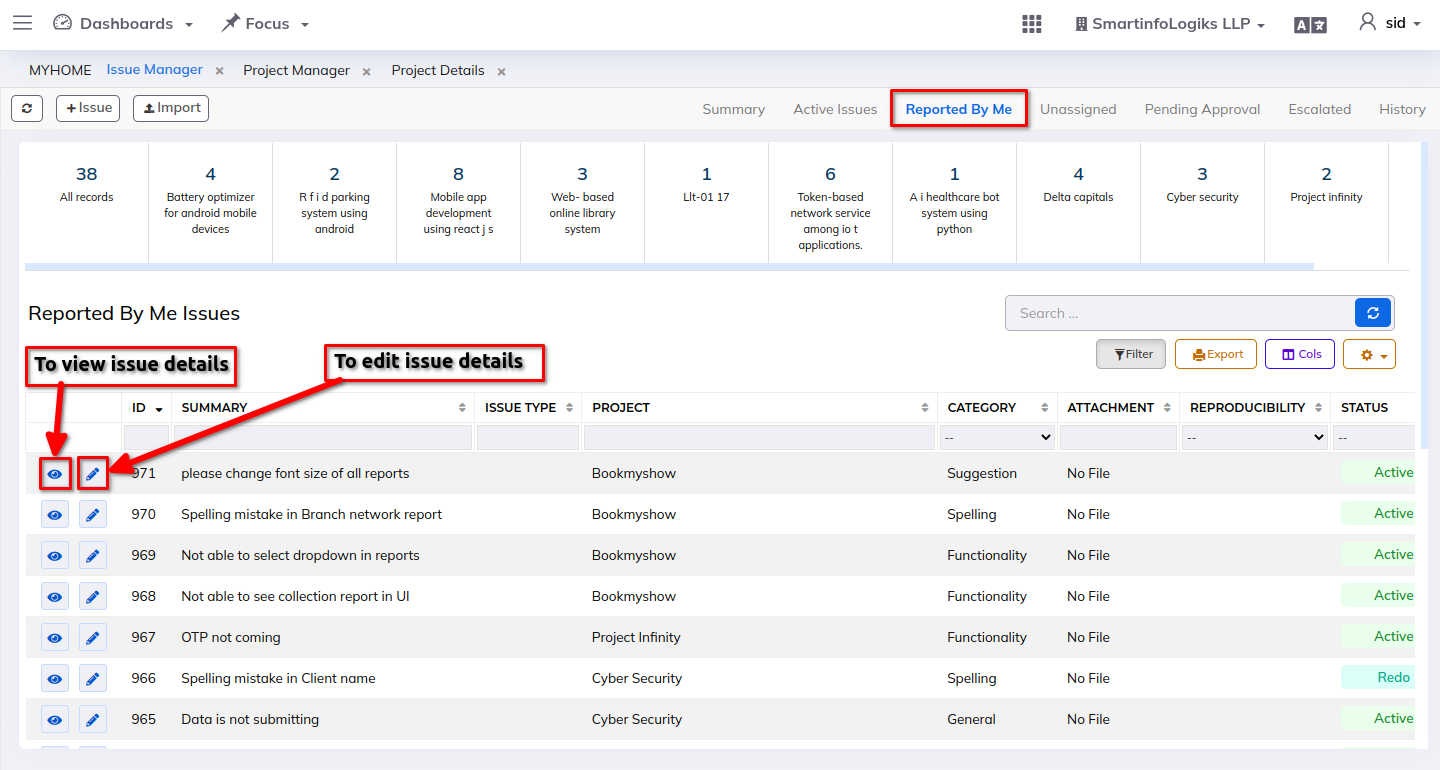
3. Reported by me:
Issues which are created/reported by session user will be listed under this tab.
To add multiple issue we can use Import functionality.
To view the issue details click on the View icon.
To update the issue details click on the Edit Issue icon.
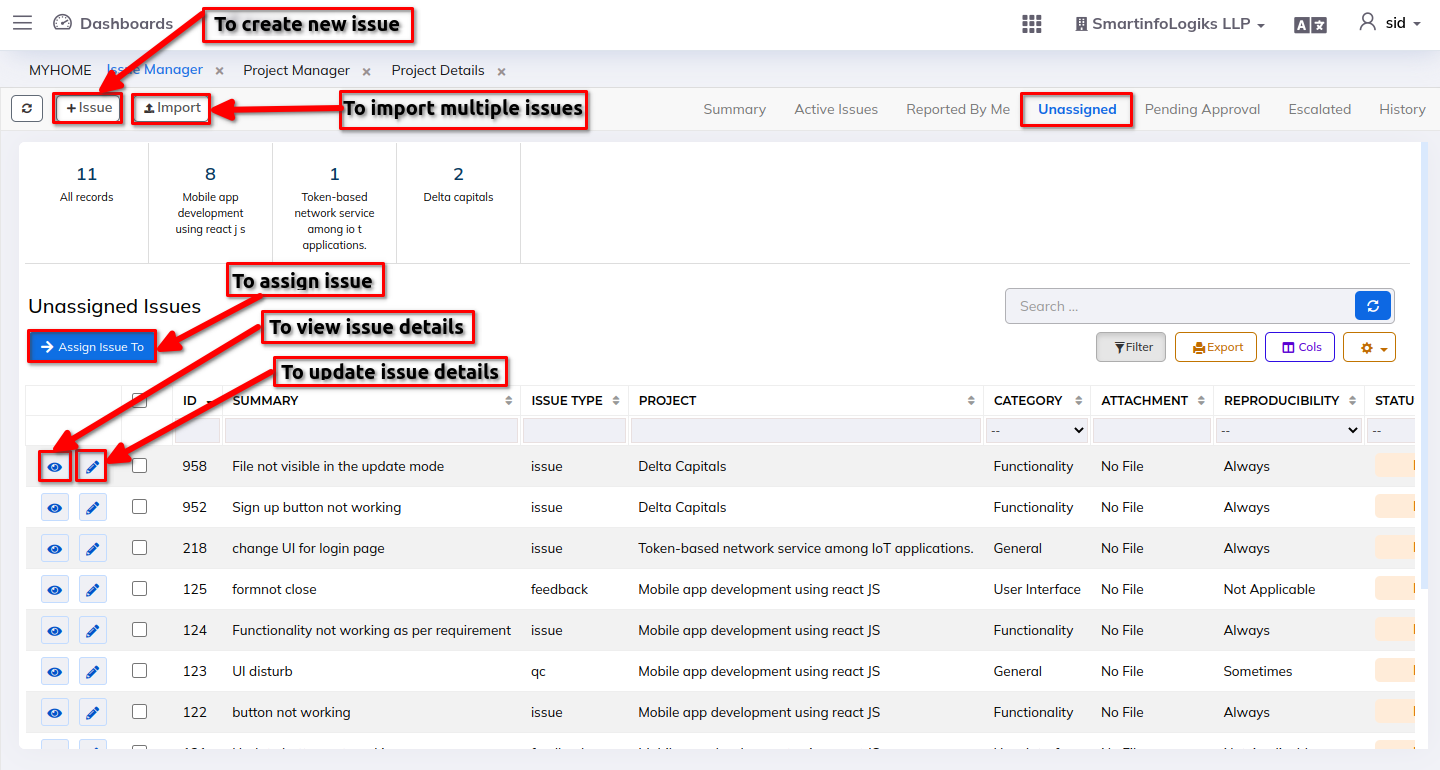
4. Unassigned:
This tab will display issues that have not yet been assigned to a any user.
To view the issue details click on the View icon.
To update the issue details click on the Edit Issue icon.
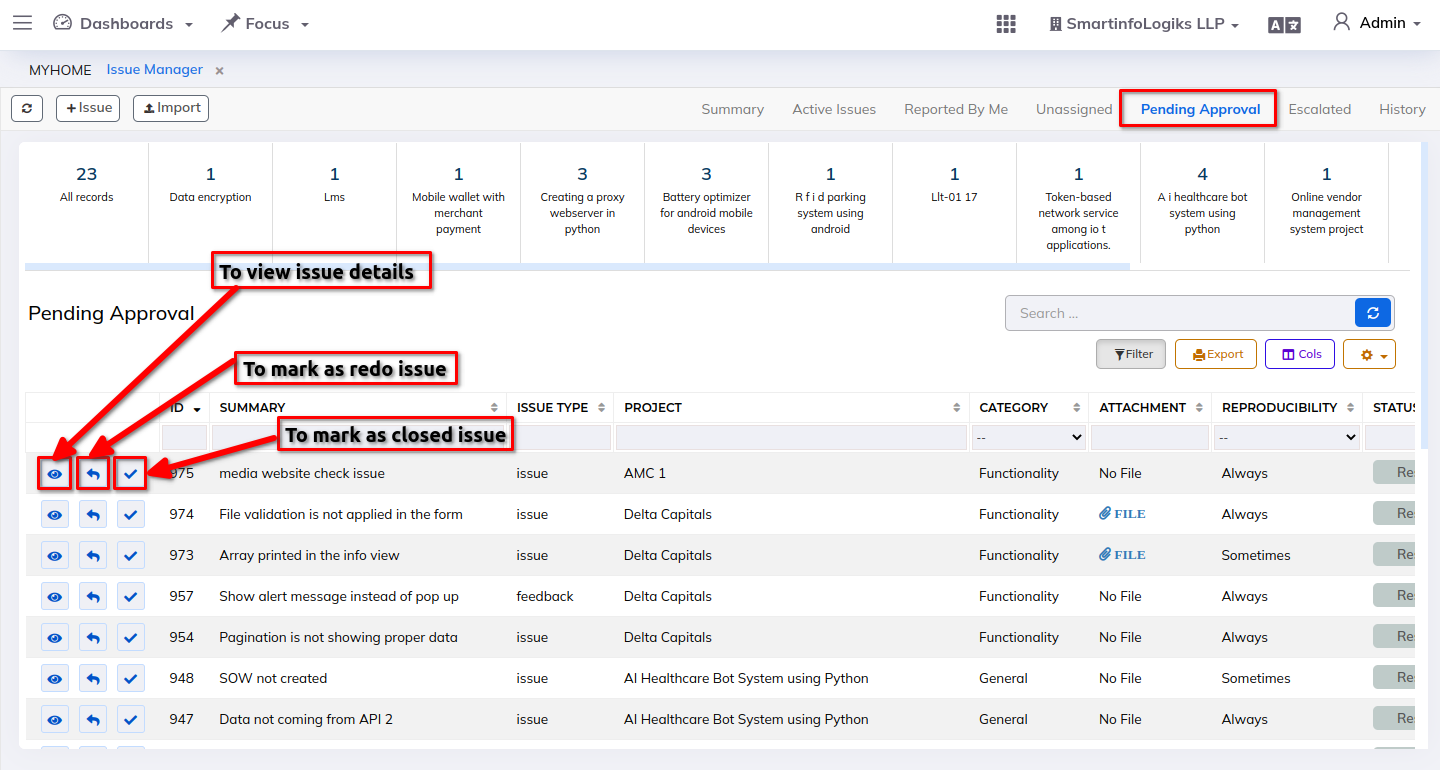
5. Pending Approval:
Issues that have been resolved by the respective user is displayed here for approval, then check whether the issue has been fixed or not, and depending on that determination, the status of the issue may be changed as Redo or Closed.
If you choose Redo issue, the issue will once again be listed under the respective user's active issue tab.
And, if select mark issue as Closed then it will be visible in the history tab.
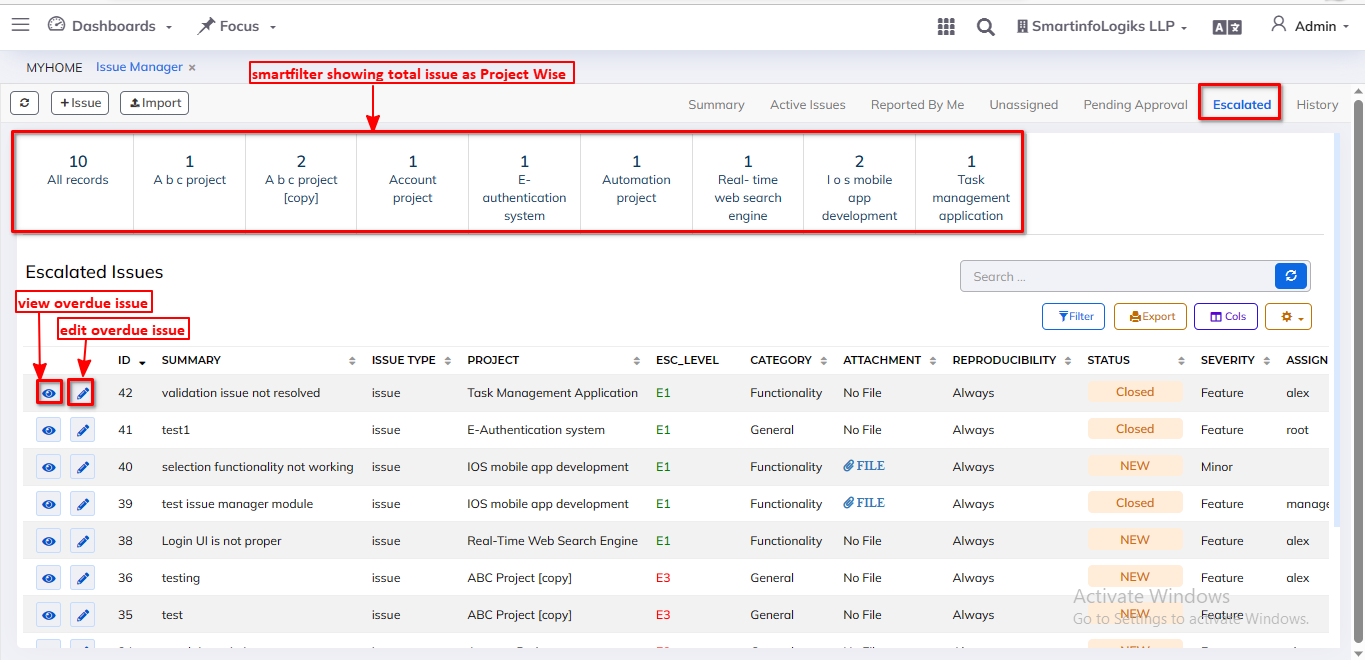
6. Escalated:
If issue is not resolved in particular period of time then the issue is moved to Escalated tab.
Escalation will be depends on the created on date are as follows: 1) ESCALATION_Level 1=7 days(E1) 2) ESCALATION_Level 2=14 days(E2) 3) ESCALATION_Level 3=21 days(E3)
Unresolved issue will be displayed in Escalated tab as shown in the below image.
On click of the View overdue issue icon, user can view Escalated issue details.
On click of the Edit overdue issue icon, user can edit Escalated issue details.
7. History:
In the history tab, issue which are Closed and Resolved will be visible here.