Contacts
- This module serves as a centralized database for storing and organizing contact-related data, and it is a crucial part of customer relationship management (CRM).
- The Contacts Module in an ERP system helps organizations effectively manage their interactions with customers, suppliers, partners, and other stakeholders.
Step:
- Go to the Contacts Module.
- After clicking on Contacts module, user will be redirect to the Companies tab as shown in below image.
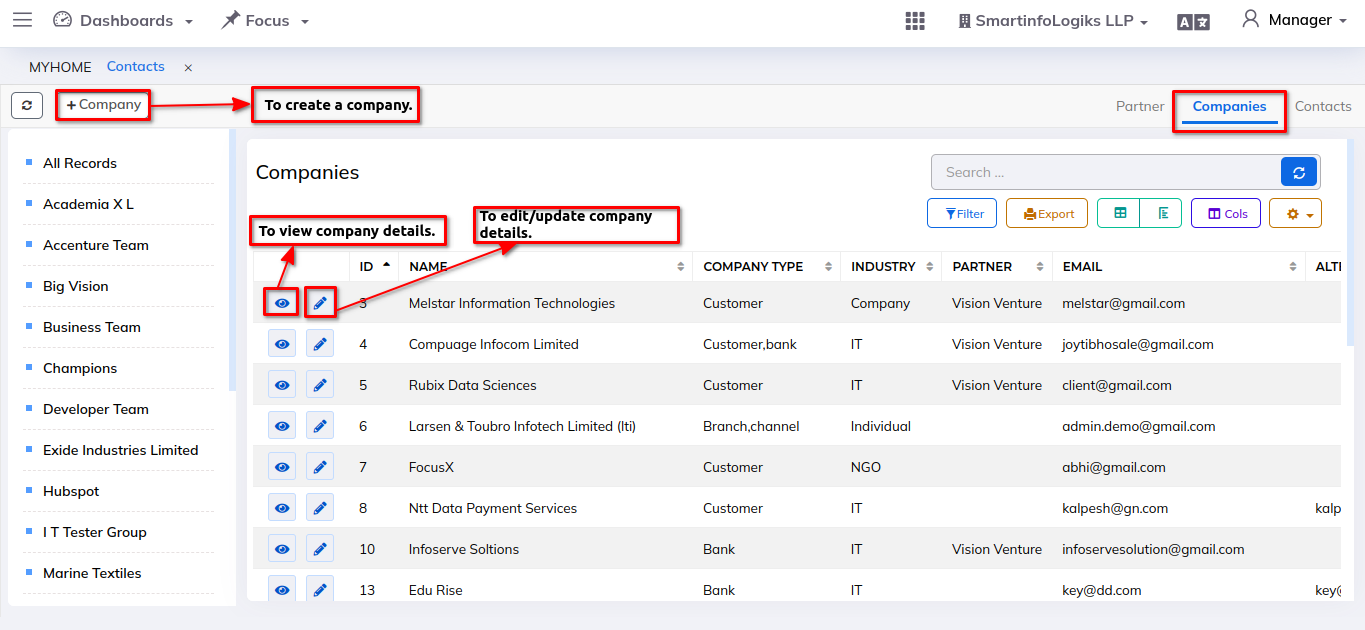
1. Companies:
- We have the Companies tab for creating companies details.
- Based on the sidebar we can easily get filter the record as per Partners.
- It serves as a central repository for maintaining records and details about the various companies
- For creating companies please follow the below steps:
Step: - Click on the +Company button, company creation form will get open as shown in the below image
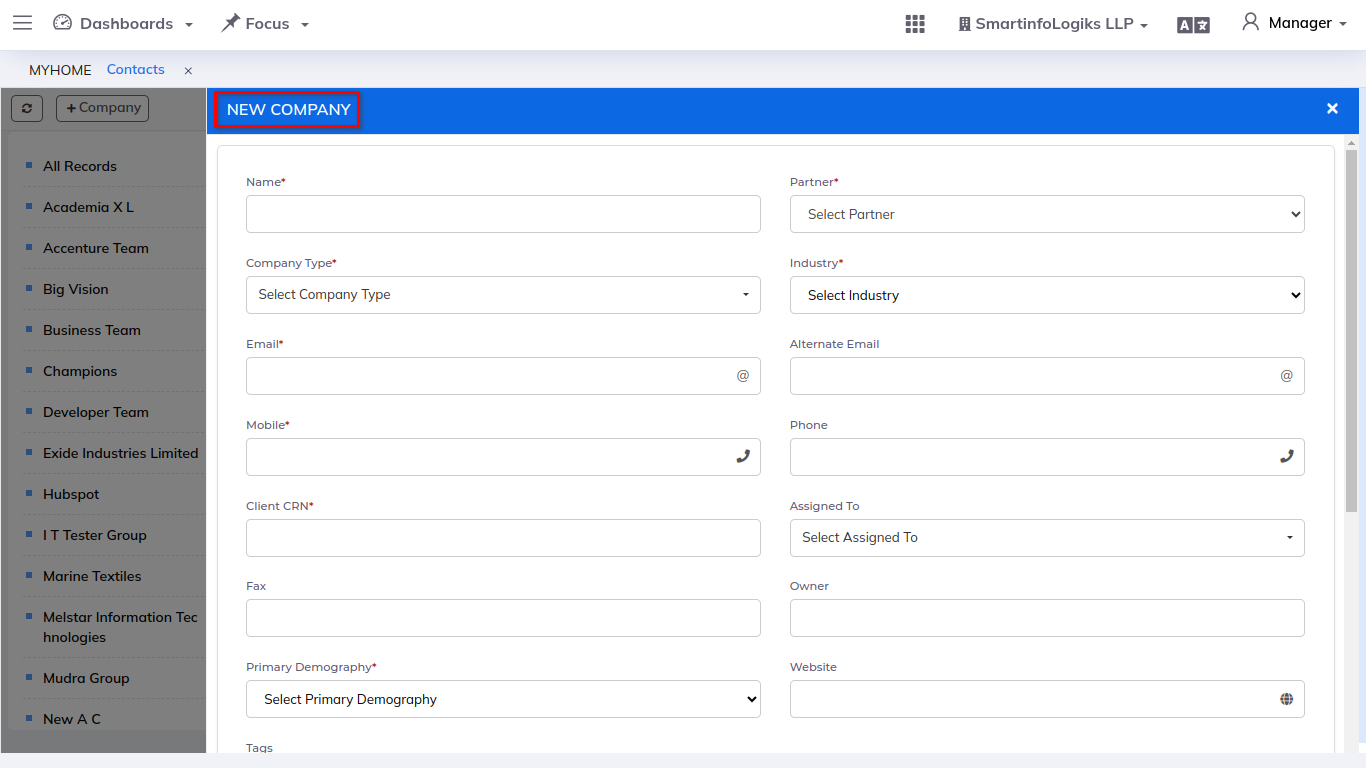
Enter the required details.
- Name: Enter the name of the company.
- Partner: Partners appear from the partner tab when you pick a partner using the dropdown.
- Company Type: Select one or more company types by using the checkbox.
- Industry: Select industry using the dropdown.
- Email: Enter the company email id.
- Mobile: Enter the mobile number.
- Client CRN: Enter the CRN number.
- Primary Demography: Select Primary Demography option using dropdown.
Additional details can be add while creating Company:
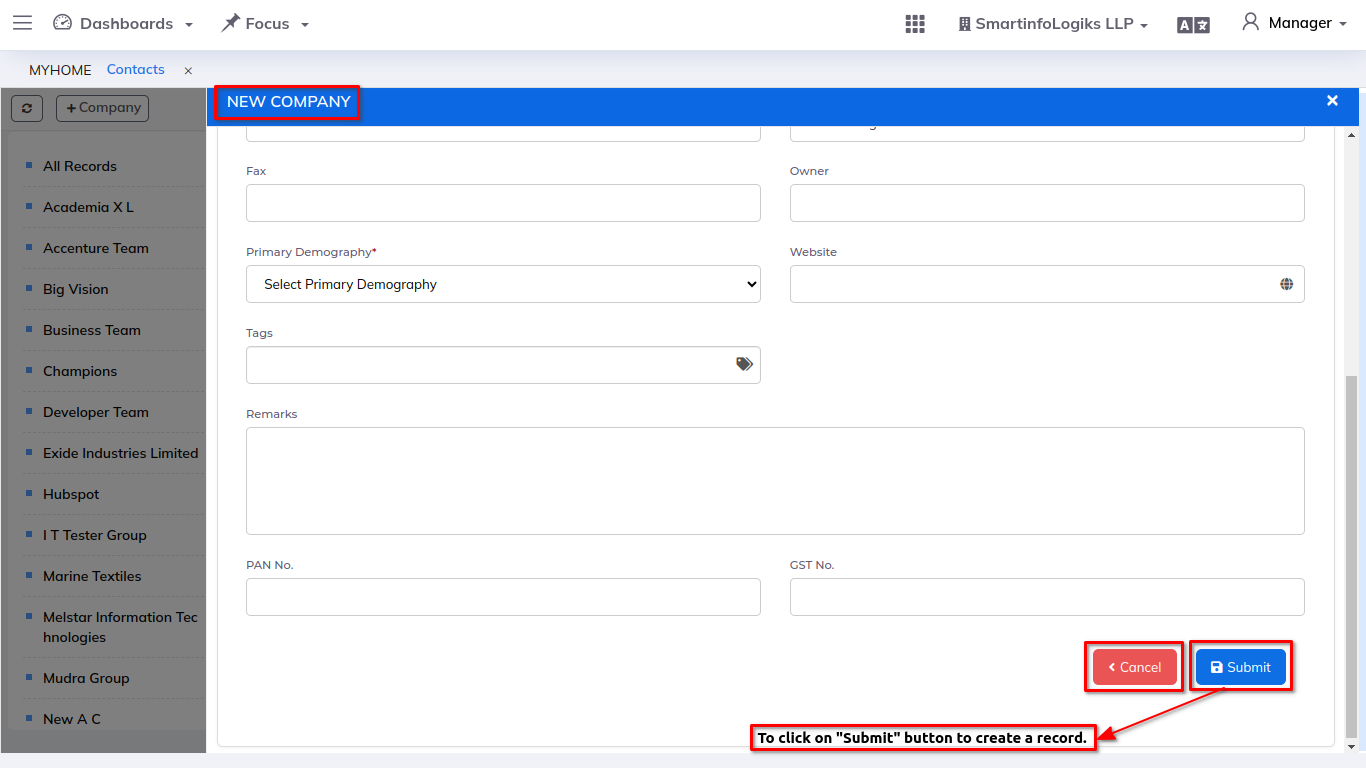
- Alternate Email: Enter the alternate email id.
- Phone: Enter the alternate phone number.
- Assigned To: Choose the name of the sales team member to whom the customer/company is assigned.
- Fax: Enter the fax.
- Owner: Enter the name of company owner.
- Website: Enter the website (if the website is available).
- Tags: Enter the tags.
- Remarks: Enter the remarks.
- PAN No.: Enter the company PAN number.
- GST No.: Enter the company GST number.
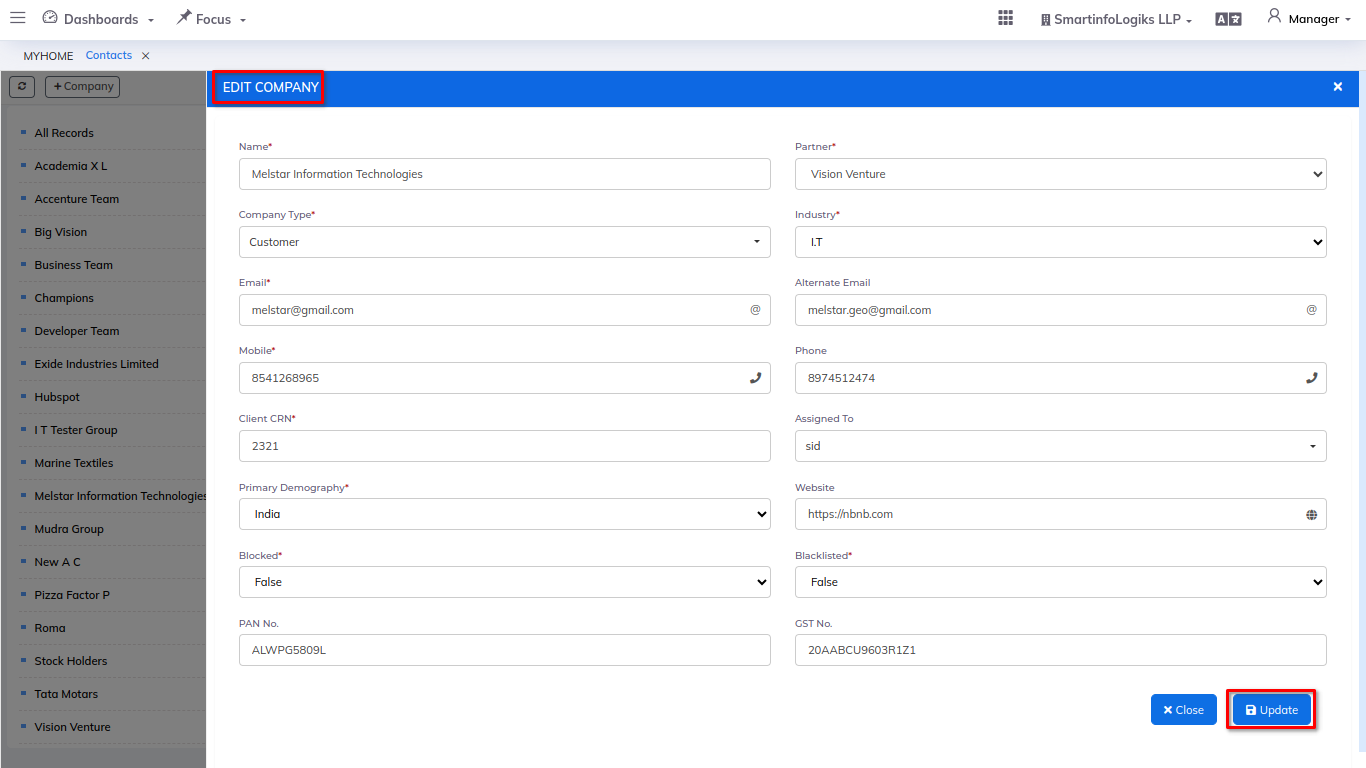
- After adding company user can edit or update company details using pencil icon.
- While viewing specific company details, additional features can be added in the info view.
1) Info: The information that we added to the form is visible in this tab: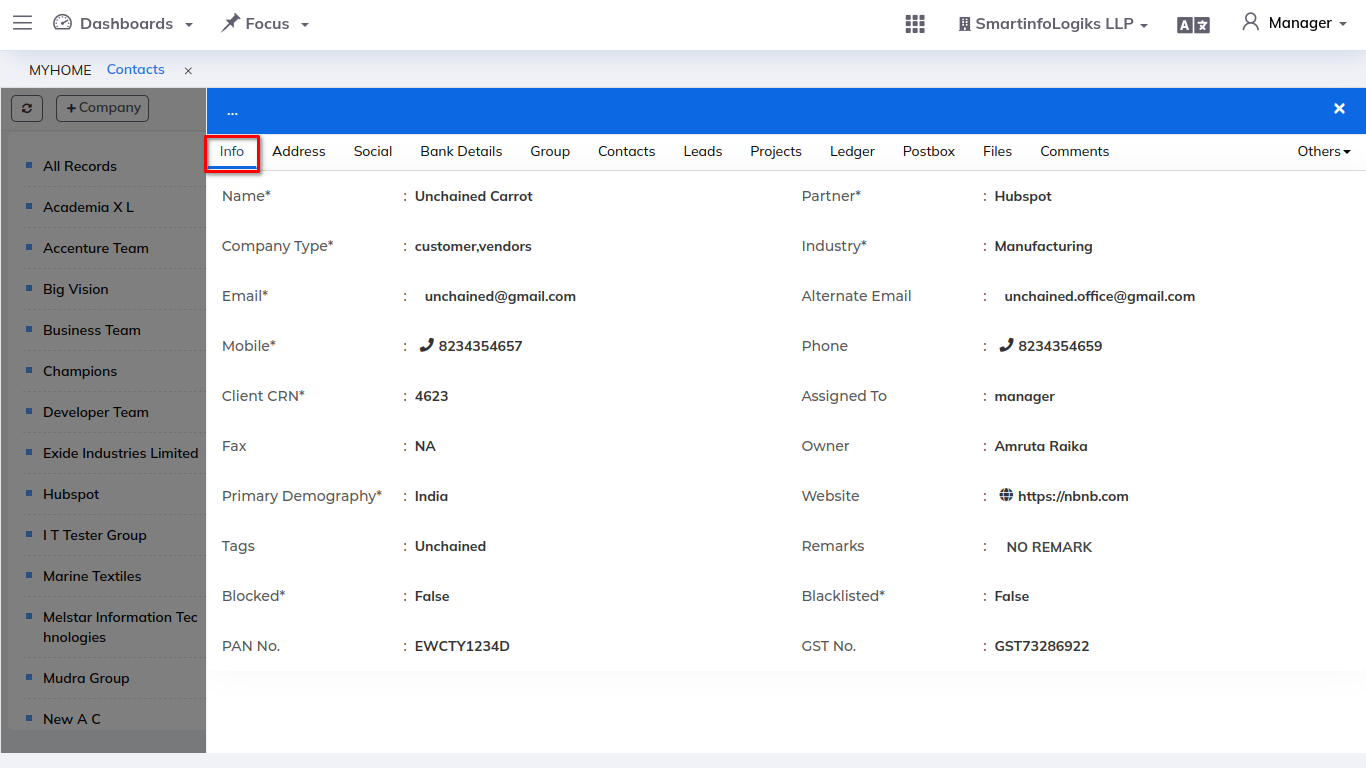
2) Address: In address tab, the user can enter multiple address types.
3) Social: In social tab, the user can enter multiple social types.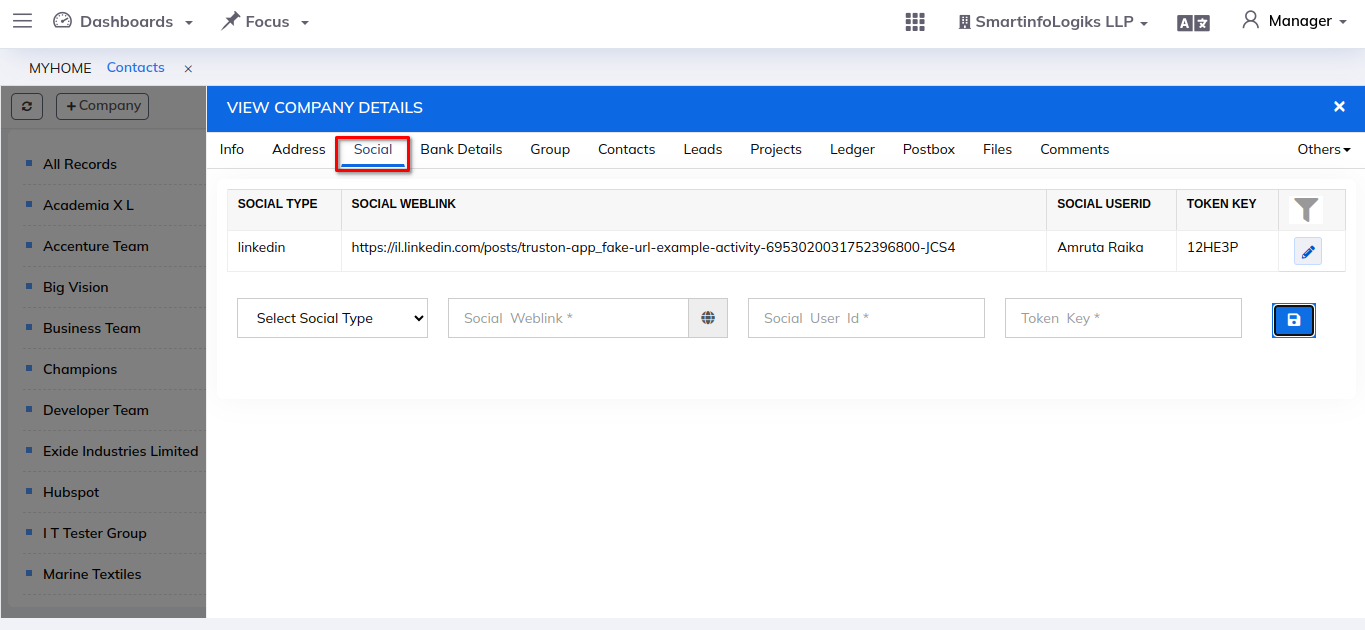
4) Bank Details: In bank details tab, the user can enter multiple bank details.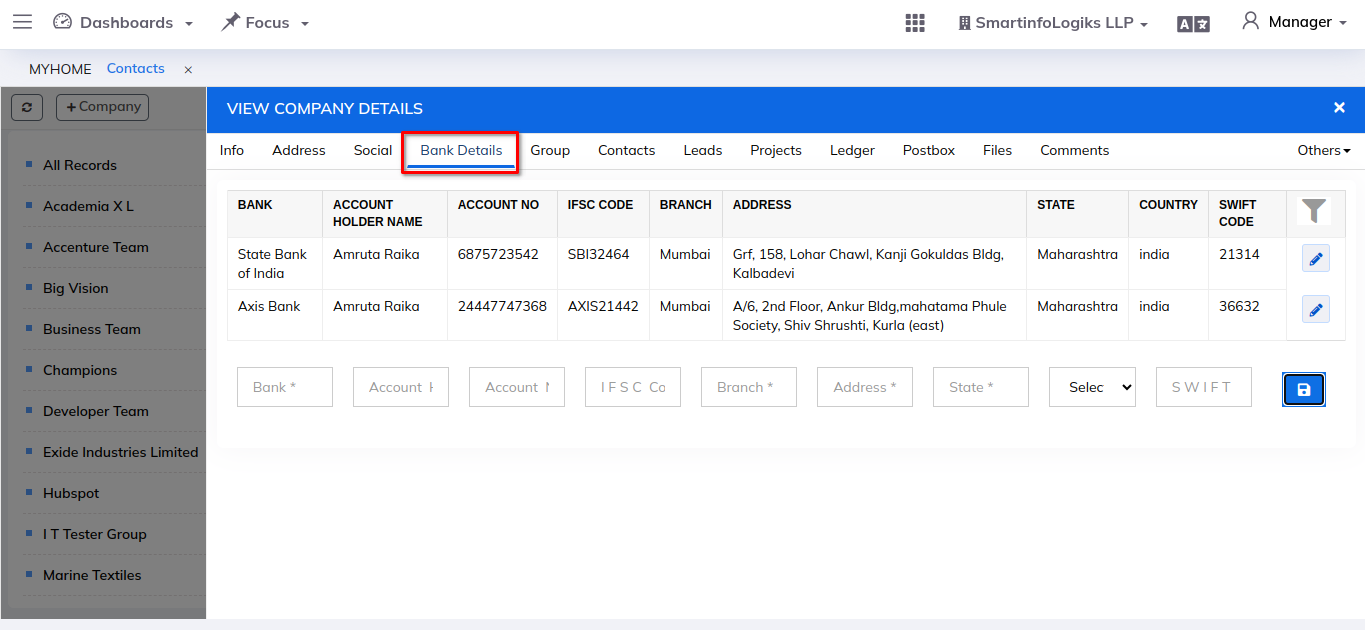
5) Contacts: In contacts tab, the user can enter multiple contacts details.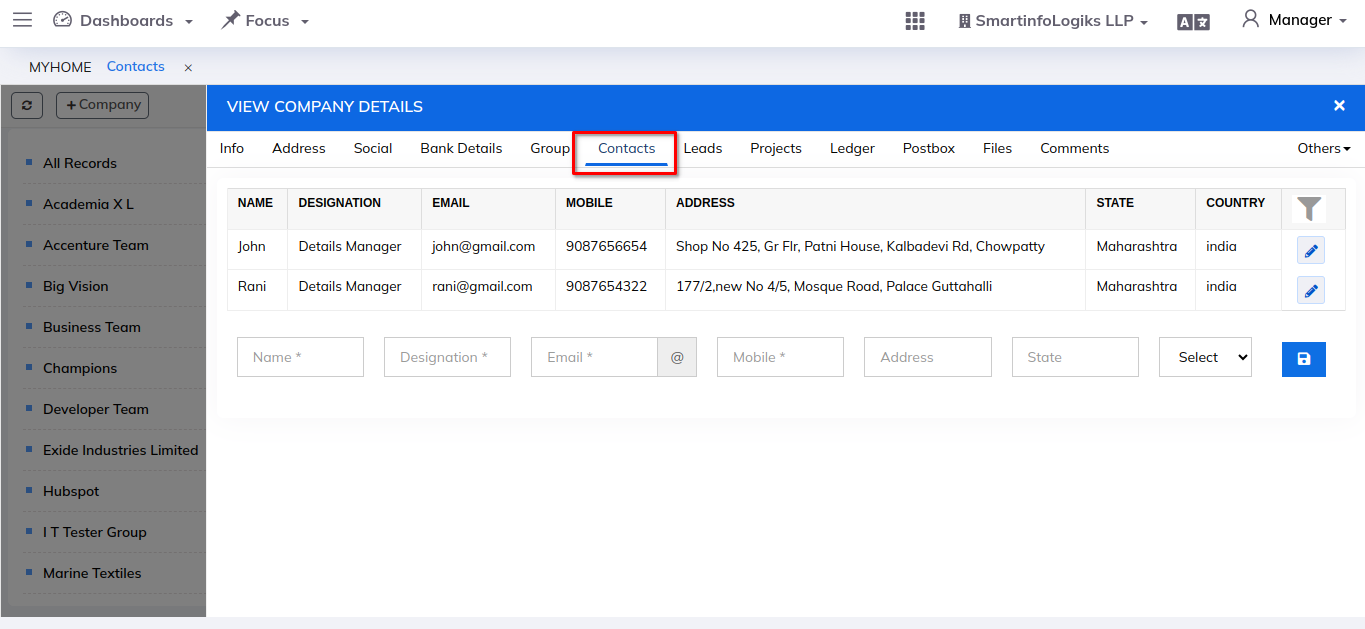
2. Partner:
- We have the Partner tab for creating partner details.
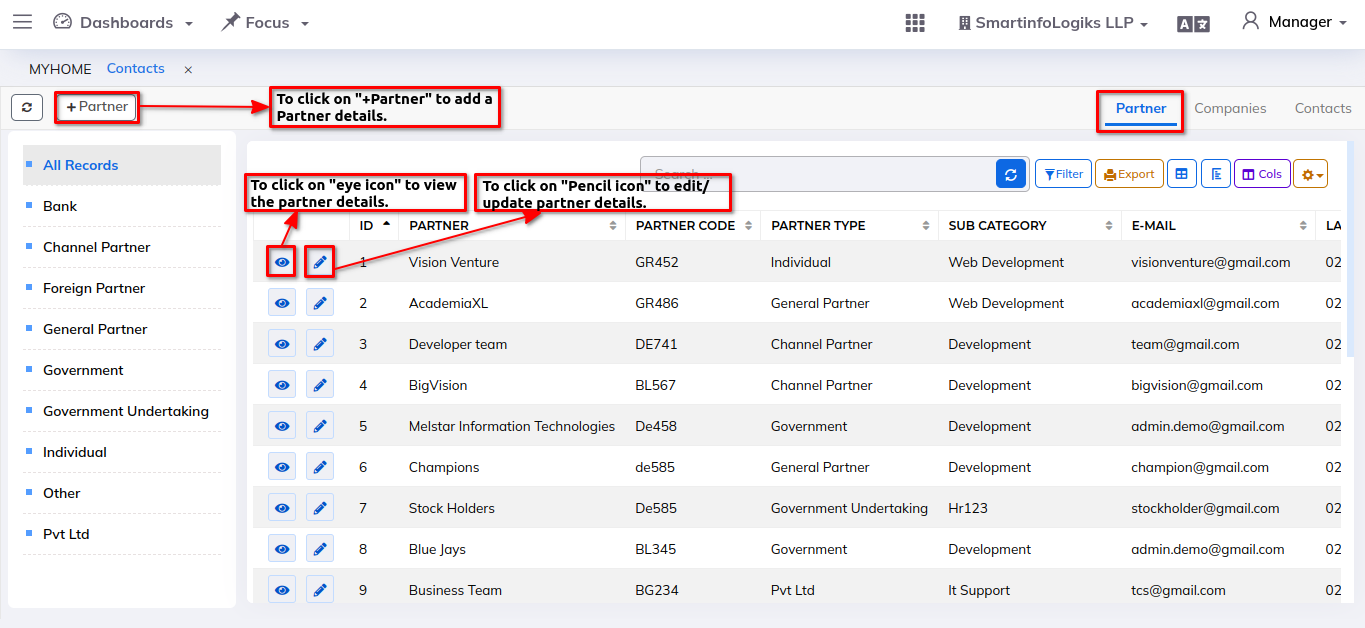
- Based on the sidebar we can easily get filter the record as per Partner type.
- For creating partners please follow the below steps:
Step: - Click on the +Partner button, partner creation form will get open as shown in the below image.
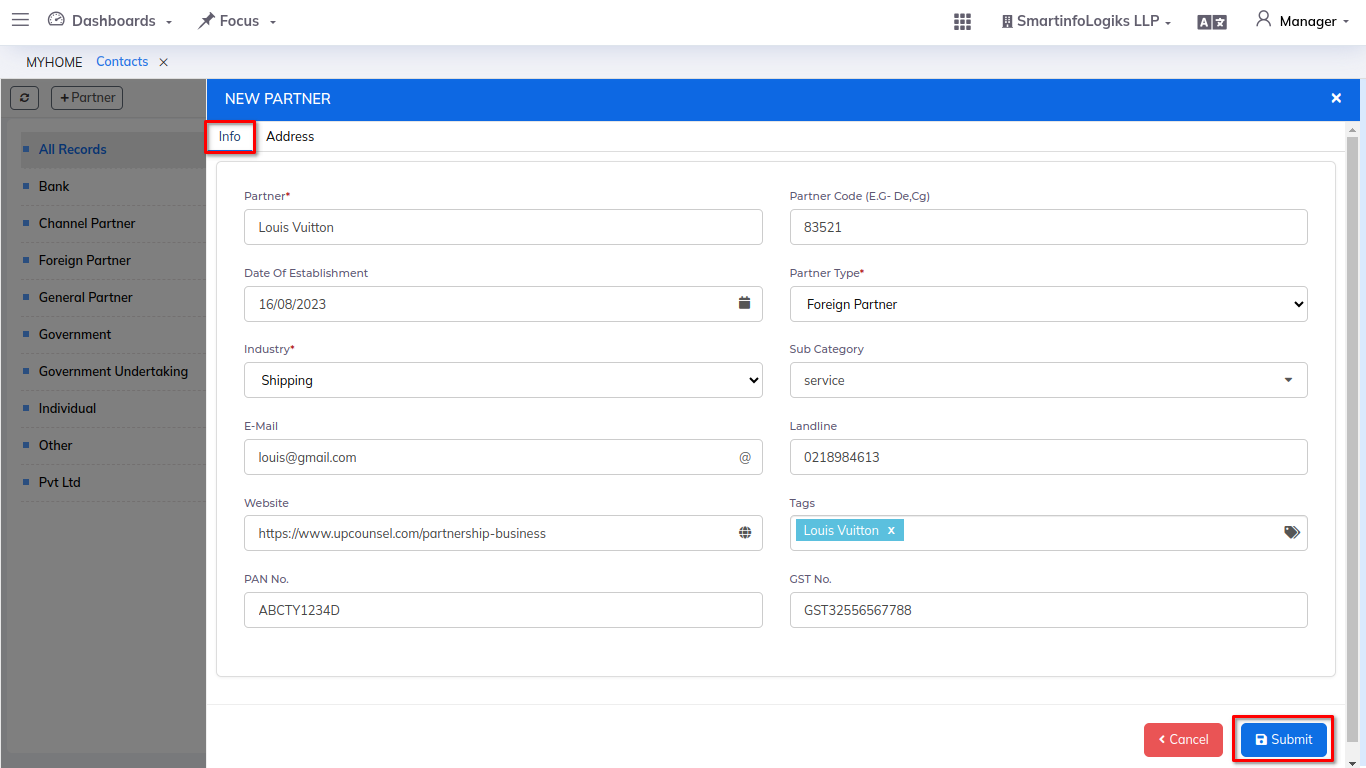
Enter the required details.
- Partner: Enter the name of the partner.
- Partner Type: Select partner type using dropdown.
- Industry: Select Industries using dropdown.
Additional details can be add while creating partners:
- Partner Code (E.G- De,Cg): Enter the Partner Code.
- Date Of Establishment: Specify the date of establishment of the partner.
- Sub Category: Enter or auto suggest partner category.
- Email: Enter the partner email id.
- Landline: Enter the landline number.
- Website: Enter the website.
- Tags: Enter the tags.
- PAN No.: Enter the partner's PAN number.
- GST No.: Enter the partner's GST number.
- After entering all the partner details in the 'Info' tab, click on the Address tab.
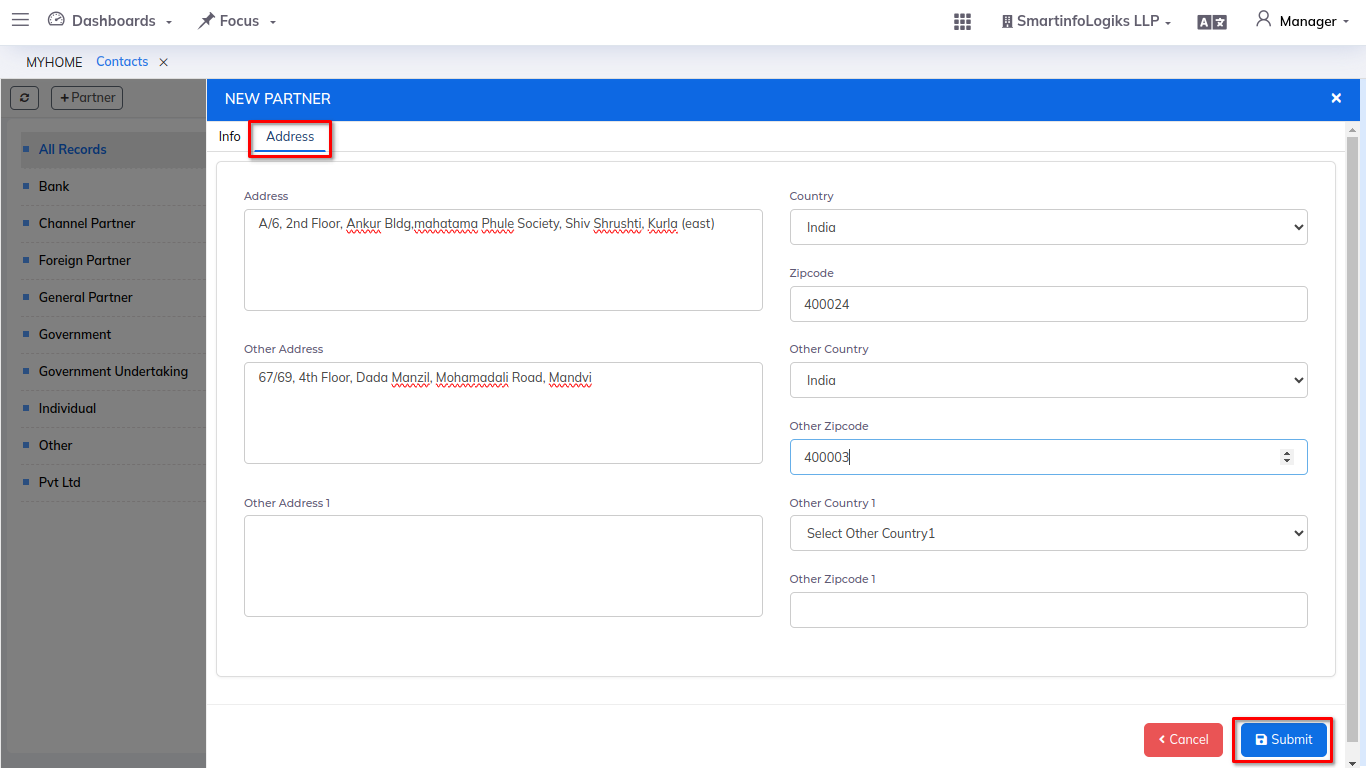
- After entering all the partner details in the 'Info' tab, click on the Address tab.
- Address: Enter the address of the partner.
- Country: Select country using dropdown.
- Zipcode: Enter the zipcode.
- After adding partner user can edit or update partner details using pencil icon.
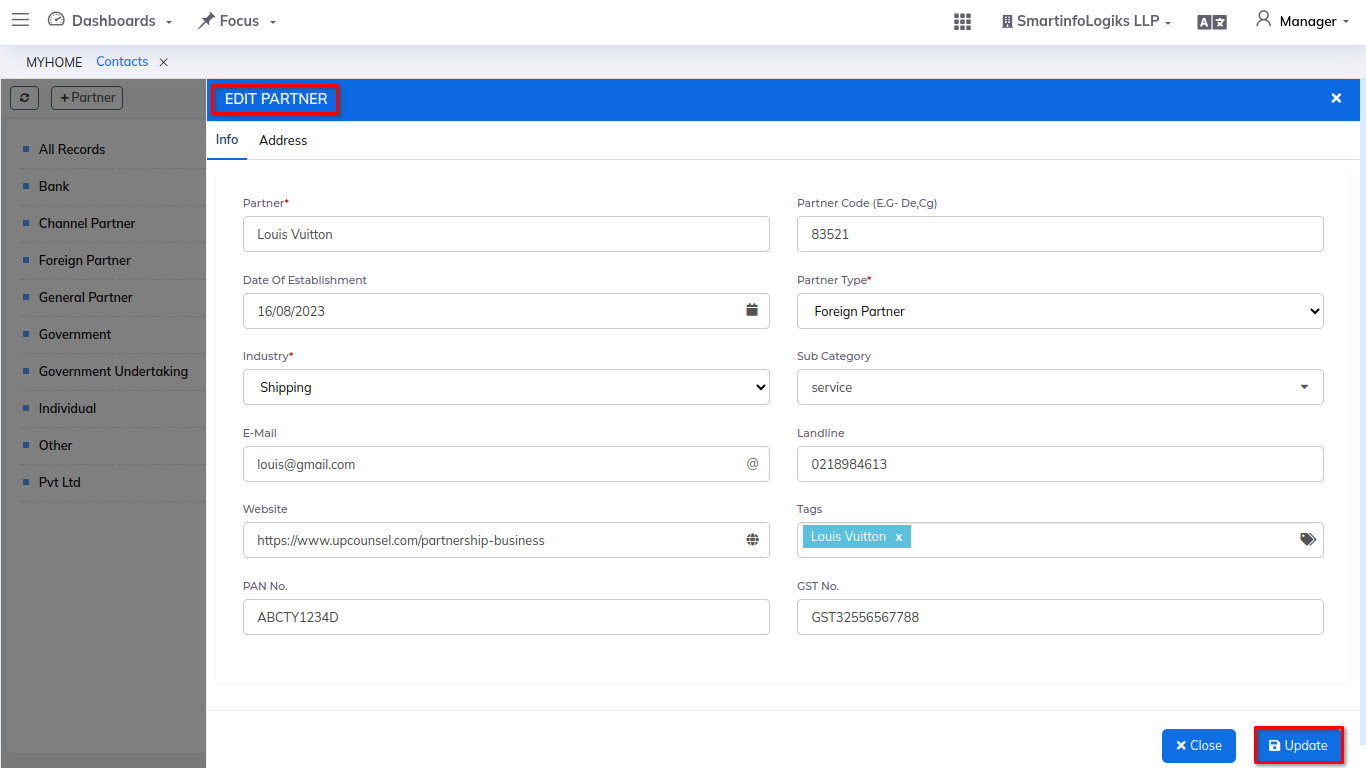
- After adding partner user can view partner details using eye icon.

3. Contacts:
- We have the Contacts tab for creating contact details.
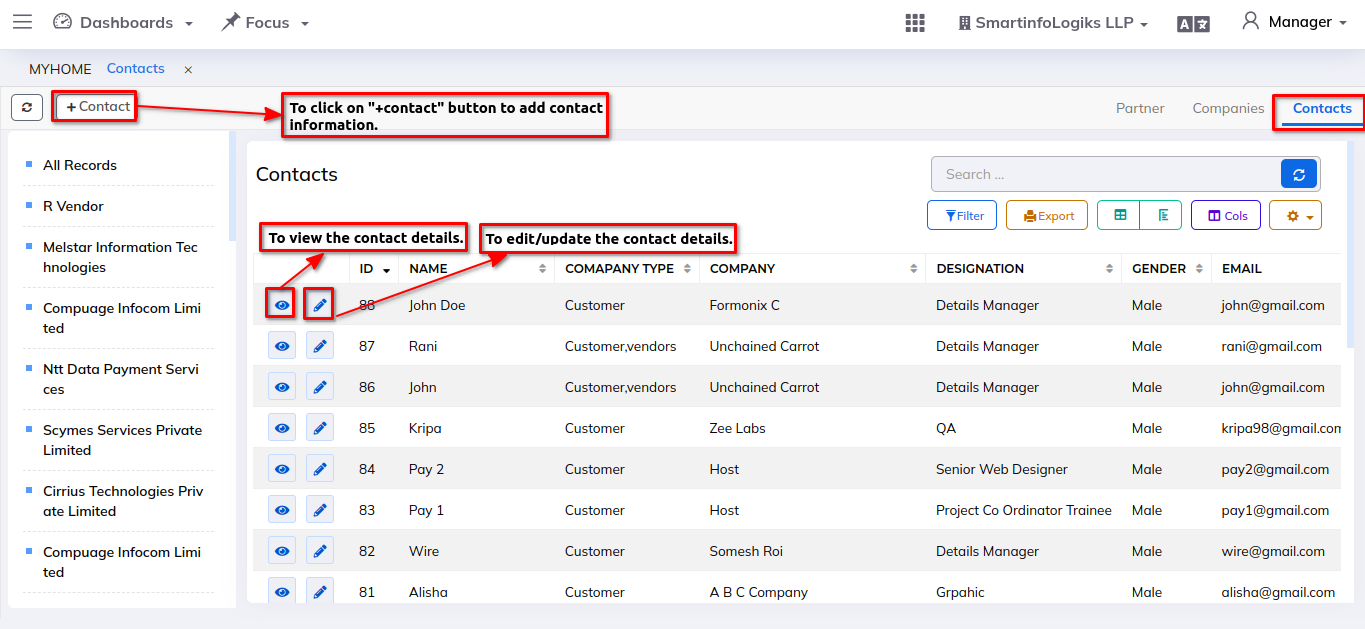
- Based on the sidebar we can easily get filter the record as per company.
- For creating contacts please follow the below steps:
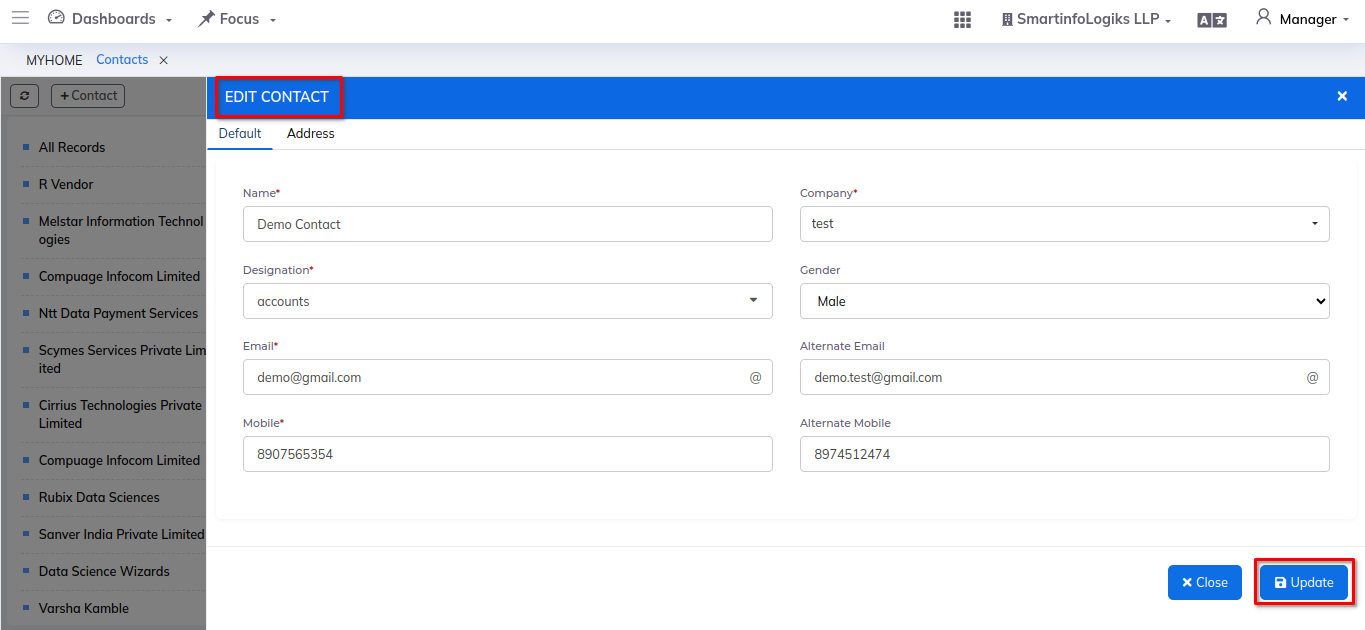
Step: - Click on the +Contact button, contact creation form will get open as shown in the below image.
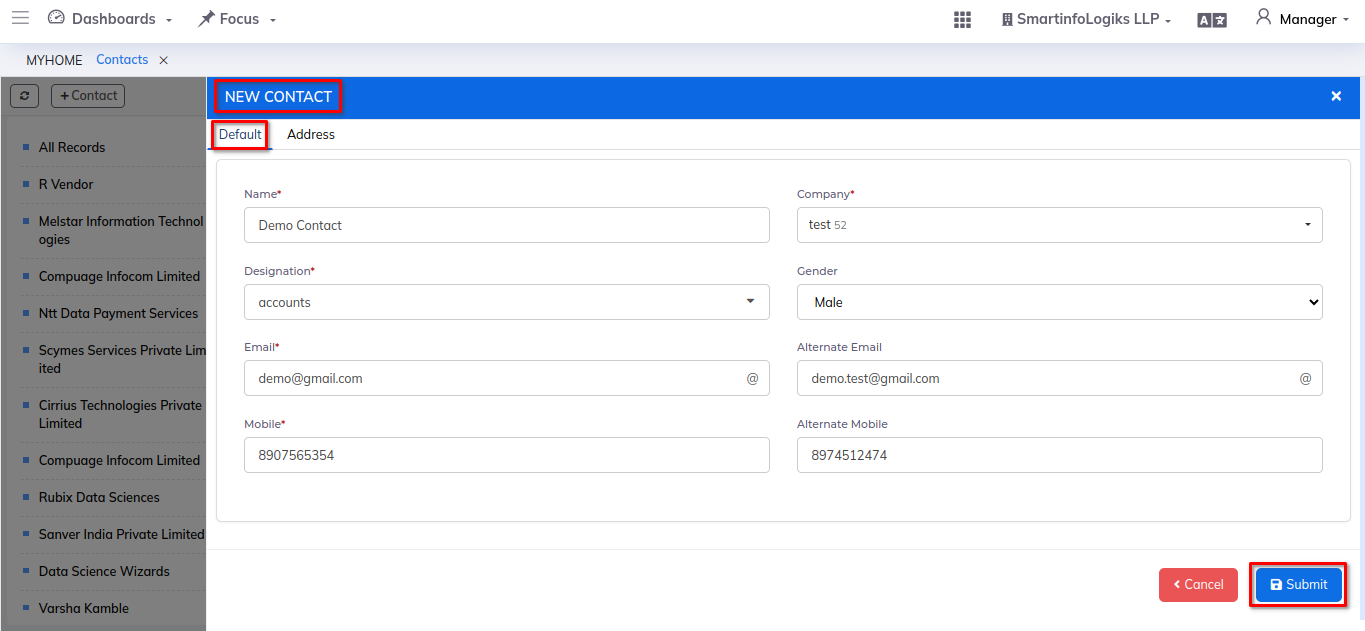
Enter the required details.
- Name: Enter the name of the contact.
- Company: Company appear from the companies tab when you pick a company using the dropdown.
- Designation: Enter the designation.
- Email: Enter the contact email id.
- Mobile: Enter the mobile number.
Additional details can be add while creating partners:
- Gender: Select the gender using dropdown.
- Alternate Email: Enter the alternate email id.
- Alternate Mobile: Enter the alternate mobile number.
- DOB: Specify the date of birth.
- Remarks: Enter the remarks.
- Linkedin Profiles: Enter the Linkedin Profile.
- After entering all the contact details in the 'Default' tab, click on the Address tab.
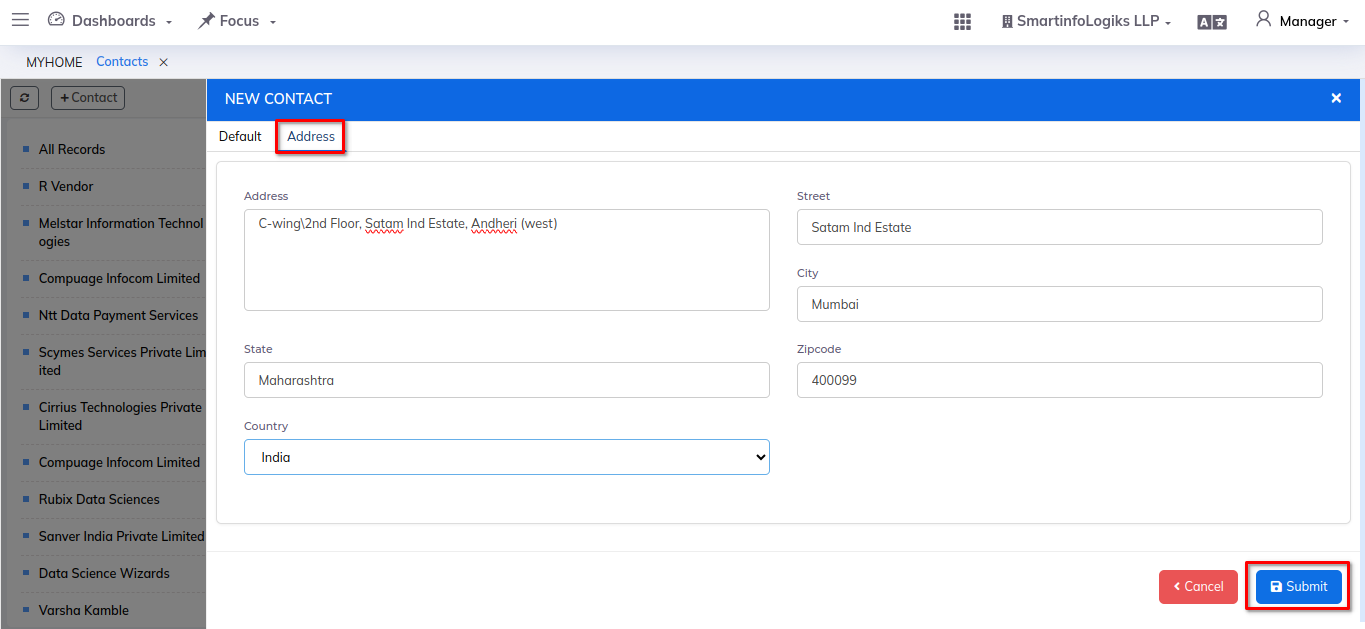
- After entering all the contact details in the 'Default' tab, click on the Address tab.
- Address: Enter the address.
- Street: Enter the street.
- City: Enter the city.
- State: Enter the state.
- Zipcode: Enter the zipcode.
- Country: Select country using dropdown.
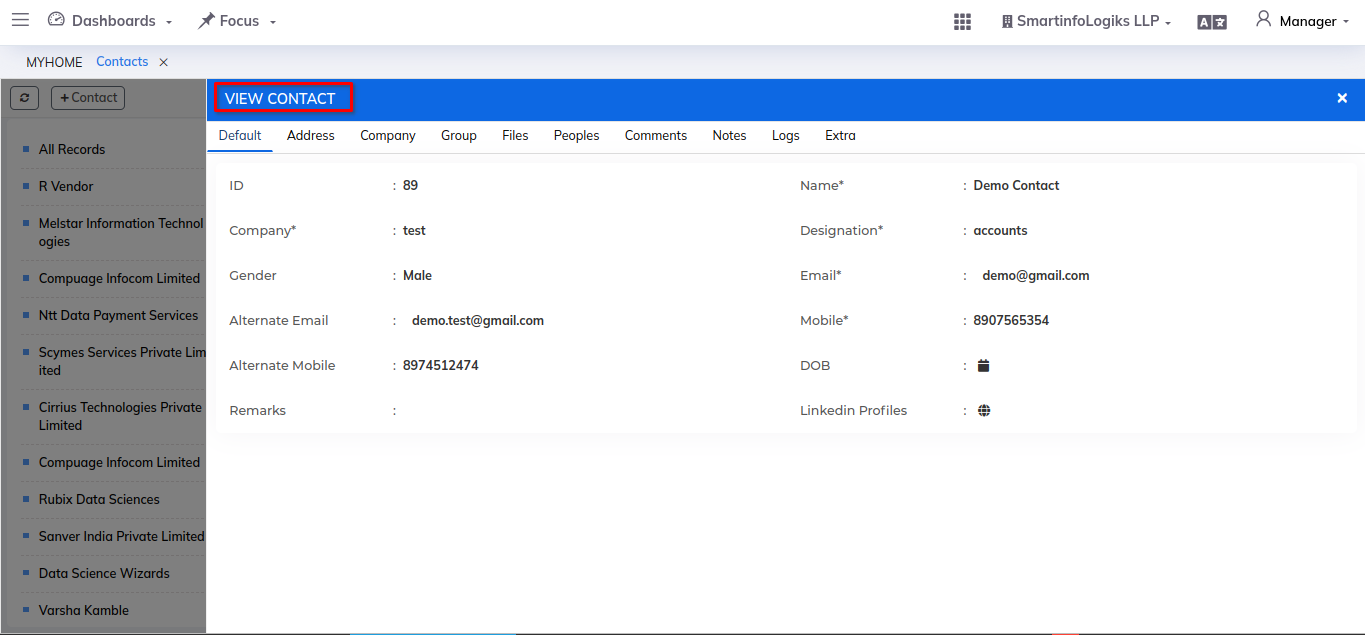
- After adding contact user can edit or update contact details using pencil icon.
- After adding contact user can view contact details using eye icon.